Imagine you’re going down a long waterslide. You’ve been traveling through it enjoying every moment despite occasional bumps on the way. You know the end will eventually come, but you don’t know when, where, and how it might feel.
Long-term projects imaging celestial objects feel the same way: It’s a long path down a known road, but you might not know what the final image will look like.
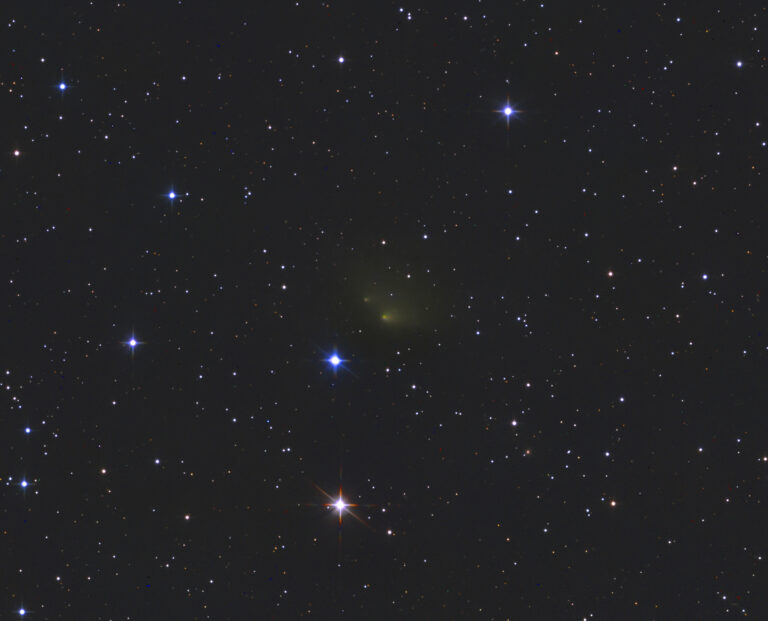
Documenting the sky has its charm, and doing so over time can make it even more fun. Some of the most popular options are recording solar and lunar analemmas or retrograde motions of planets. But I want to explore some less common projects that give you more freedom in terms of creating and composing the image. The most intriguing thing about these projects is that the resulting image is hard to predict. It’s a journey and, as they say, “the journey is more beautiful than the destination.”

What is a long-term project?
Long-term astrophotography projects involve capturing a celestial object through time, showing its changing position and/or appearance in the sky. Such a project can last anywhere from a few days to a few years and may involve imaging the same object many times. It records both change and continuity.
Long-term projects are part of why astrophotography is considered a marriage of art and science. Creating the final image provides enough science to show fundamental properties of the subject, and at the same time it gives the photographer an opportunity to unleash creativity in the way the final composition is wrought.
Prerequisites
Many long-term projects can be taken up by anybody with a camera, a lens, and a tripod (and some basic filters, if required). Depending on the subject, you might use a wide-angle lens (18mm to 50mm) or a telephoto lens (135mm to 600mm).
Apart from the equipment, an astrophotographer will need what I call “the six Ps” to initiate and complete a project. Three of these are technical: Planning (creating an outline for the project), Photographing (doing the actual shooting), and Processing (converting the raw data into a beautiful image). From a nontechnical standpoint, an astrophotographer will require three more: Passion (a love for the sky), Patience (the time to complete the work), and Perseverance (to keep up the required daily/weekly/monthly routine).
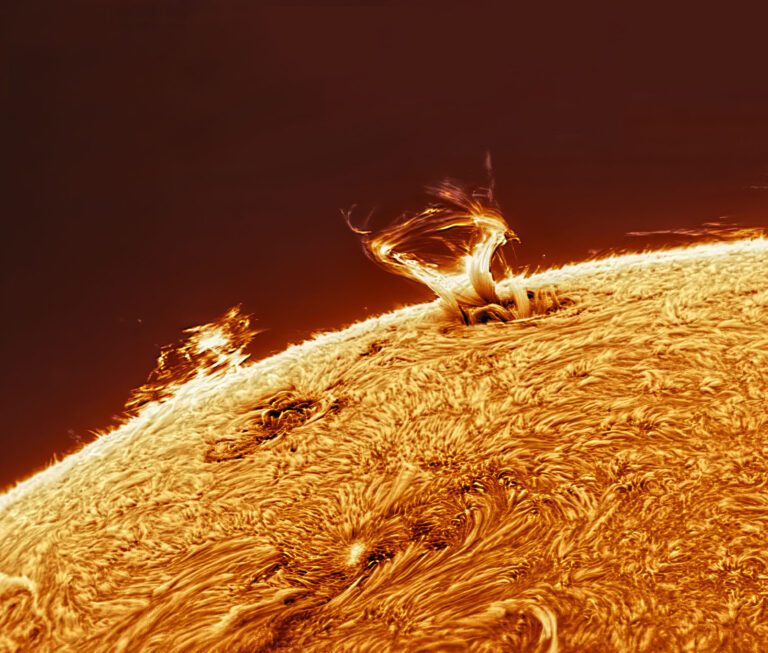
Projects with the Sun
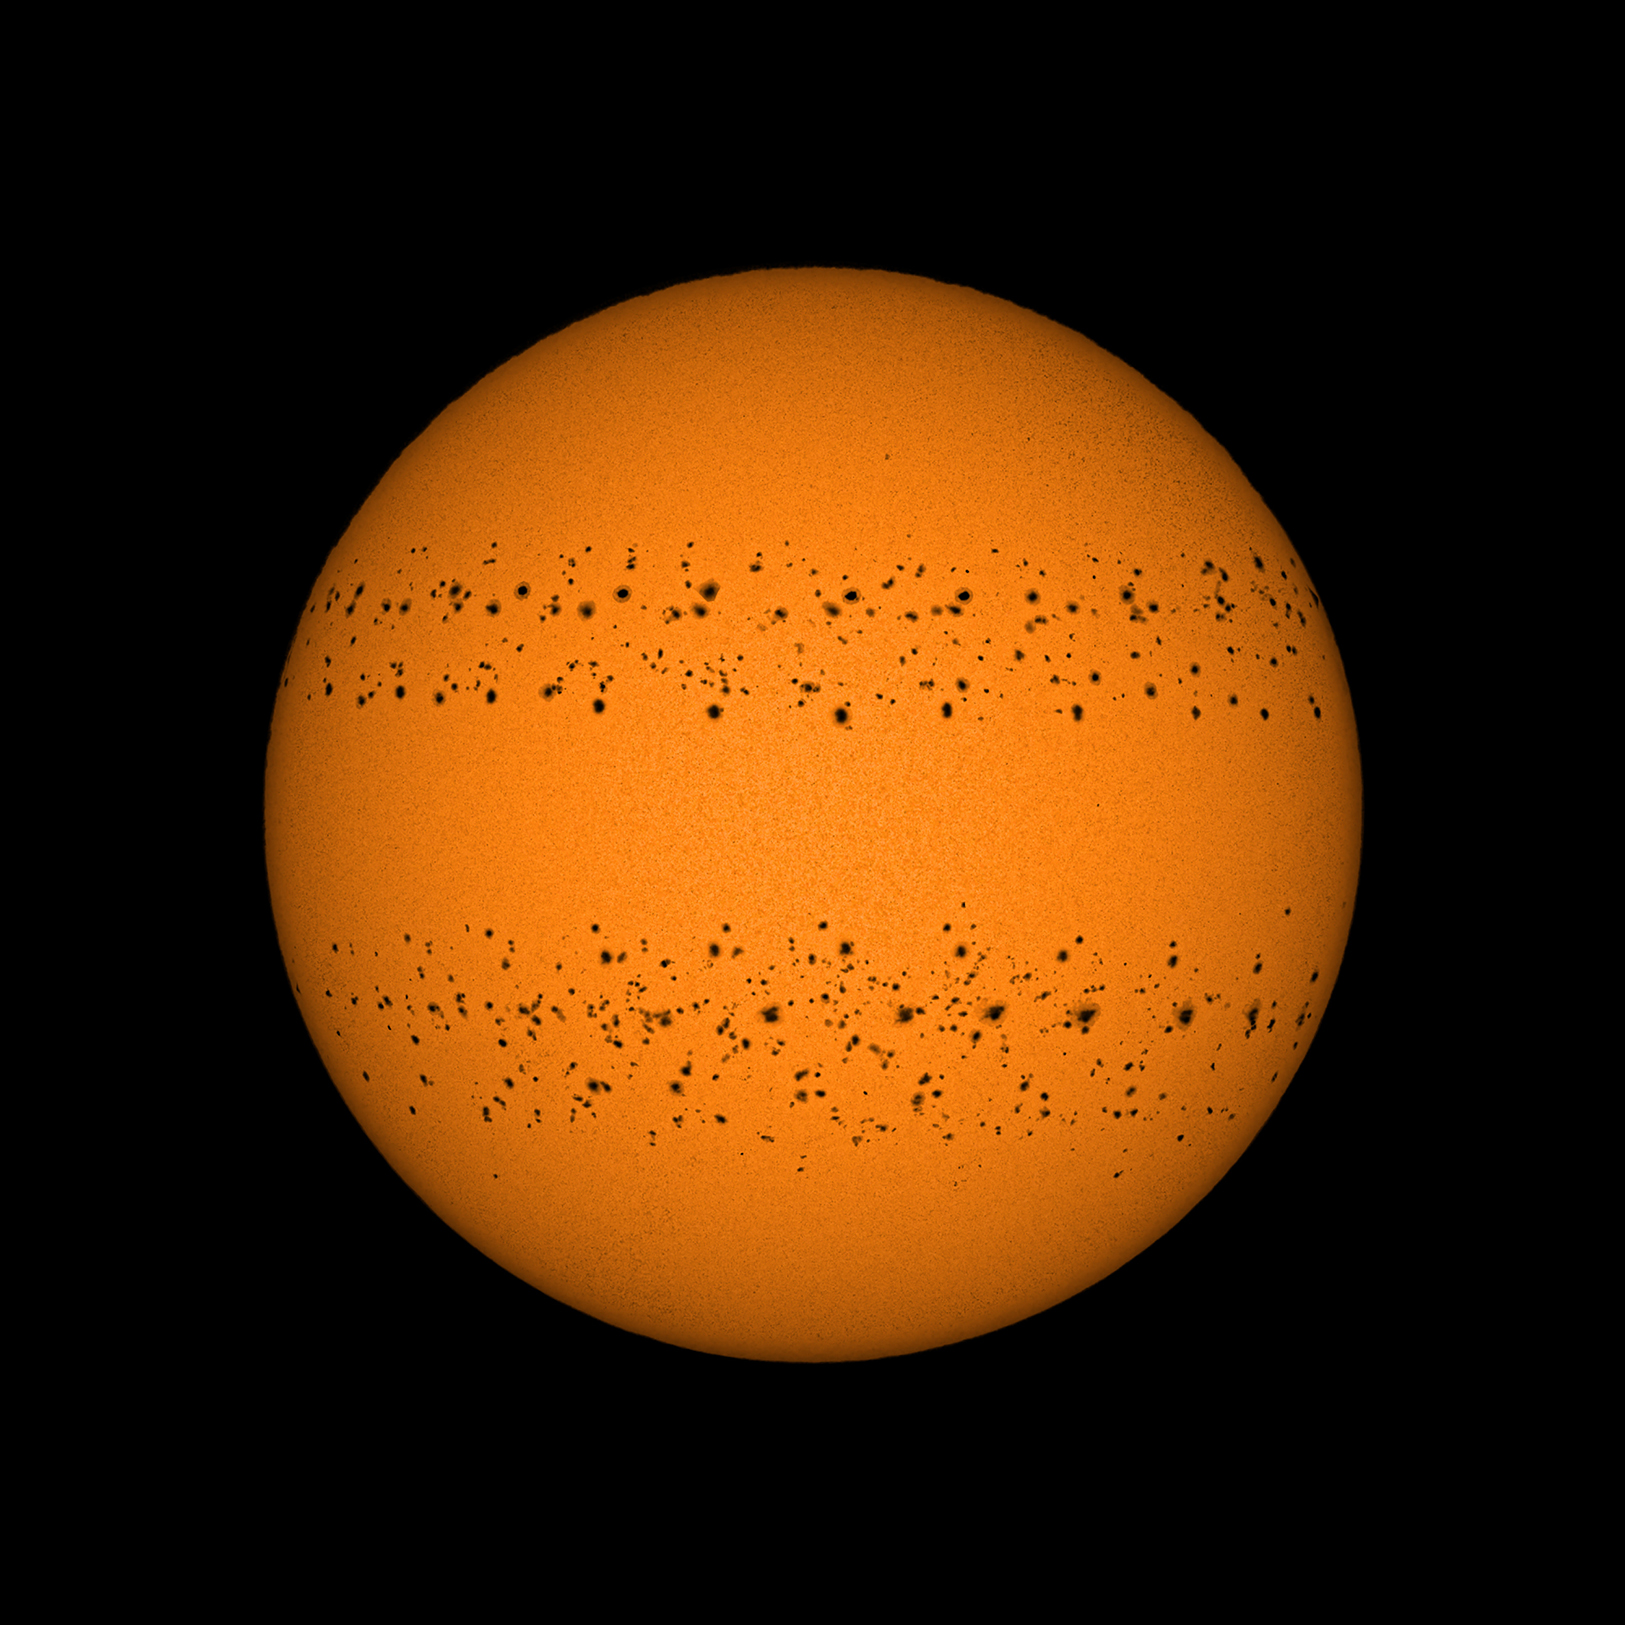
Because the Sun is currently going through solar maximum, now is one of the best times to start a long-term project with it. It’s easy to get started: Take an image of the Sun every day. The solar disk is dynamic, so you’ll observe not only new sunspots but also existing spots changing shape and size as they move across the Sun’s face. All you need is a DSLR camera, a telephoto lens, a solar filter, and a tripod.
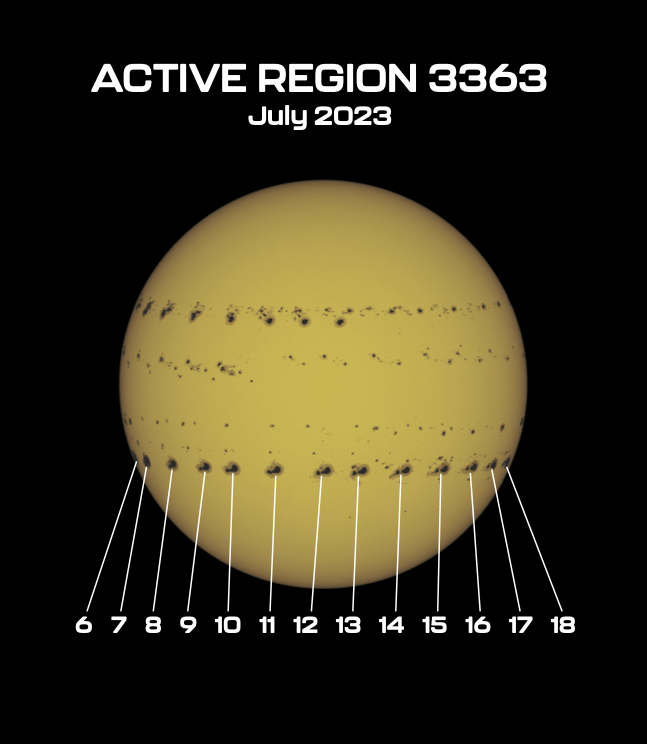
You can start by tracking a single sunspot. Begin when it lies at one edge of the solar disk, and end when the sunspot vanishes at the other edge. This typically takes 12 to 15 days.
A solar project, however, can run for months or years. There’s no strict endpoint. Taking images of the Sun every day will not only give you a final image, but you’ll also have the option to create multiple images over the course of the project. These can allow a comparison of sunspots between weeks, months, or even quarters. You also can create an image with a specific number of days: 100, 200, or 300. If your dates happen to encompass Earth’s perihelion (the first week of January) and aphelion (the first week of July), you can produce a collage comparing the different apparent sizes of the solar disk.
Planning for a solar project mainly involves when to begin. You don’t have to decide when to end until later. Pick a start date when there is a maximum chance of clear skies. (E.g., monsoons are not the best time to begin a project.) However, if you continue taking images for many months, you’ll eventually encounter seasonal weather changes, such as increased cloudiness or storms. All you need to do is go outside and take an image of the Sun every day; it doesn’t need to be at the same time. These daily images can be single or comprise a stack of multiple images. The decision lies with you, but committing to multiple image stacks will require more time, both for photographing and processing.
During processing, arrange the solar disks linearly. You’ll also need to rotate the images to counter the field rotation introduced on consecutive days. As a reference point, you can use images from NASA’s Solar Dynamics Observatory directly from its website (http://sdo.gsfc.nasa.gov). To create a composite image with data from multiple days, load all the images into Photoshop (or a similar program) as layers and choose the blend mode “Darken” for all of them.
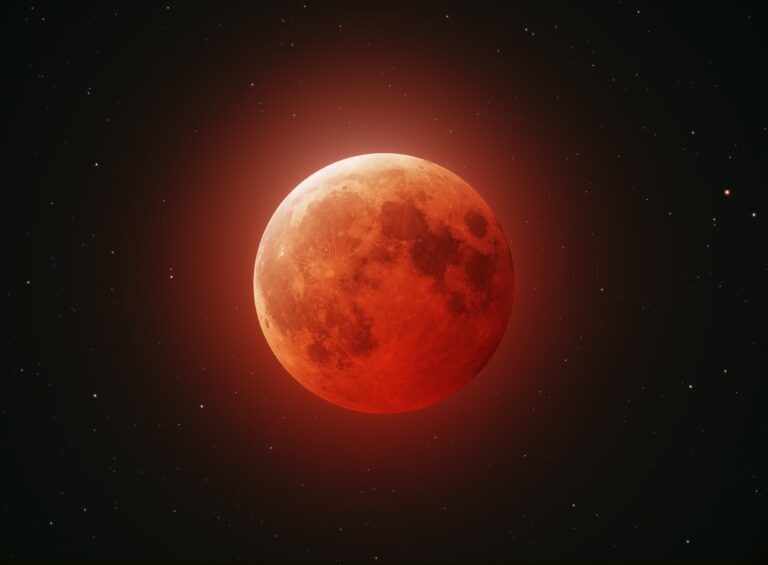
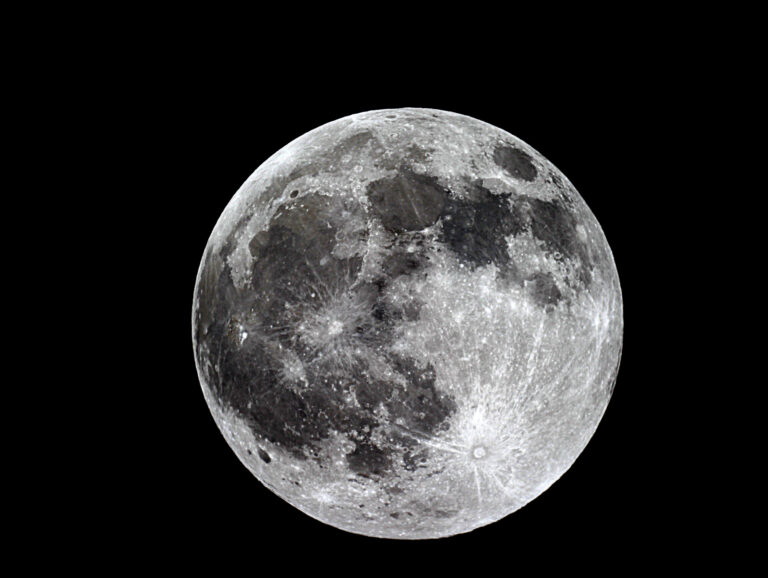
Projects with the Moon
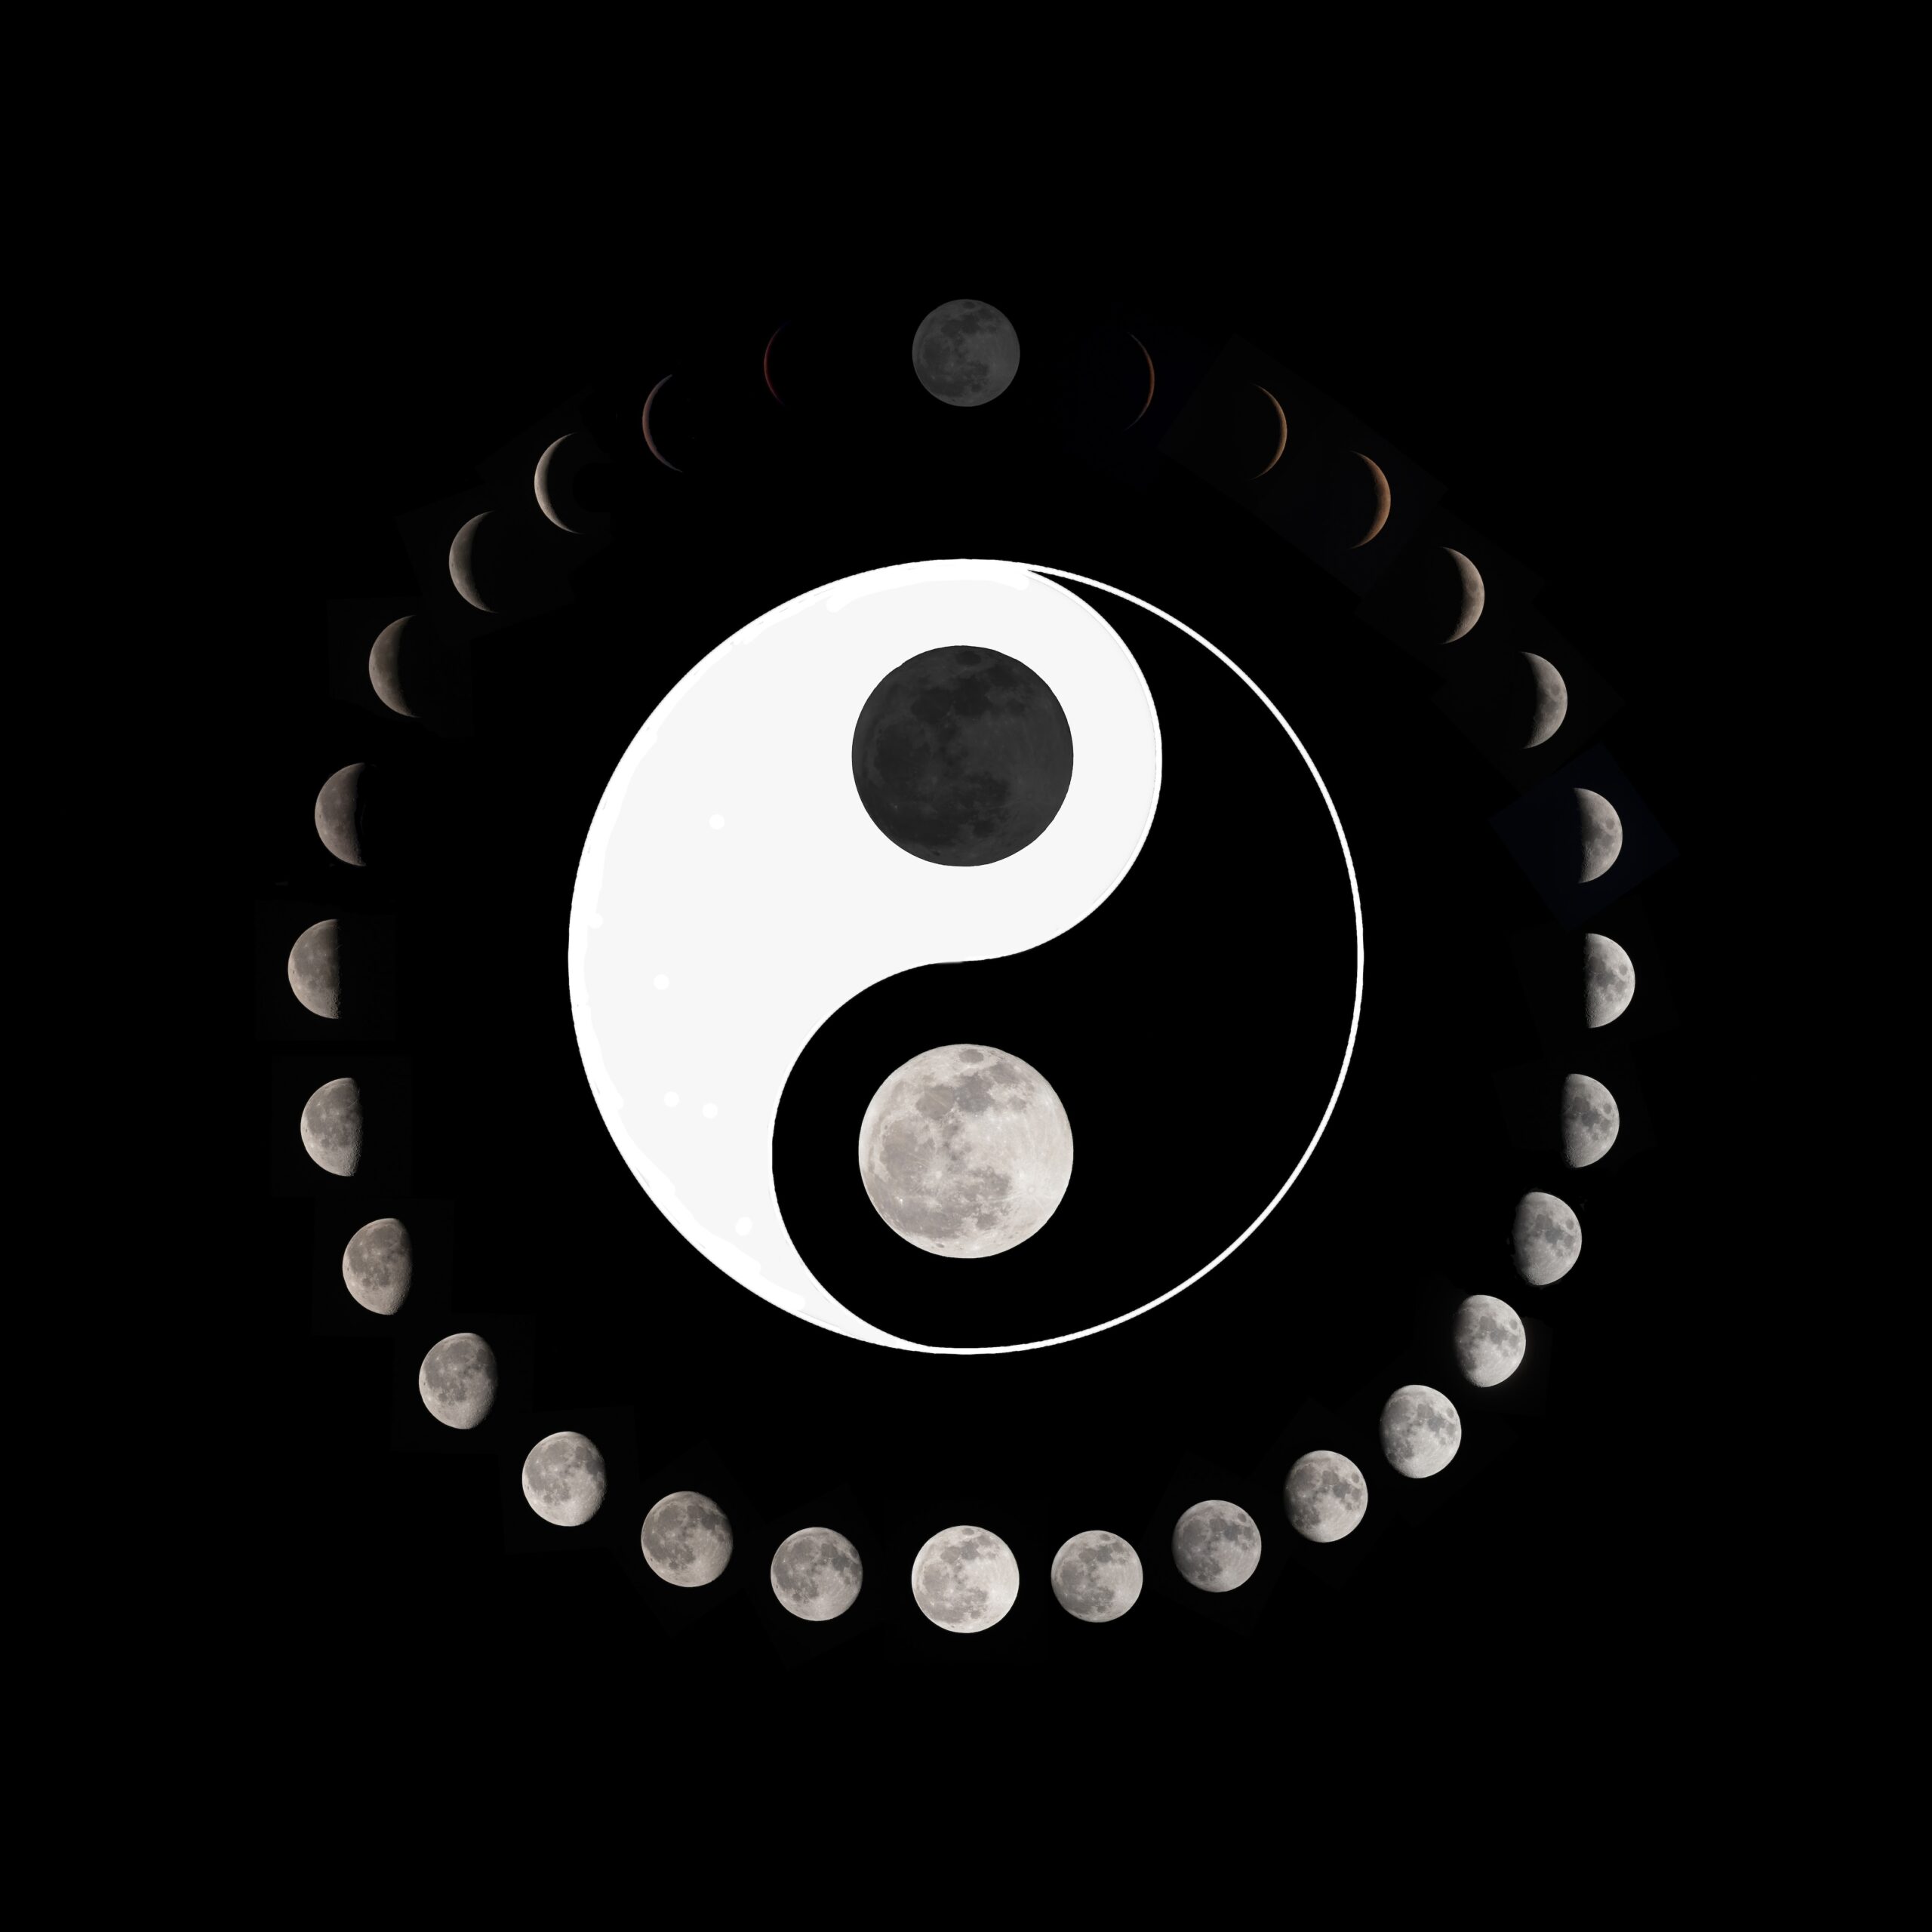
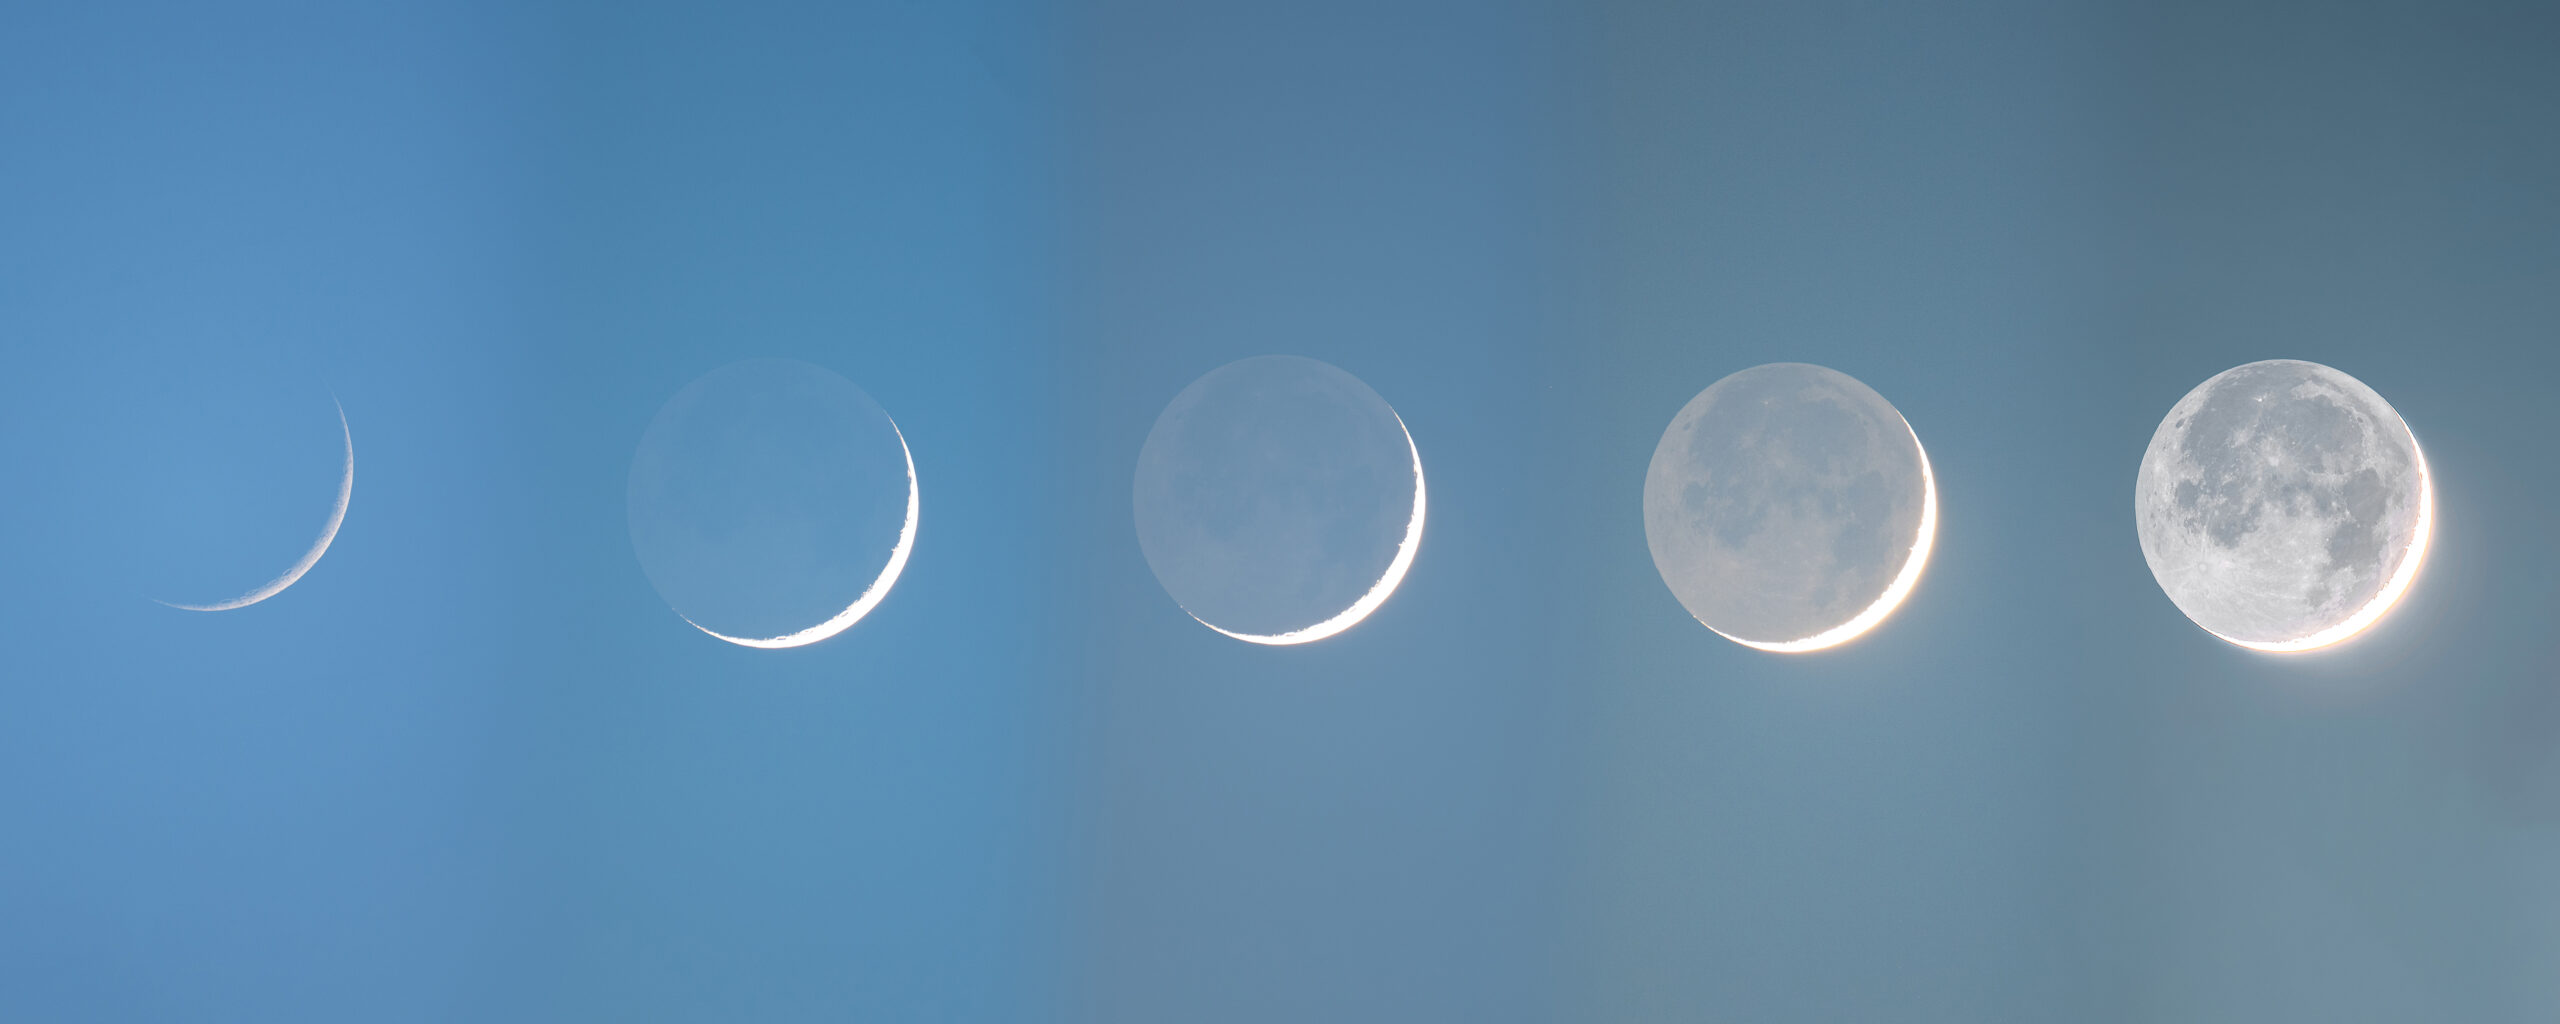
While the Sun’s changing nature is seen as sunspots and other surface features through specialized equipment, the Moon shows us naked-eye changes. Long-term projects with our satellite can capture the different phases, its libration, changes in apparent size, and more. For a monthlong project, you can start with capturing the Moon every night. The final image will show all the phases, from New Moon to the next New Moon. The key is to choose a month with the clearest possible skies. The final image will give you a lot of liberty in terms of composition. Just choose what you prefer most.
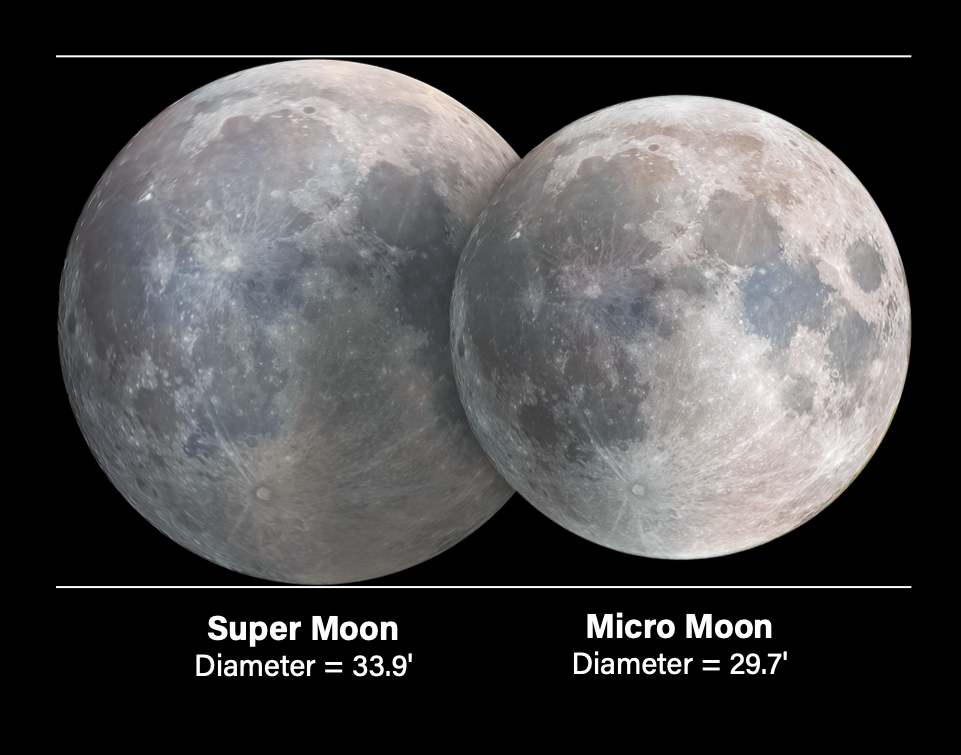
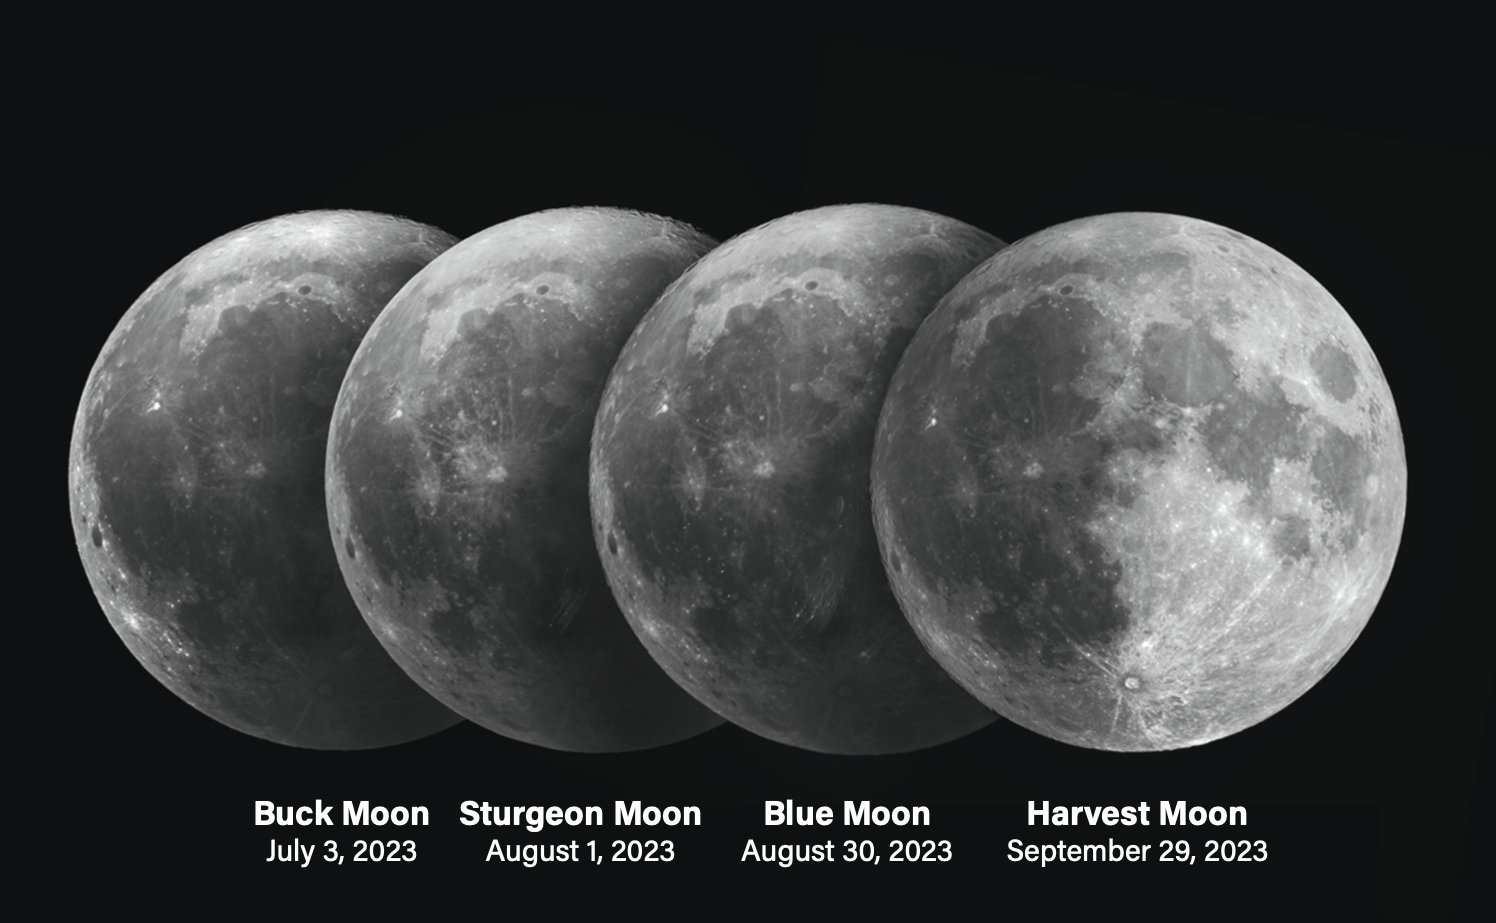
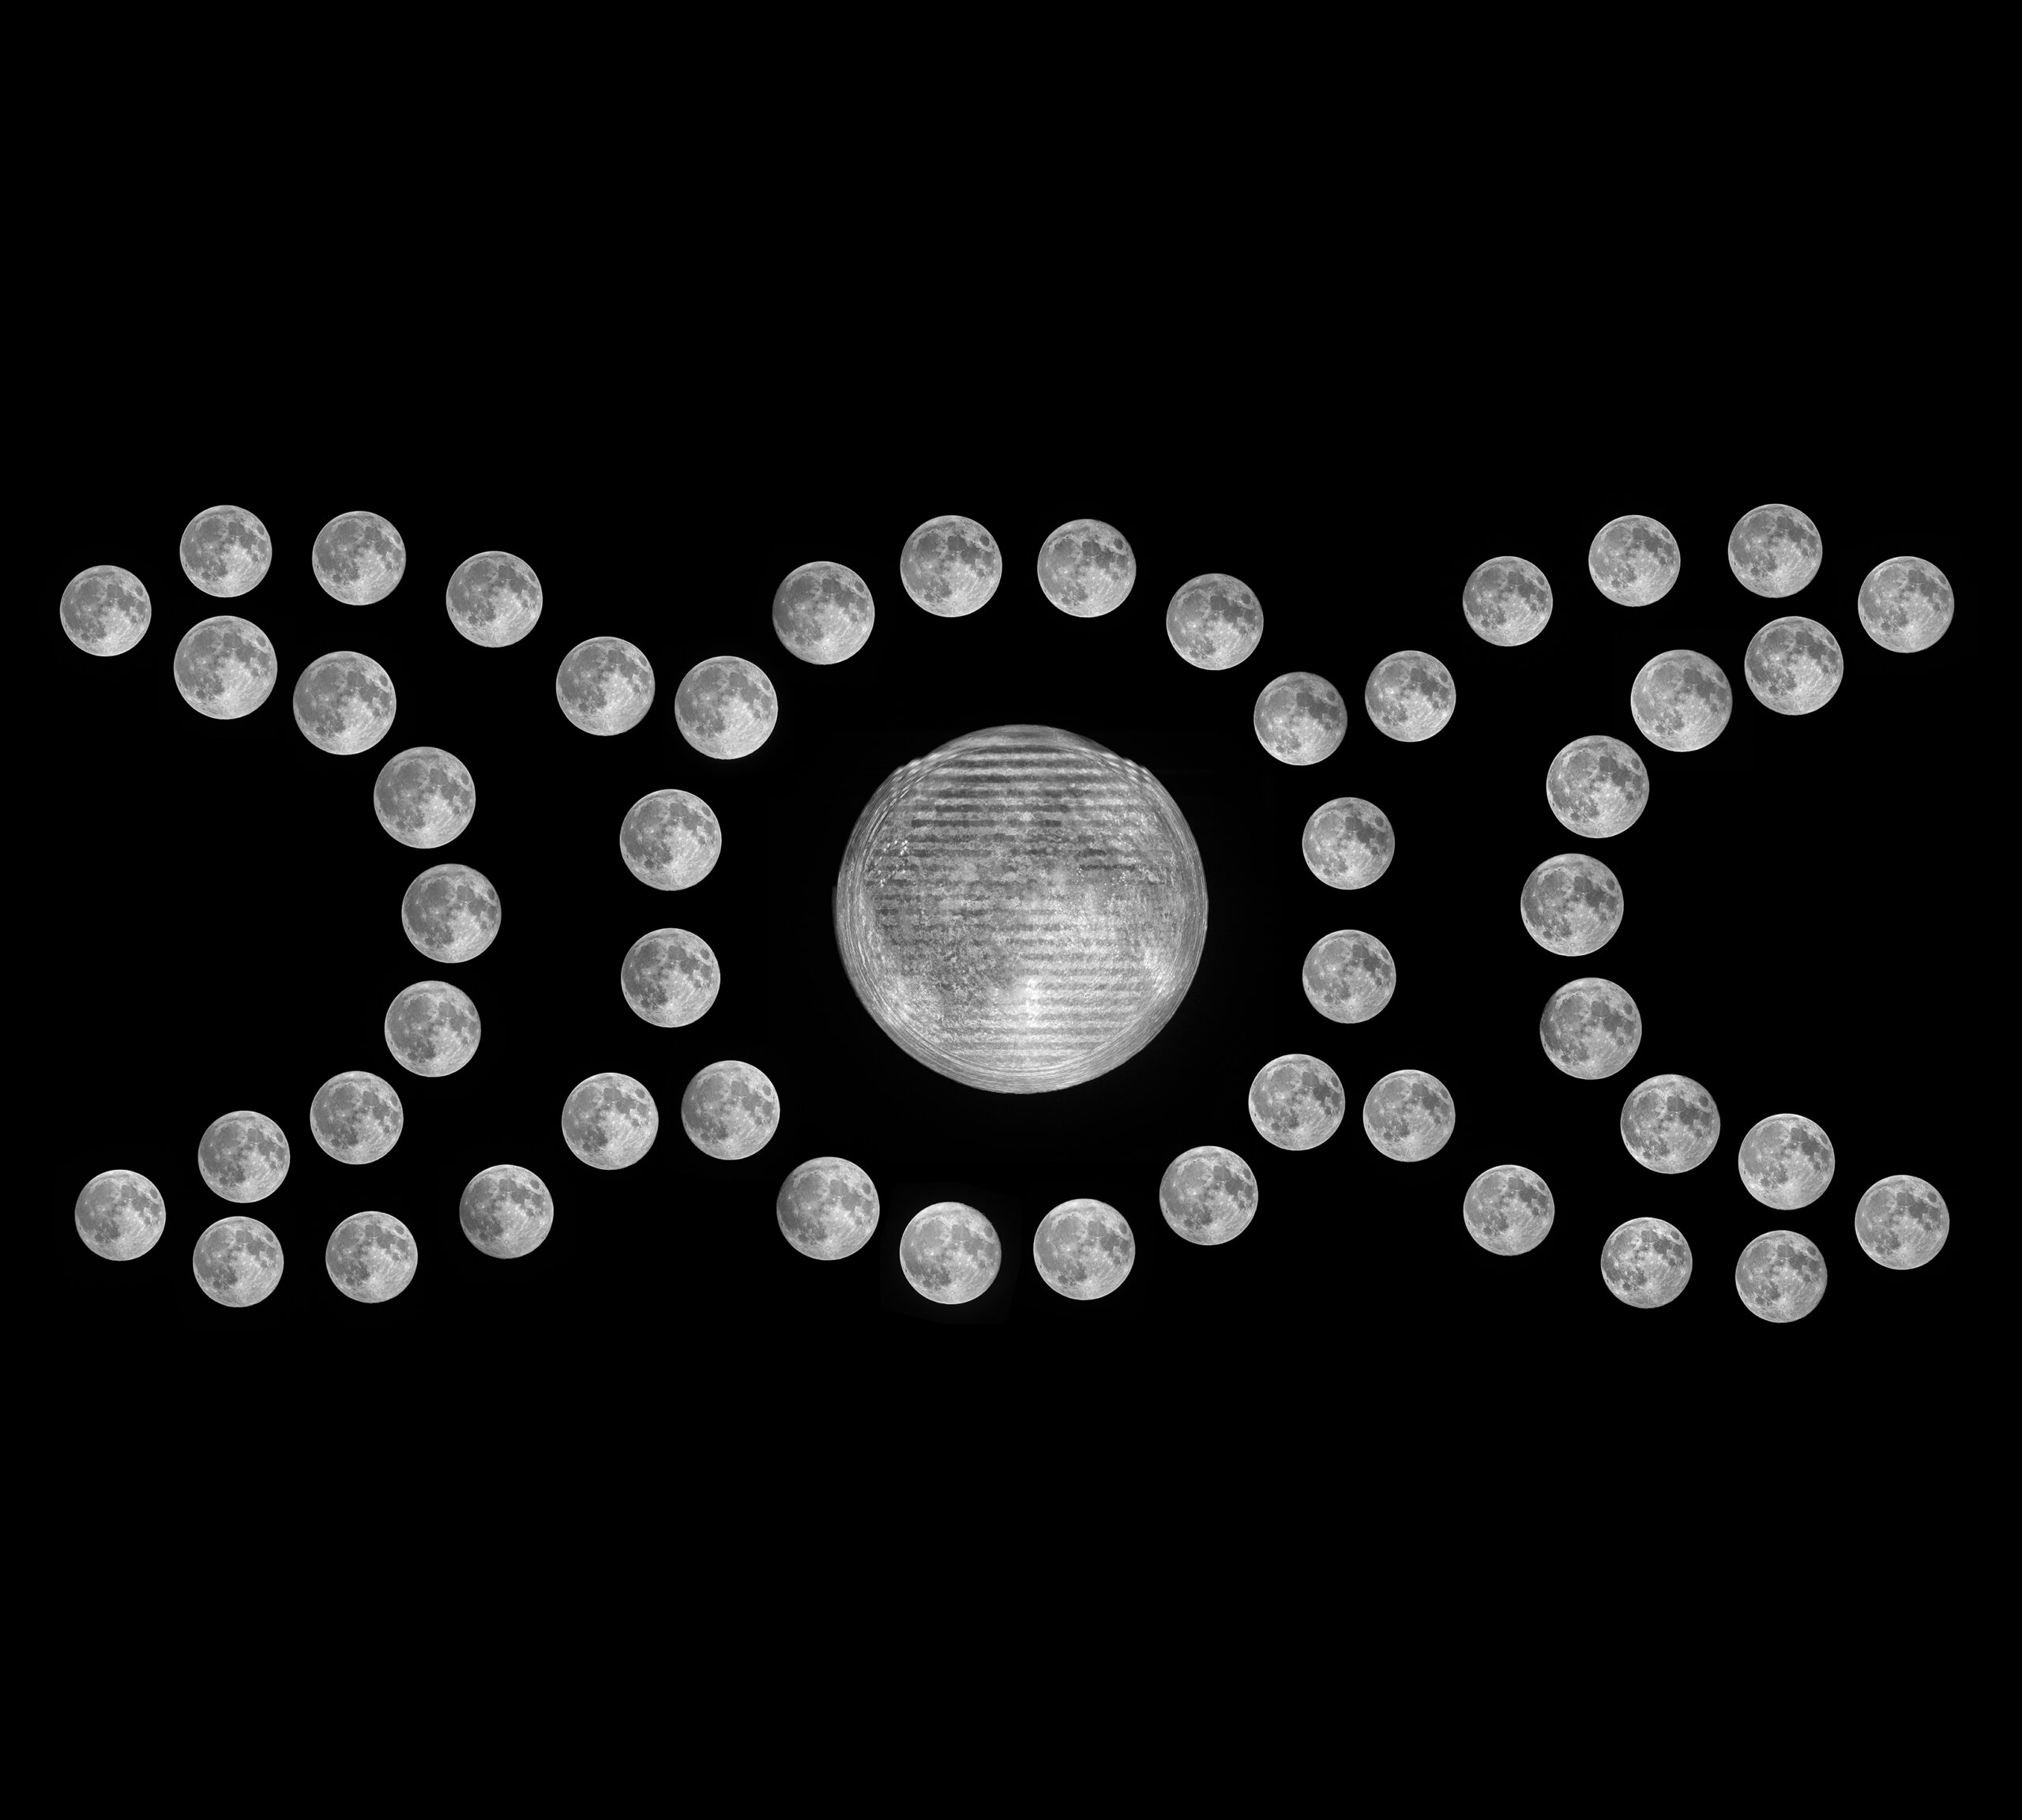
A longer, less demanding project would photographing Full Moons every month. This requires only one night of effort per month, plus you’ll get plenty of time to plan each image and to revisit if required. This project will take 12 months, rendering a year of Full Moons. With the collected data, multiple images can be created, including a collage of all 12 Full Moons, a collection of only the Super Moons that appeared during the year (if there are any), or a comparison of the apparent sizes of the Full Moon during perigee and apogee.
The project can be started any month, though beginning at the start of the calendar year can be quite satisfying. But don’t stop there. You can continue for as long as you want. A collage of 50 or 100 Full Moons can look fantastic. With more data, you can create a short video showing the libration of the Moon.
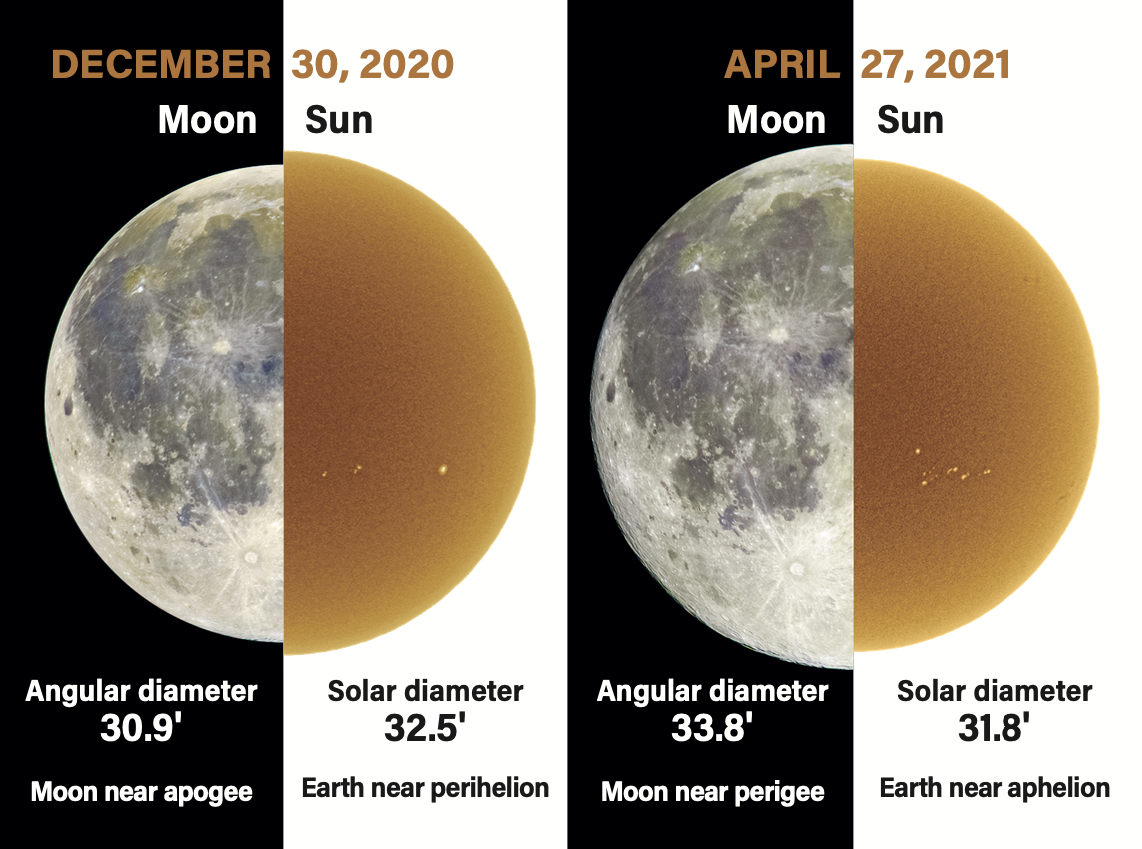
Some projects can include both the Sun and the Moon. One could look at their apparent sizes on a specific date or during perigee/perihelion and apogee/aphelion.
A few “not so long” projects
If you’re unsure whether you want to commit to a long-term project, start with a shorter one. For example, a weeklong project could include a nightly photograph of a special celestial event, like a conjunction of two planets. You can either start the project up to six days before and end on the day of the conjunction, or continue for another six days after it. This will capture the movement of the two planets as they move closer and then farther apart.
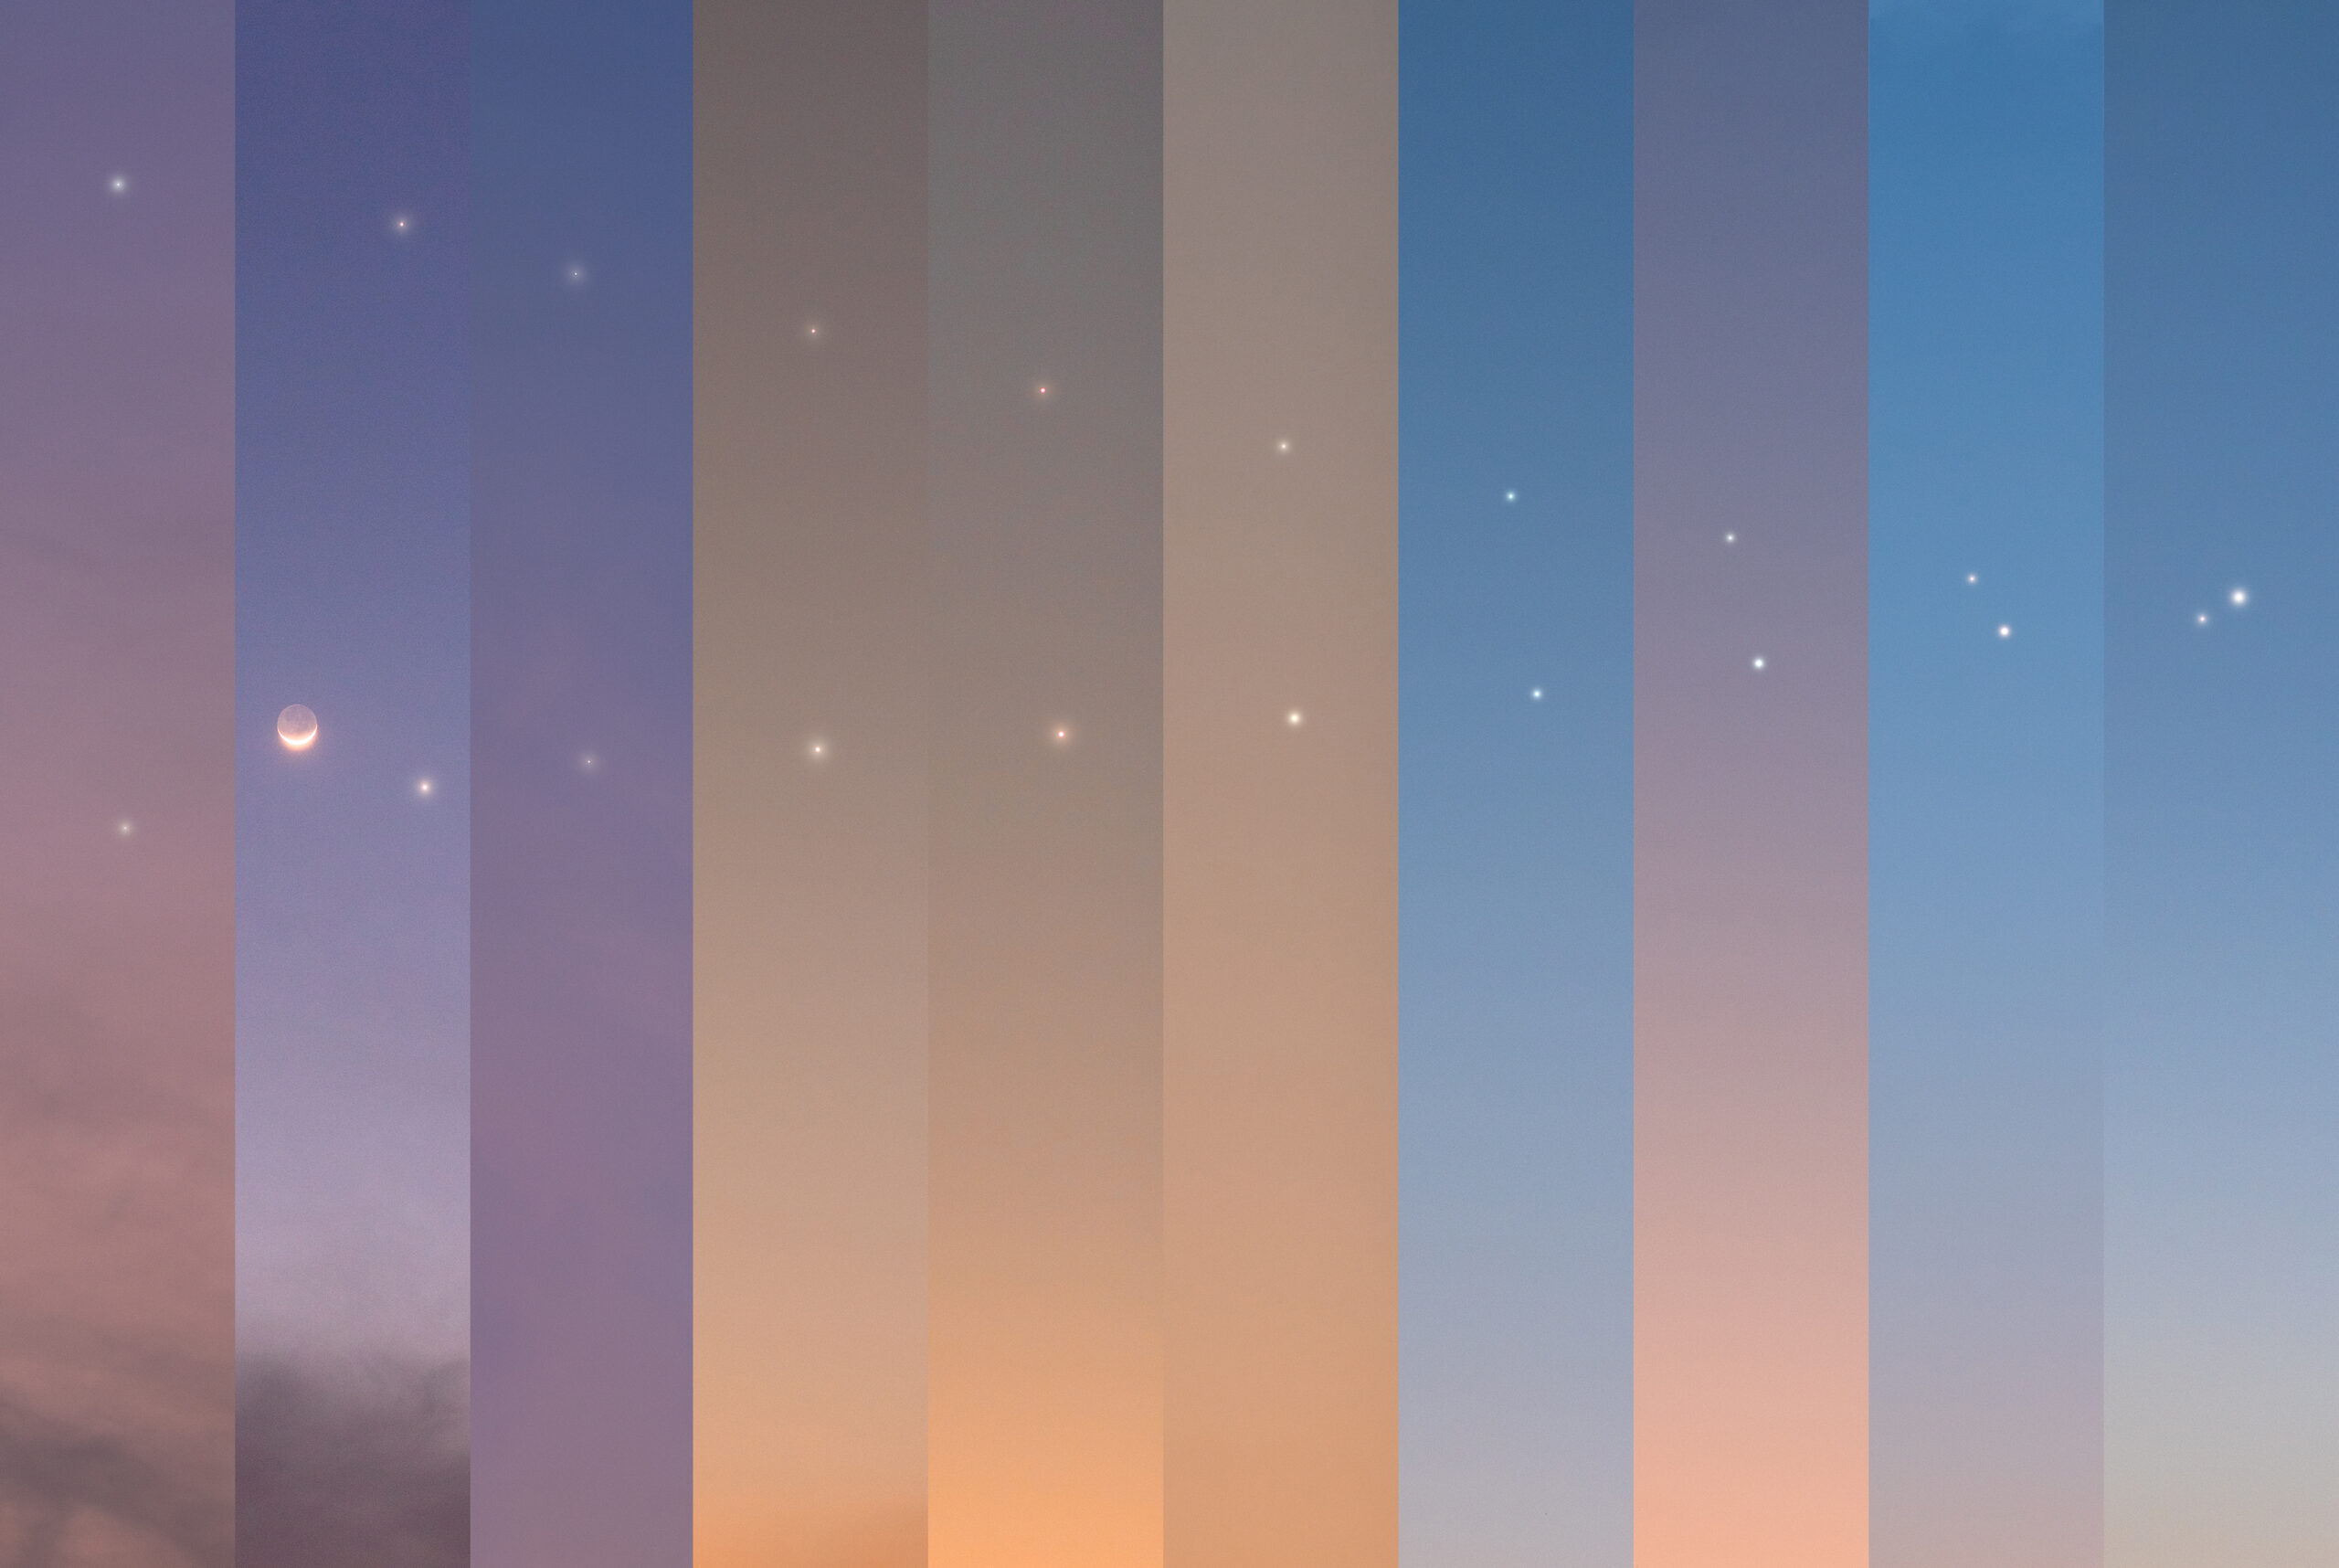
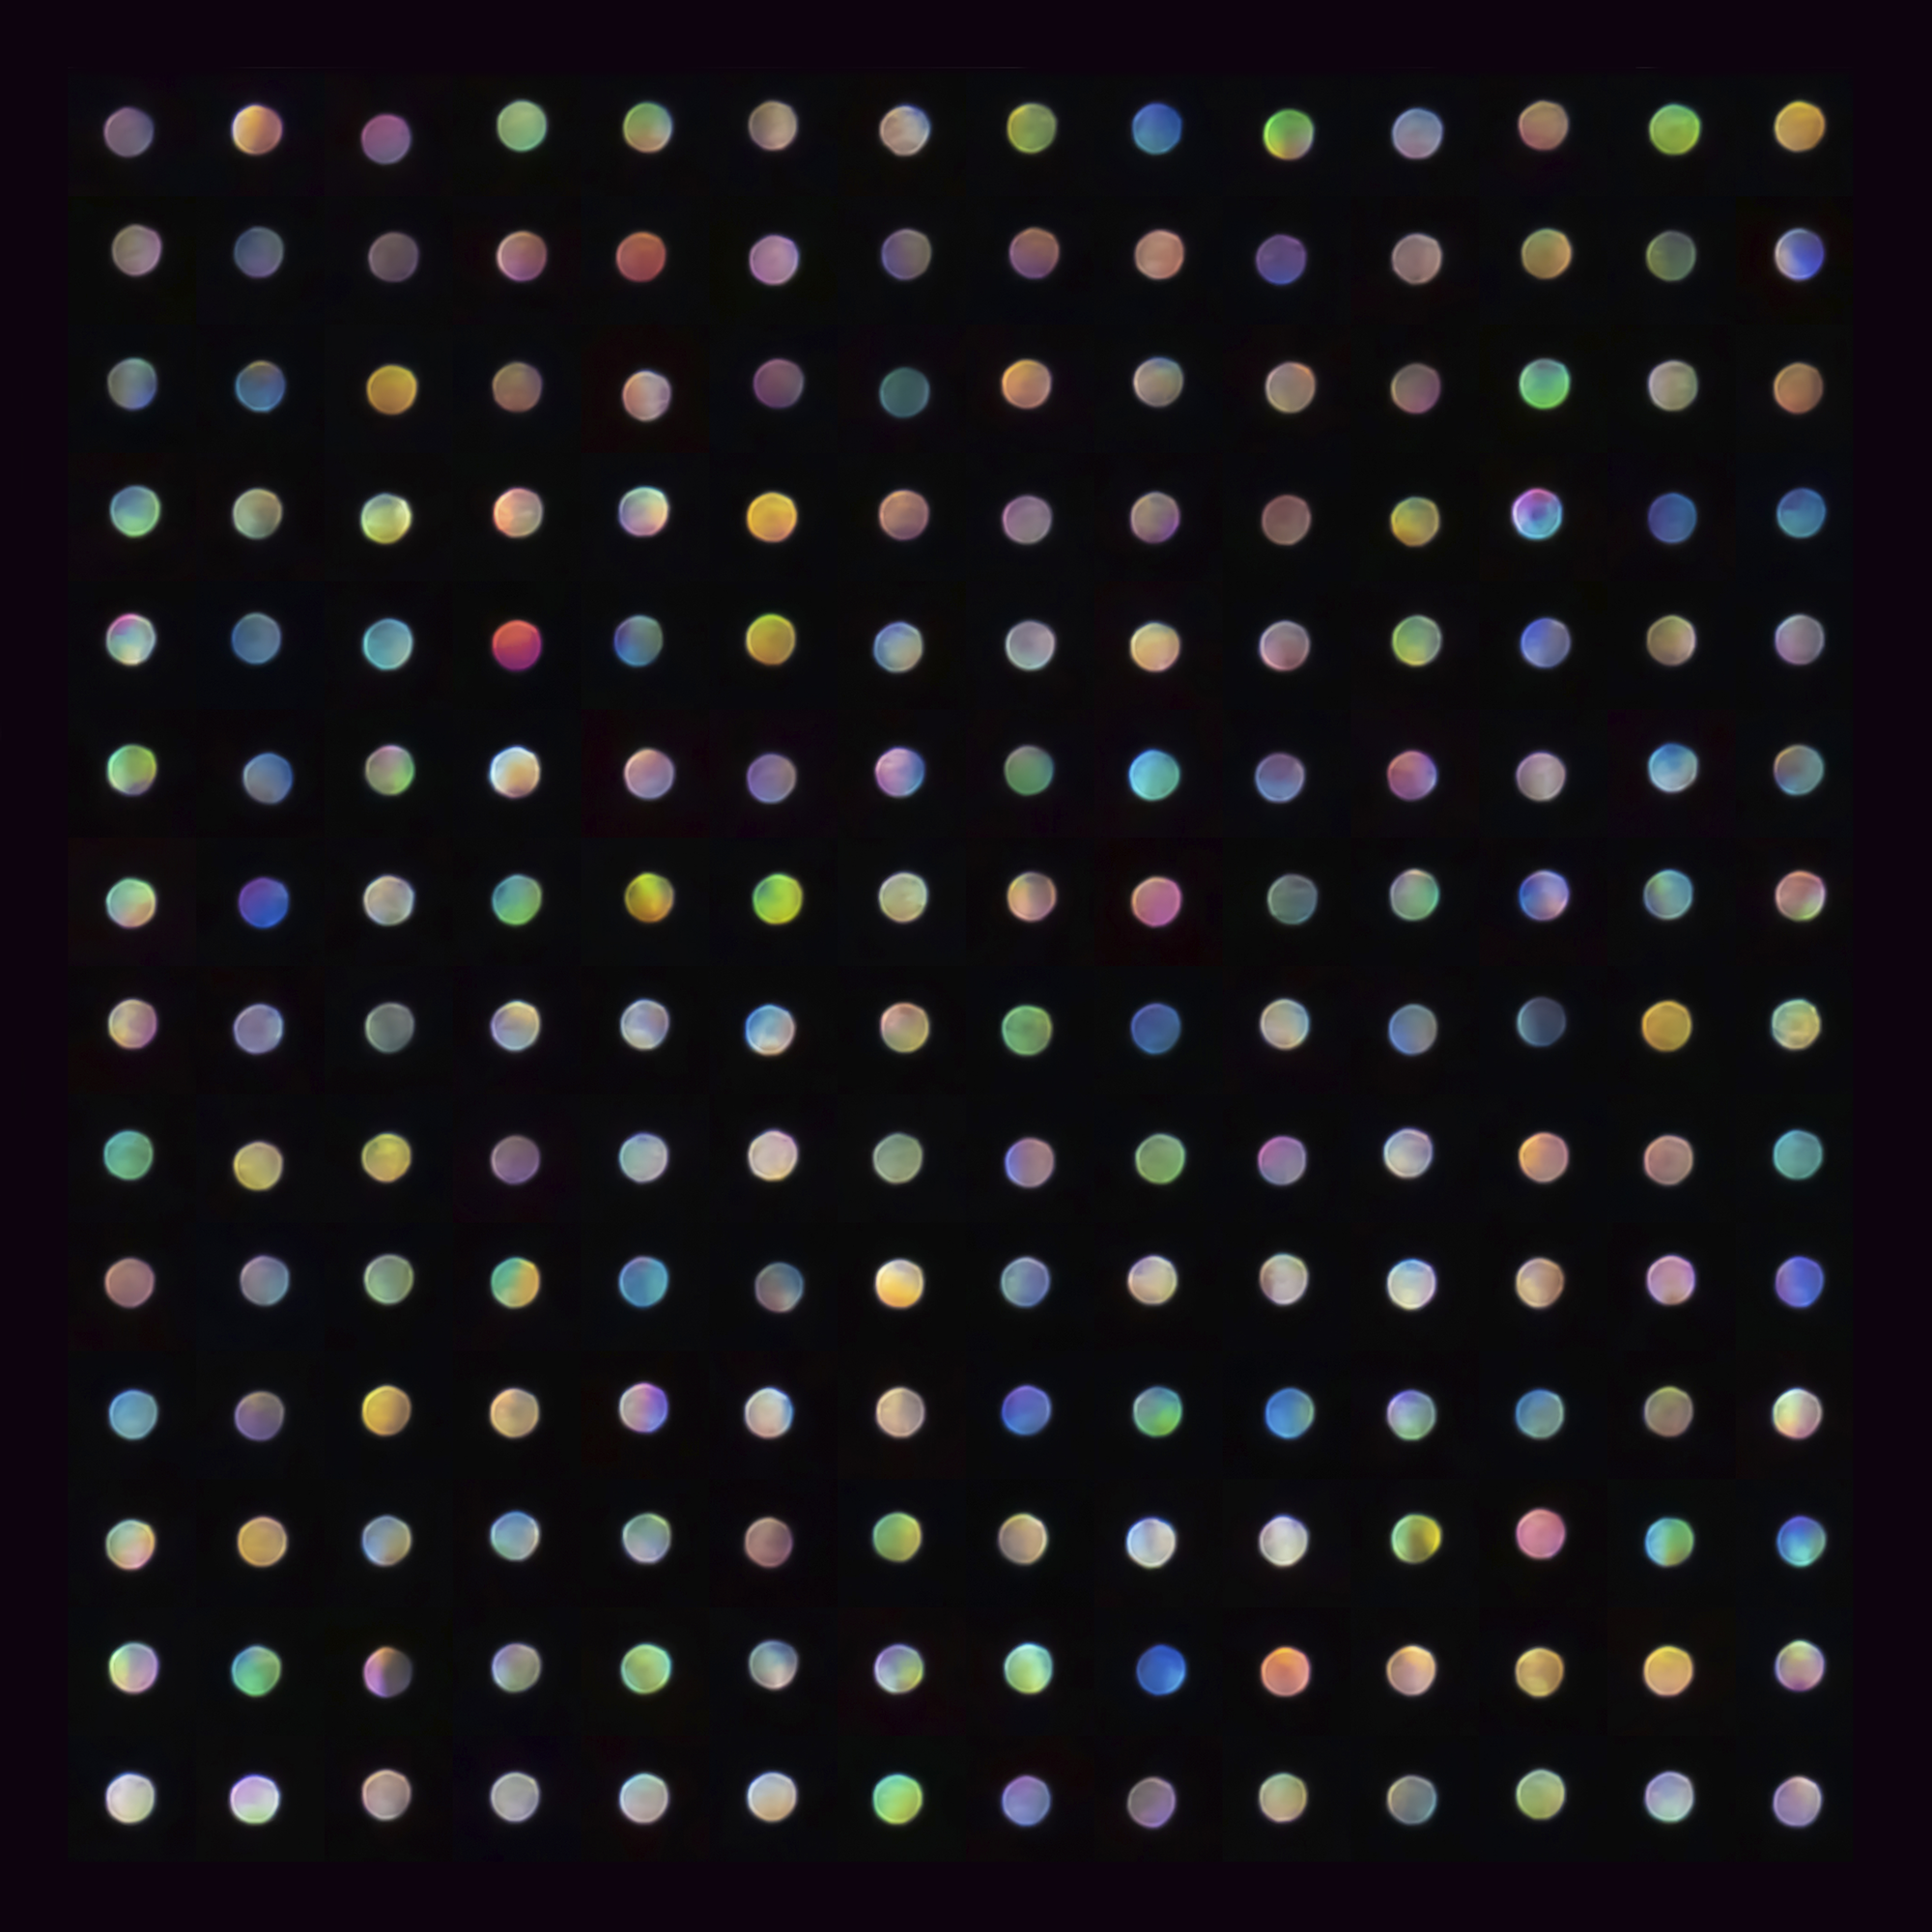
A much shorter project, only a few hours long, can be done with a bright planet like Venus or with a crescent Moon. Focus on these in the twilight period and capture the changing sky background. Start just before or at sunset when Venus or the Moon becomes visible. Then take an image during sunset, civil twilight, nautical twilight, astronomical twilight, and astronomical night. Such images of Venus in particular will slowly reveal the background stars as darkness falls, and are ideal if it’s in or near a prominent region in the sky (like Sagittarius). If your target is the crescent Moon, you’ll capture earthshine as well as the background stars.

You can pursue a shorter project still with bright stars like Sirius by aiming to capture the different apparent shades of the star as it twinkles. You’ll need to take 100 or more exposures (there is no specific number) of the defocused star to create a collage.
A few tips
Now that you have an idea of some prospective projects, here are a few suggestions that will help make your experience smoother.
• Data arrangement is important. Sort your data every day (or every week) in folders and subfolders labeled with dates. Note anything special in a document, and keep it in that folder.
• Back up your data regularly, the more frequently (e.g., every day or every three days), the better. Put a copy of your raw data on an external device or online. You don’t want to lose your hard-earned data to a technical fault on your computer.
• Experiment during photographing and processing with different subjects and projects. But in all cases, the final image should be yours.
• Be creative. The final image could end up close to what you imagined, but if you come up with ideas along the way that mean it might turn out differently, follow them.
• If you get stuck at any point or run out of ideas, discuss it with a fellow photographer and collaborate.
By now, I’ve given you several options for possible projects. If you already have the basic equipment, start planning. Just remember: These suggestions are just starting points. The sky is the limit — literally.