Some of us find new energy by purchasing a longer focal length scope to image smaller targets, only to discover unexpected challenges due to poor seeing, imperfect collimation, and the need for off-axis guiding, not to mention limited portability.
Others go in the direction of forgoing amateur equipment entirely and instead processing data captured by professional astronomers using ground-based observatories or space telescopes. Still others have gone to wider fields of view (FOV), using large CCD chips like the KAF-16803, along with a high-quality apochromatic telescope.
This is the approach I’ve taken in my evolution as an amateur astrophotographer over the past two decades, in order to gain a greater appreciation of target size — especially when it comes to large, sprawling nebulae.
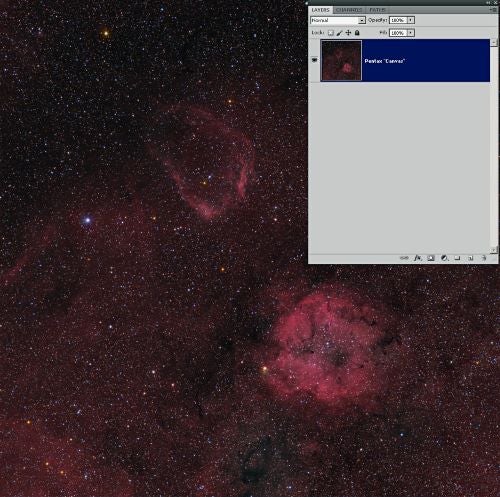
In recent years, I’ve enjoyed using a Takahashi FSQ-106 apochromatic refractor, which has a focal length of 530mm and yields a respectable field of view of 4° at image scales in the range of 3.5″ per pixel. But, recently, I’ve pushed things even further to capture very wide-field views of nebulae and star fields in the Milky Way. I’ve taken a hybrid approach, employing an even wider field of view obtained using an inexpensive, high-quality Pentax lens as a canvas upon which to repurpose some of my prior, higher resolution images. I’ve found that this offers a new perspective on familiar targets by showing how they relate to one another in the night sky.
Choosing equipment
In order to obtain a very wide-field backdrop, I decided to couple my Apogee Alta U16M CCD camera (which has a KAF-16803 chip) with a Pentax 67, 200mm fixed-focal-length lens that I obtained at a great price from eBay a few years ago. This afforded me a very wide field of view of almost 11 square degrees, while still maintaining a reasonable image scale (9.27″ per pixel).
I also take advantage of a high-quality CCD camera and filter wheel that I have owned for many years. This avoids the smaller field of view typical of most DSLR camera chips, and also enables me to take advantage of individual R, G, and B filters to minimize the chromatic aberration typical of achromatic lenses (including the Pentax 67), such as those used with most consumer-grade DSLR cameras. This is not to say that one cannot obtain a pleasing wide-field backdrop using a one-shot color-cooled CCD camera, or even using a DSLR with a fixed focal length lens, but I’ve always found that monochrome CCD cameras, combined with broadband or narrowband filters, have yielded the best results in my hands.
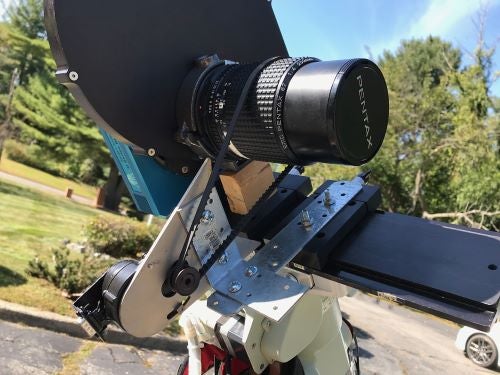
My setup is not exactly “plug and play,” but the results are worth it. The U16M CCD camera requires an adapter to connect the filter wheel to the Pentax lens, and was manufactured to my specifications by PreciseParts (www.preciseparts.com). The length of my custom adapter for the Pentax 67 lens to the Apogee FW50-7S/9R Series filter wheel was 29.5 millimeters, but your setup could be different. I use a RoboFocus attachment that I tailor-made with sheet metal and a few odds and ends from the local hardware store, and I obtained the rubber belt and timing sprocket from www.robofocus.com.
Using a RoboFocus is critical to achieving good focus with this system, especially since most filters are not exactly parfocal, and I wanted my setup to be automated. I also found that with the Pentax lens, the sweet spot for obtaining sharp images with a reasonable aperture was f/5.6.
Building a composite image
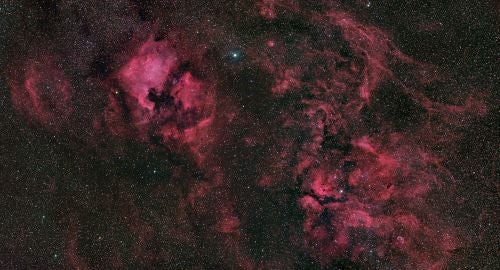
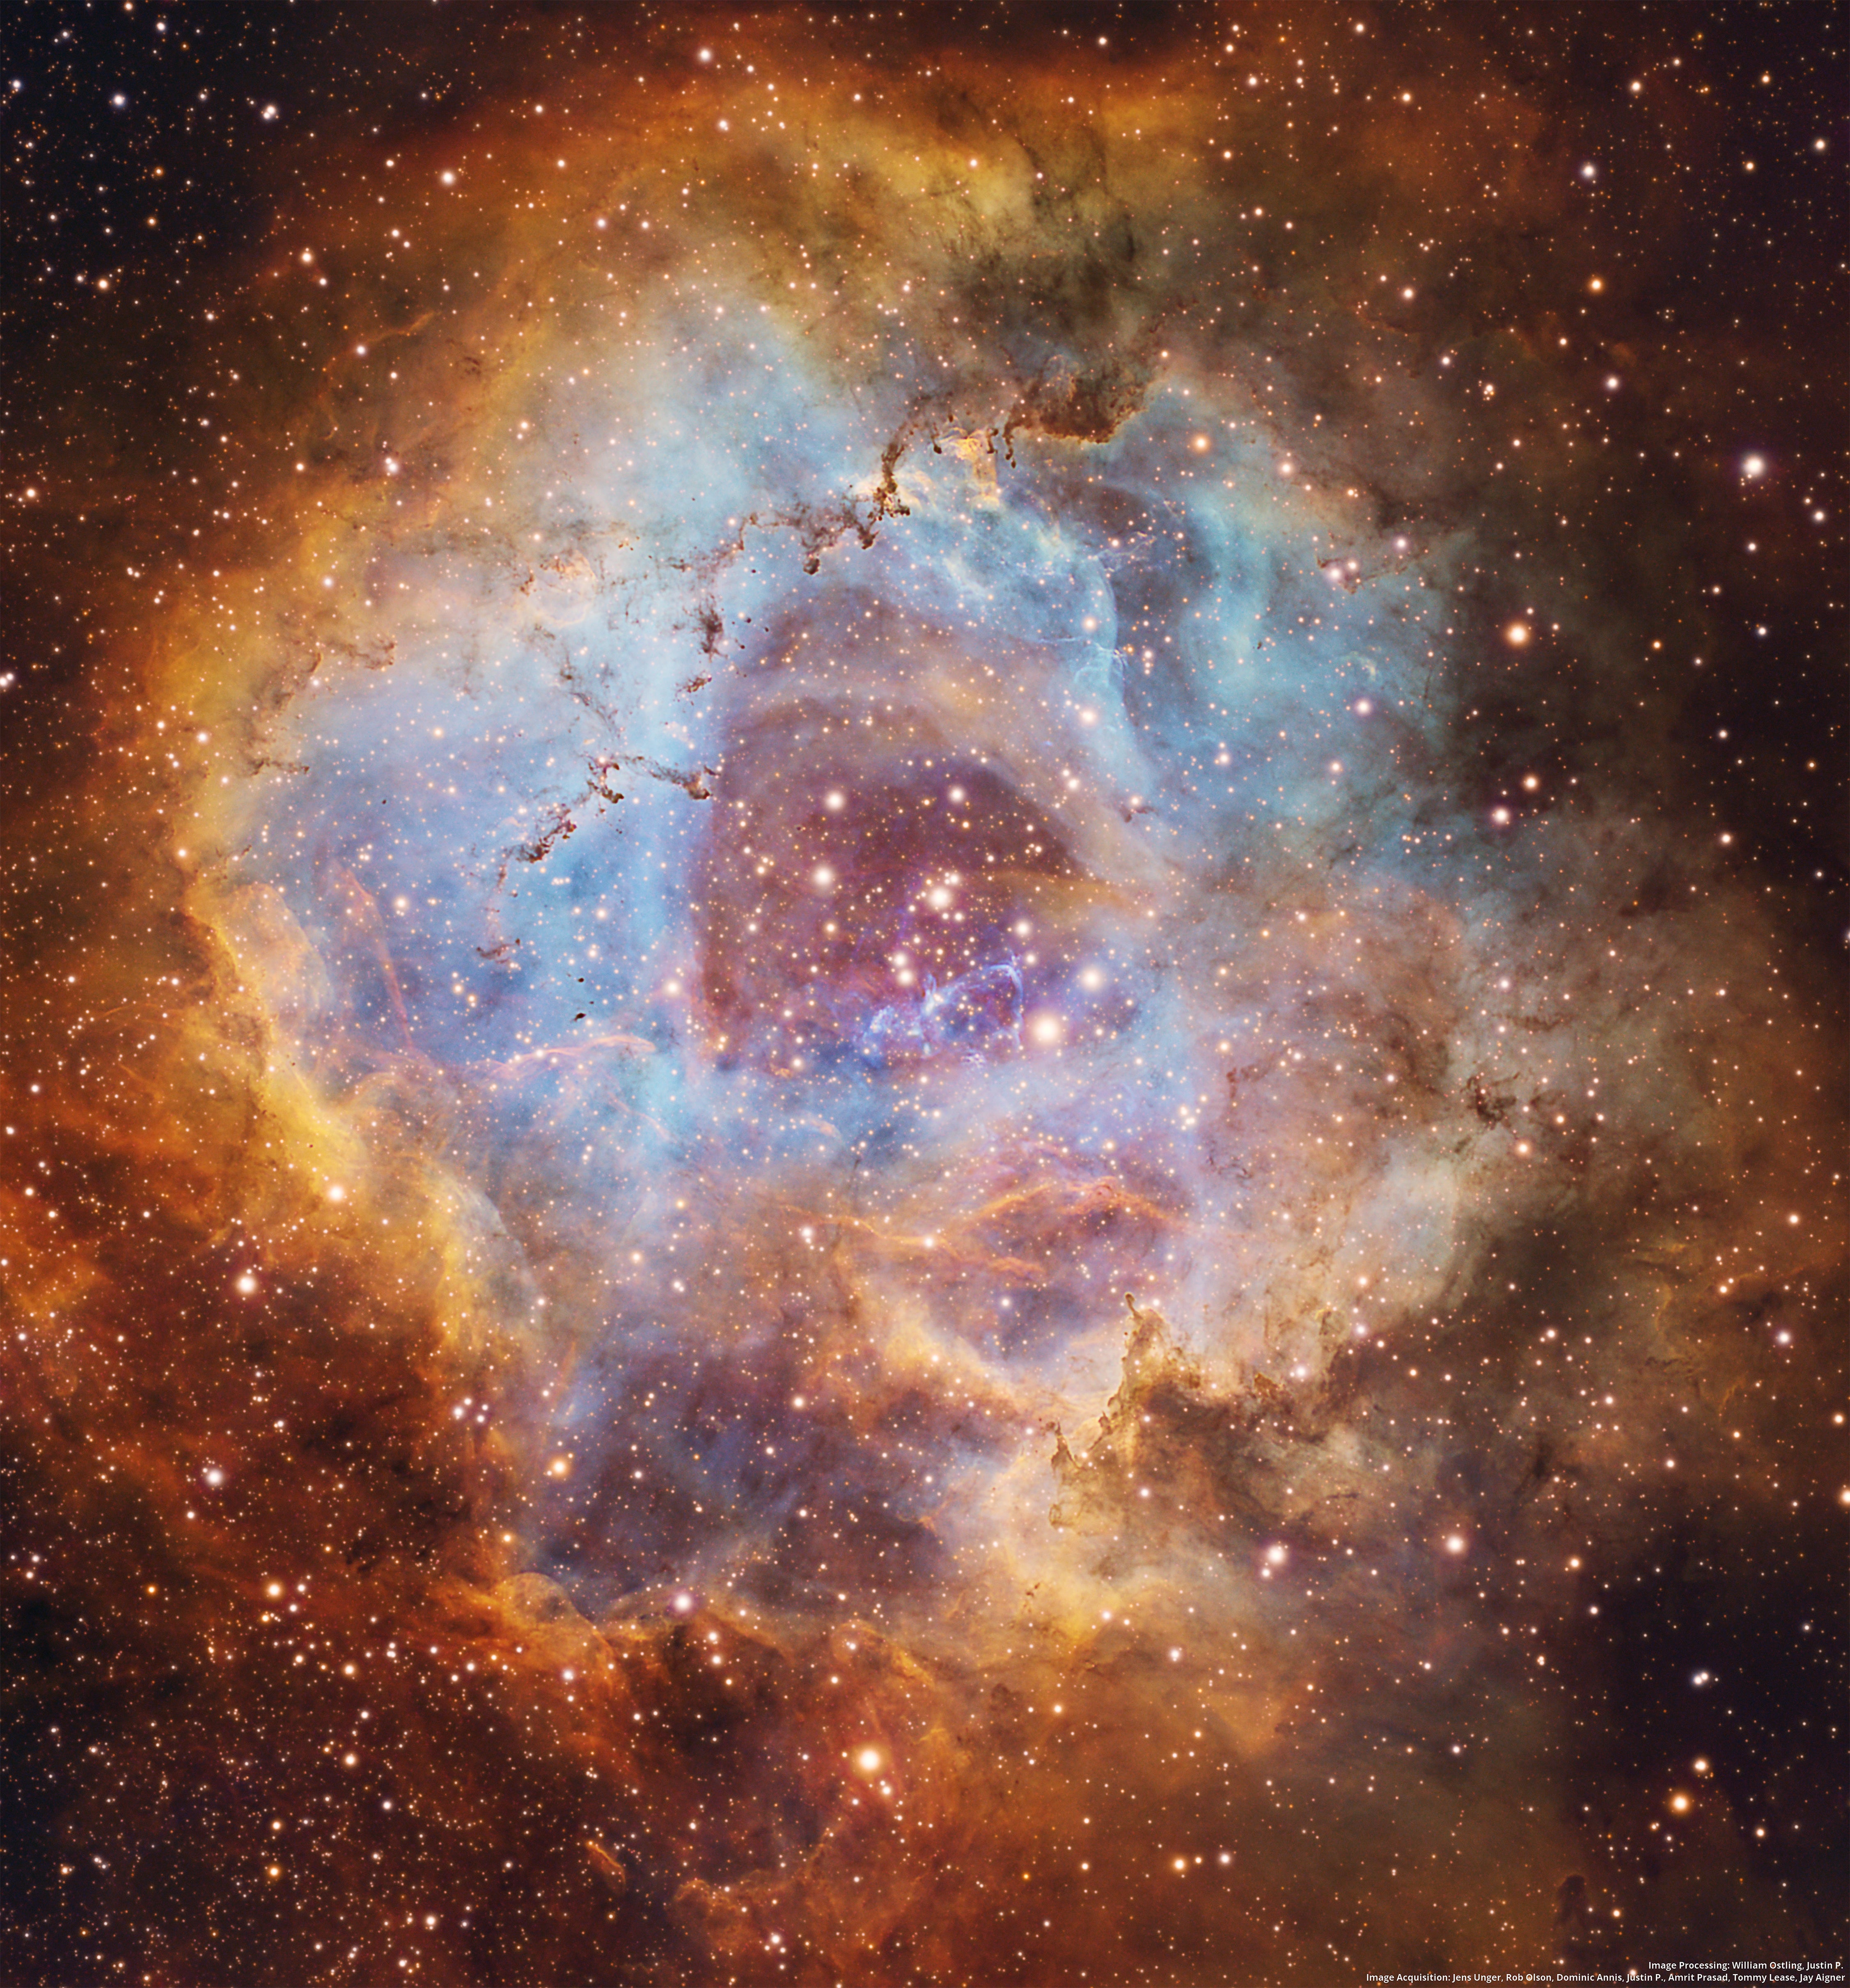
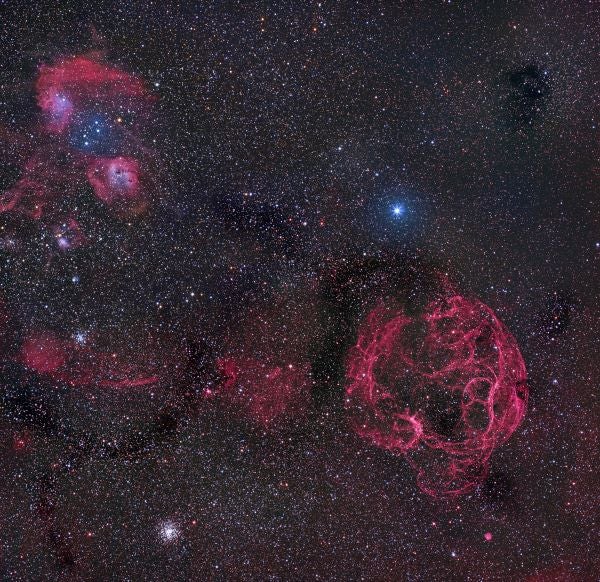
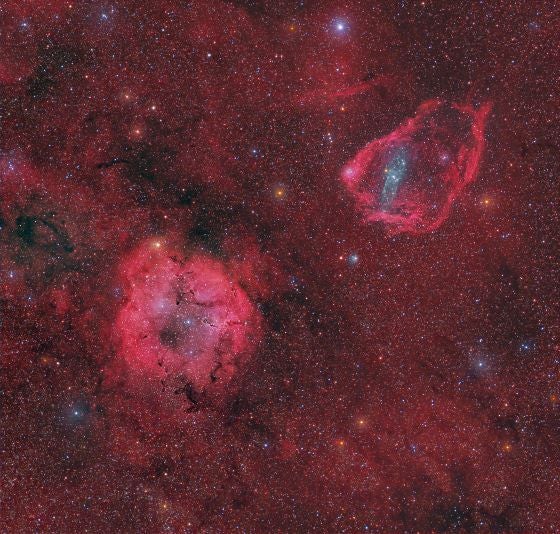
I won’t review all of the usual steps in image processing here, since these have been well covered in other articles on the subject. Rather, let’s focus on steps that are specific to building a wide-field composite. Above you’ll see a typical image from the Pentax 200mm/U16M setup, after calibration, stretching, and gradient removal, representing eight hours of an HαRGB exposure. It’s reassuring that the star colors are preserved without excessive blue fringing despite the achromatic lens system. Also preserved is the detail in the Hα components of the two main targets, as well as the intervening faint Hα signal that bathes this entire region (and which is often not appreciated when imaging a more limited field of view).
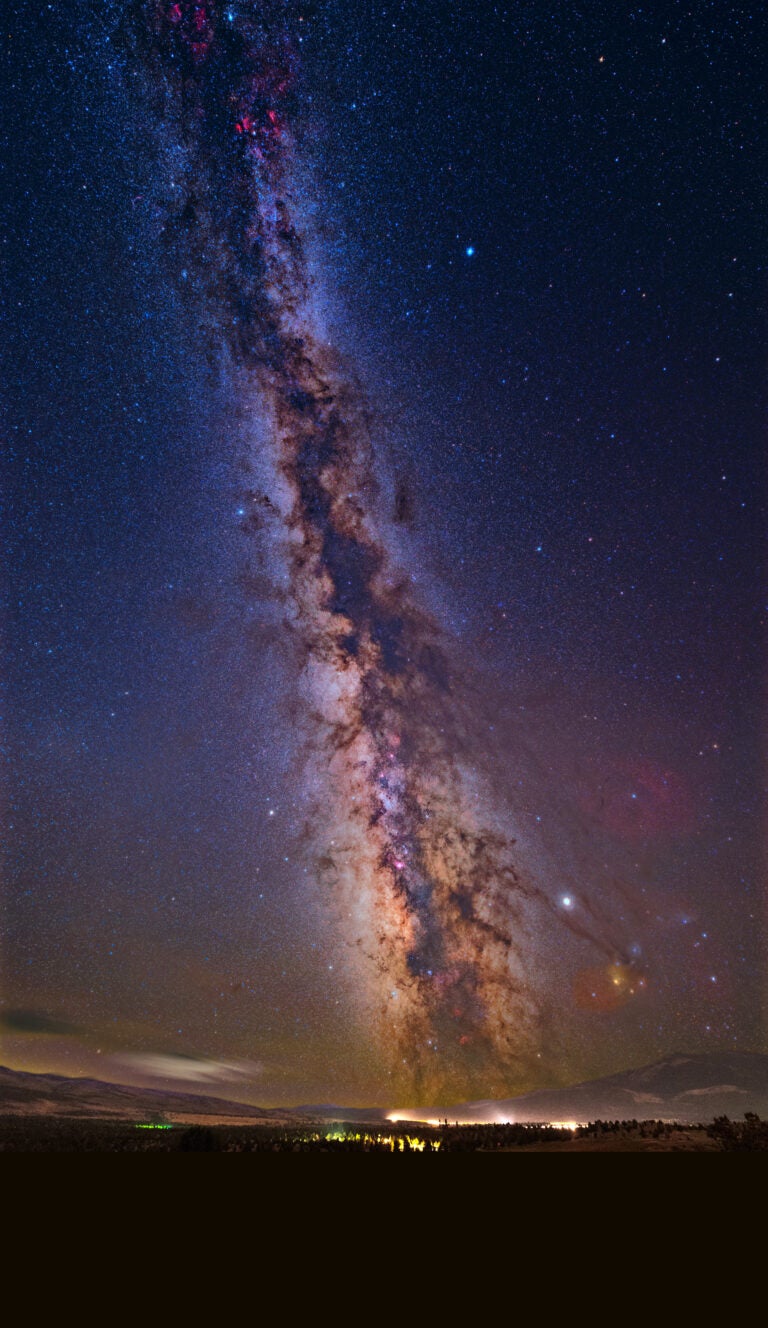
Take in the view
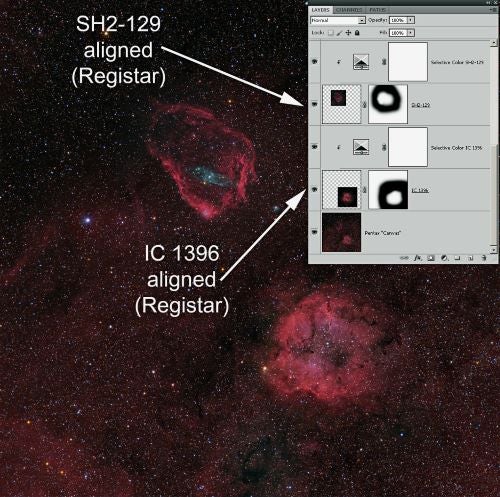
As shown in the accompanying pictures, this relatively simple technique can breathe new life into old images. How many of us realized that the Elephant Trunk was so close (in angular separation, at least) to Sh 2–129, or that the Spaghetti Nebula (Simeis 147) was near the Flaming Star Nebula? And how many of us painstakingly created mosaics of the North America, Pelican, and IC 1318 nebulae to capture a wide field of view, when we could have used the composite approach described here to achieve a very similar result?