Several years ago, I decided to drive somewhere dark enough to see the Milky Way with the naked eye. Something had rekindled my curiosity of the heavens, and I wanted to see them for myself. So I picked a reasonably dark and clear night and drove out to an area outside of Ann Arbor, Michigan.
When I began to see more stars in the sky, I figured I had reached a location that was dark enough. I stopped by the side of the road near a cornfield, got out, and looked toward the south.
I found the constellation Sagittarius, its brightest stars forming the asterism of a teapot — and I could see “steam” pouring out of it. There it was, the Milky Way! I felt a sense of accomplishment having seen it with the naked eye.
Ever since, I’ve been a student of our galaxy, striving to capture the Milky Way in photographs the same way I saw it that night outside Ann Arbor, arcing across the sky above the land. These wide-field shots that incorporate the landscape and the sky above — sometimes called nightscapes — are one of the most accessible ways to get into astrophotography.
I began sharing them with others who had a passion for the sky, joining a group of avid amateurs in Ann Arbor called the University Lowbrow Astronomers. Back then, the Lowbrows were primarily a group of long-time visual astronomers, but I and a few others started presenting more astroimages to the group. I was hooked!
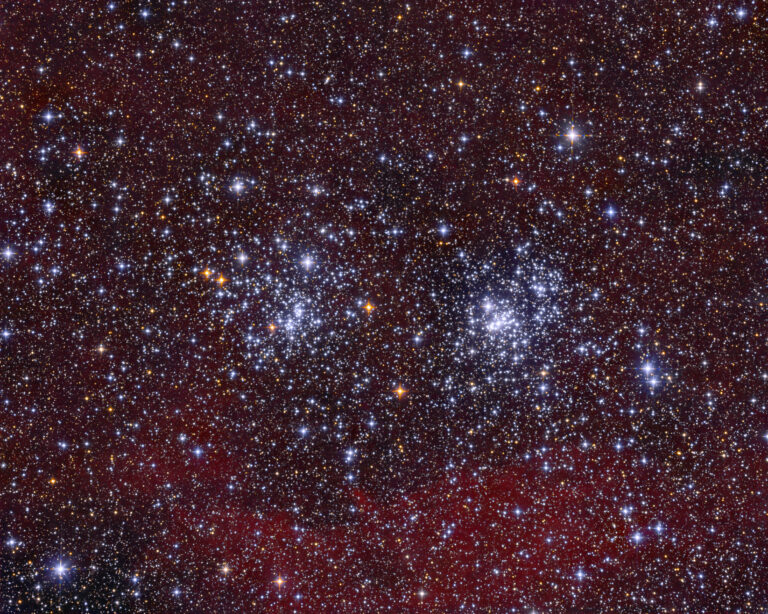
Shooting nightscapes allows you to get to know our galaxy. Sagittarius is home to the bright galactic center, but there are many other regions of the Milky Way that are just as interesting to target.
Why I shoot wide-field
Classic astrophotography, as I like to call it, focuses on one or more objects in space as seen from our vantage point. They are beautiful, but they are isolated images. I prefer wide-angle vistas for two reasons: First, by seeing the entire picture of that region in space, I can appreciate just how large and vast these regions are.
And second, I can add a part of our own planet to the photograph to indicate that we are a part of this universe, and that our vantage point from Earth is unique. If there is life similar to us on other worlds, their images will not contain our landscapes nor our human-made structures.
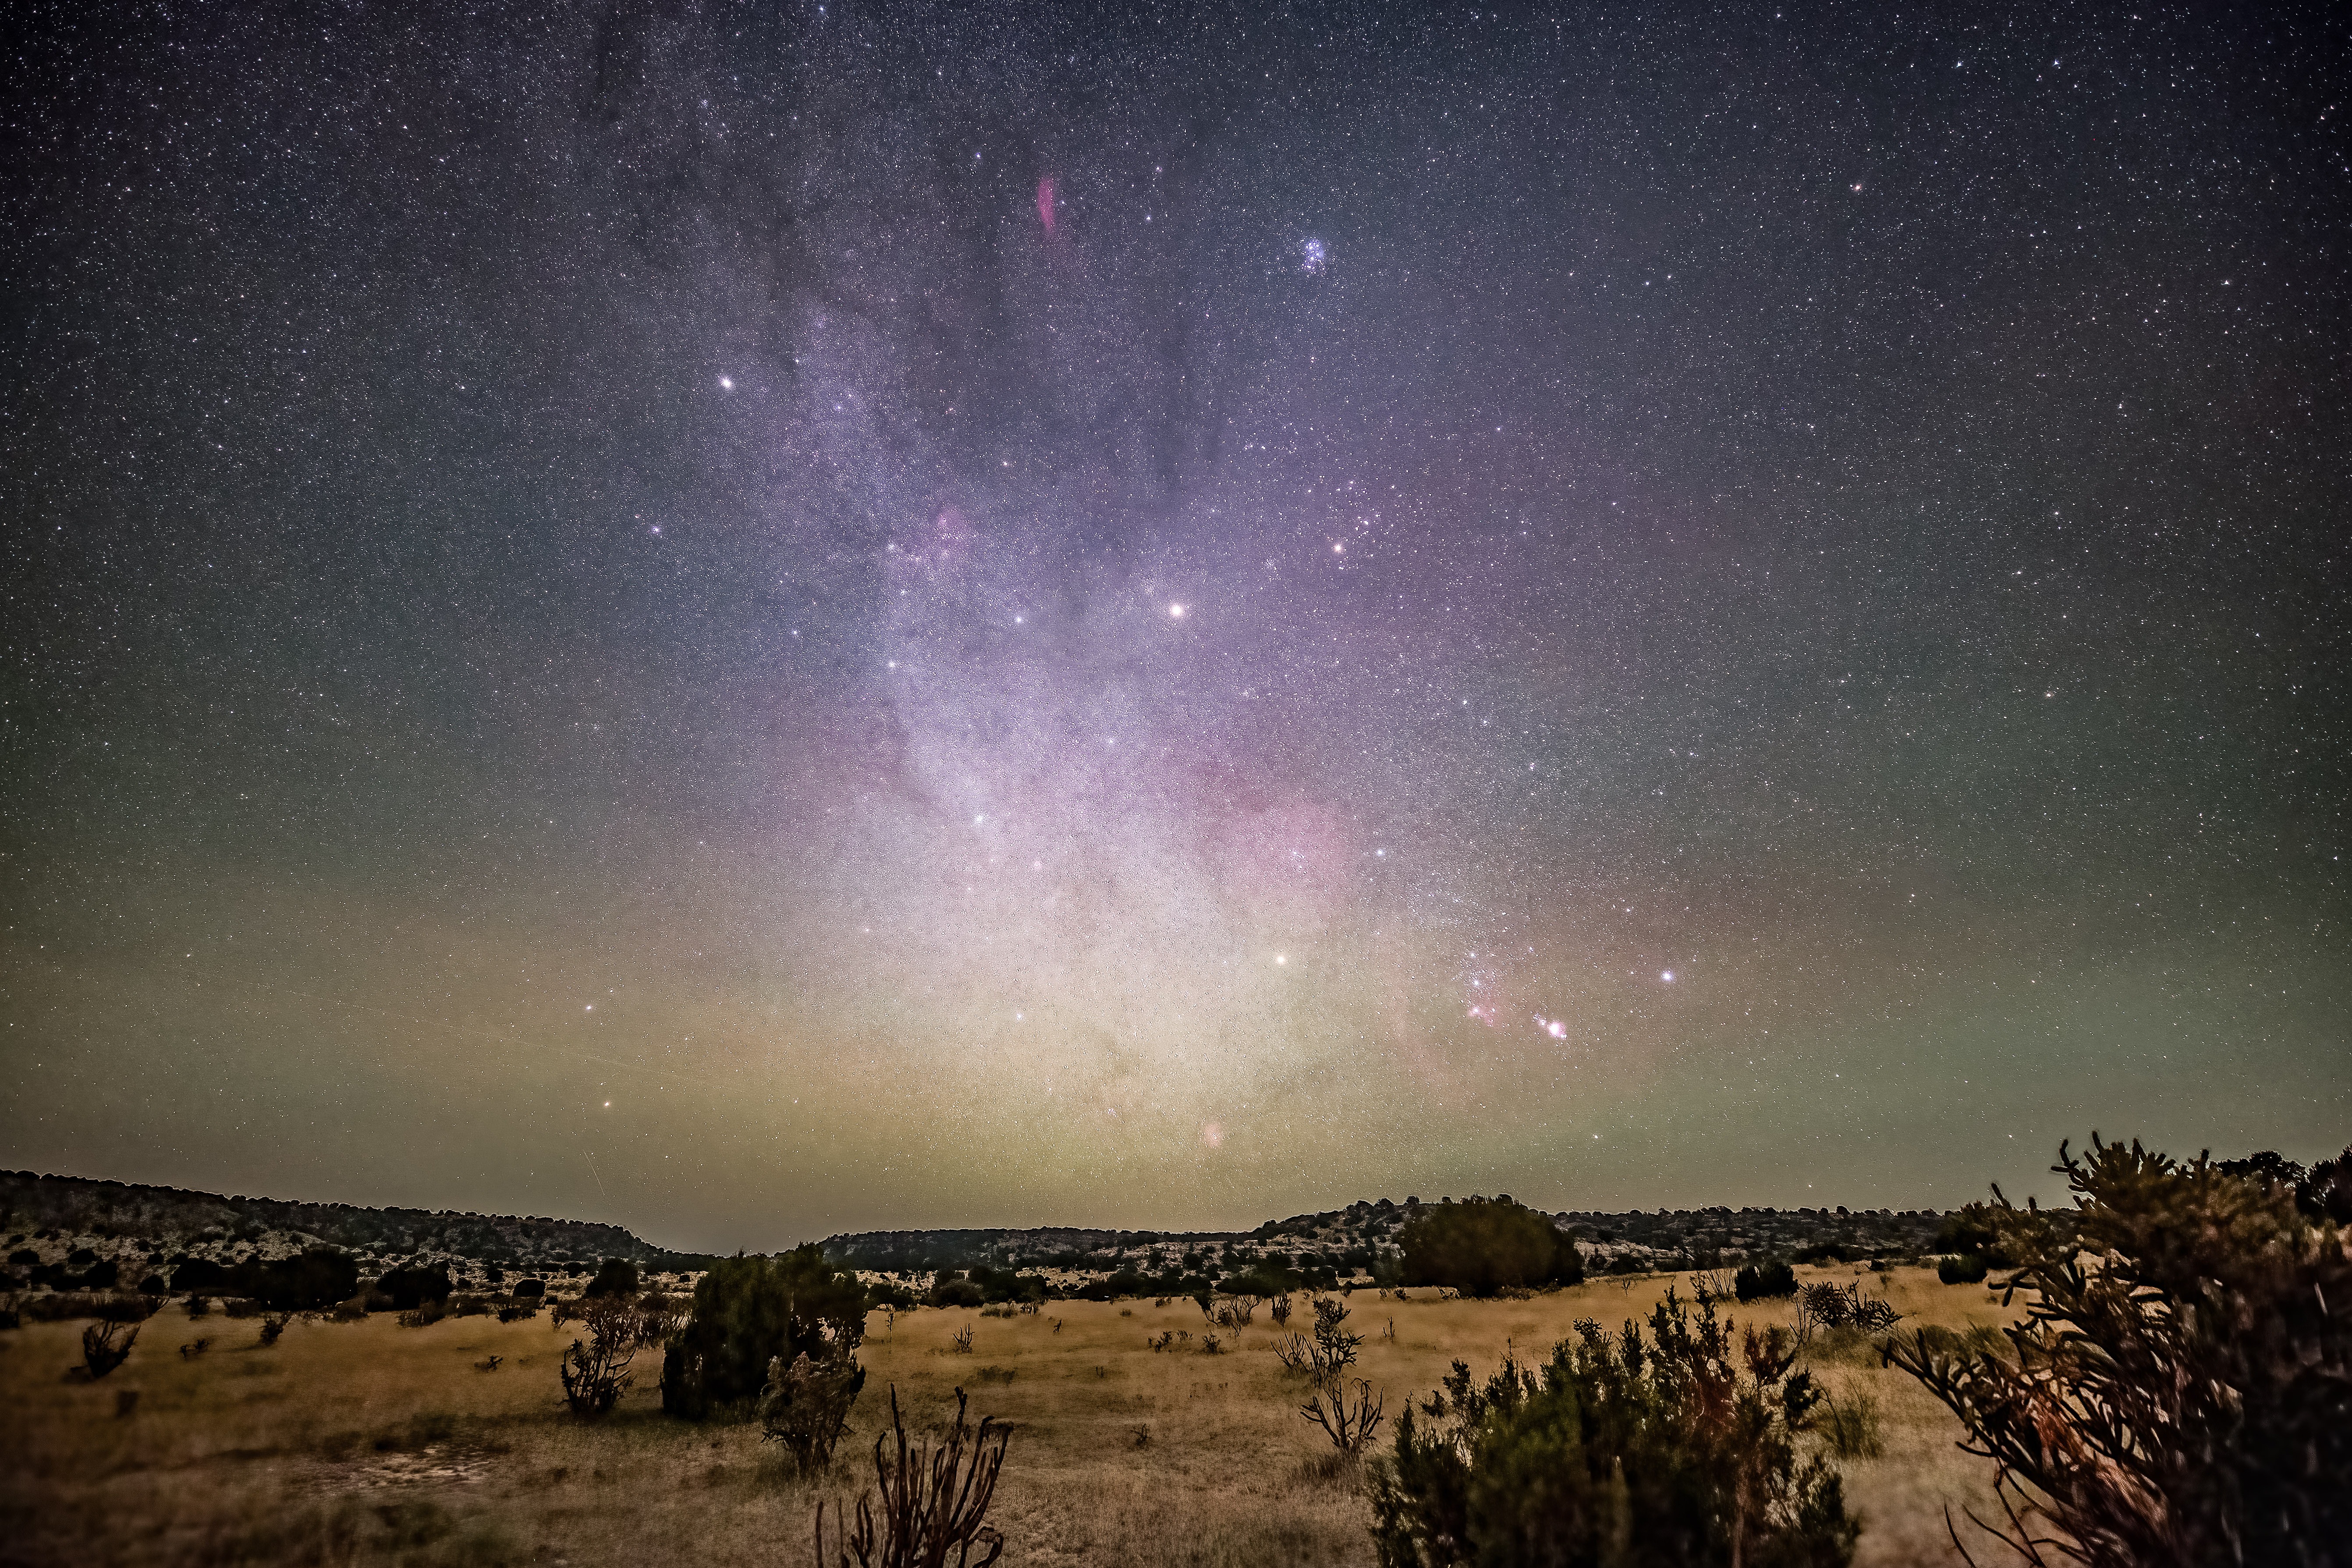
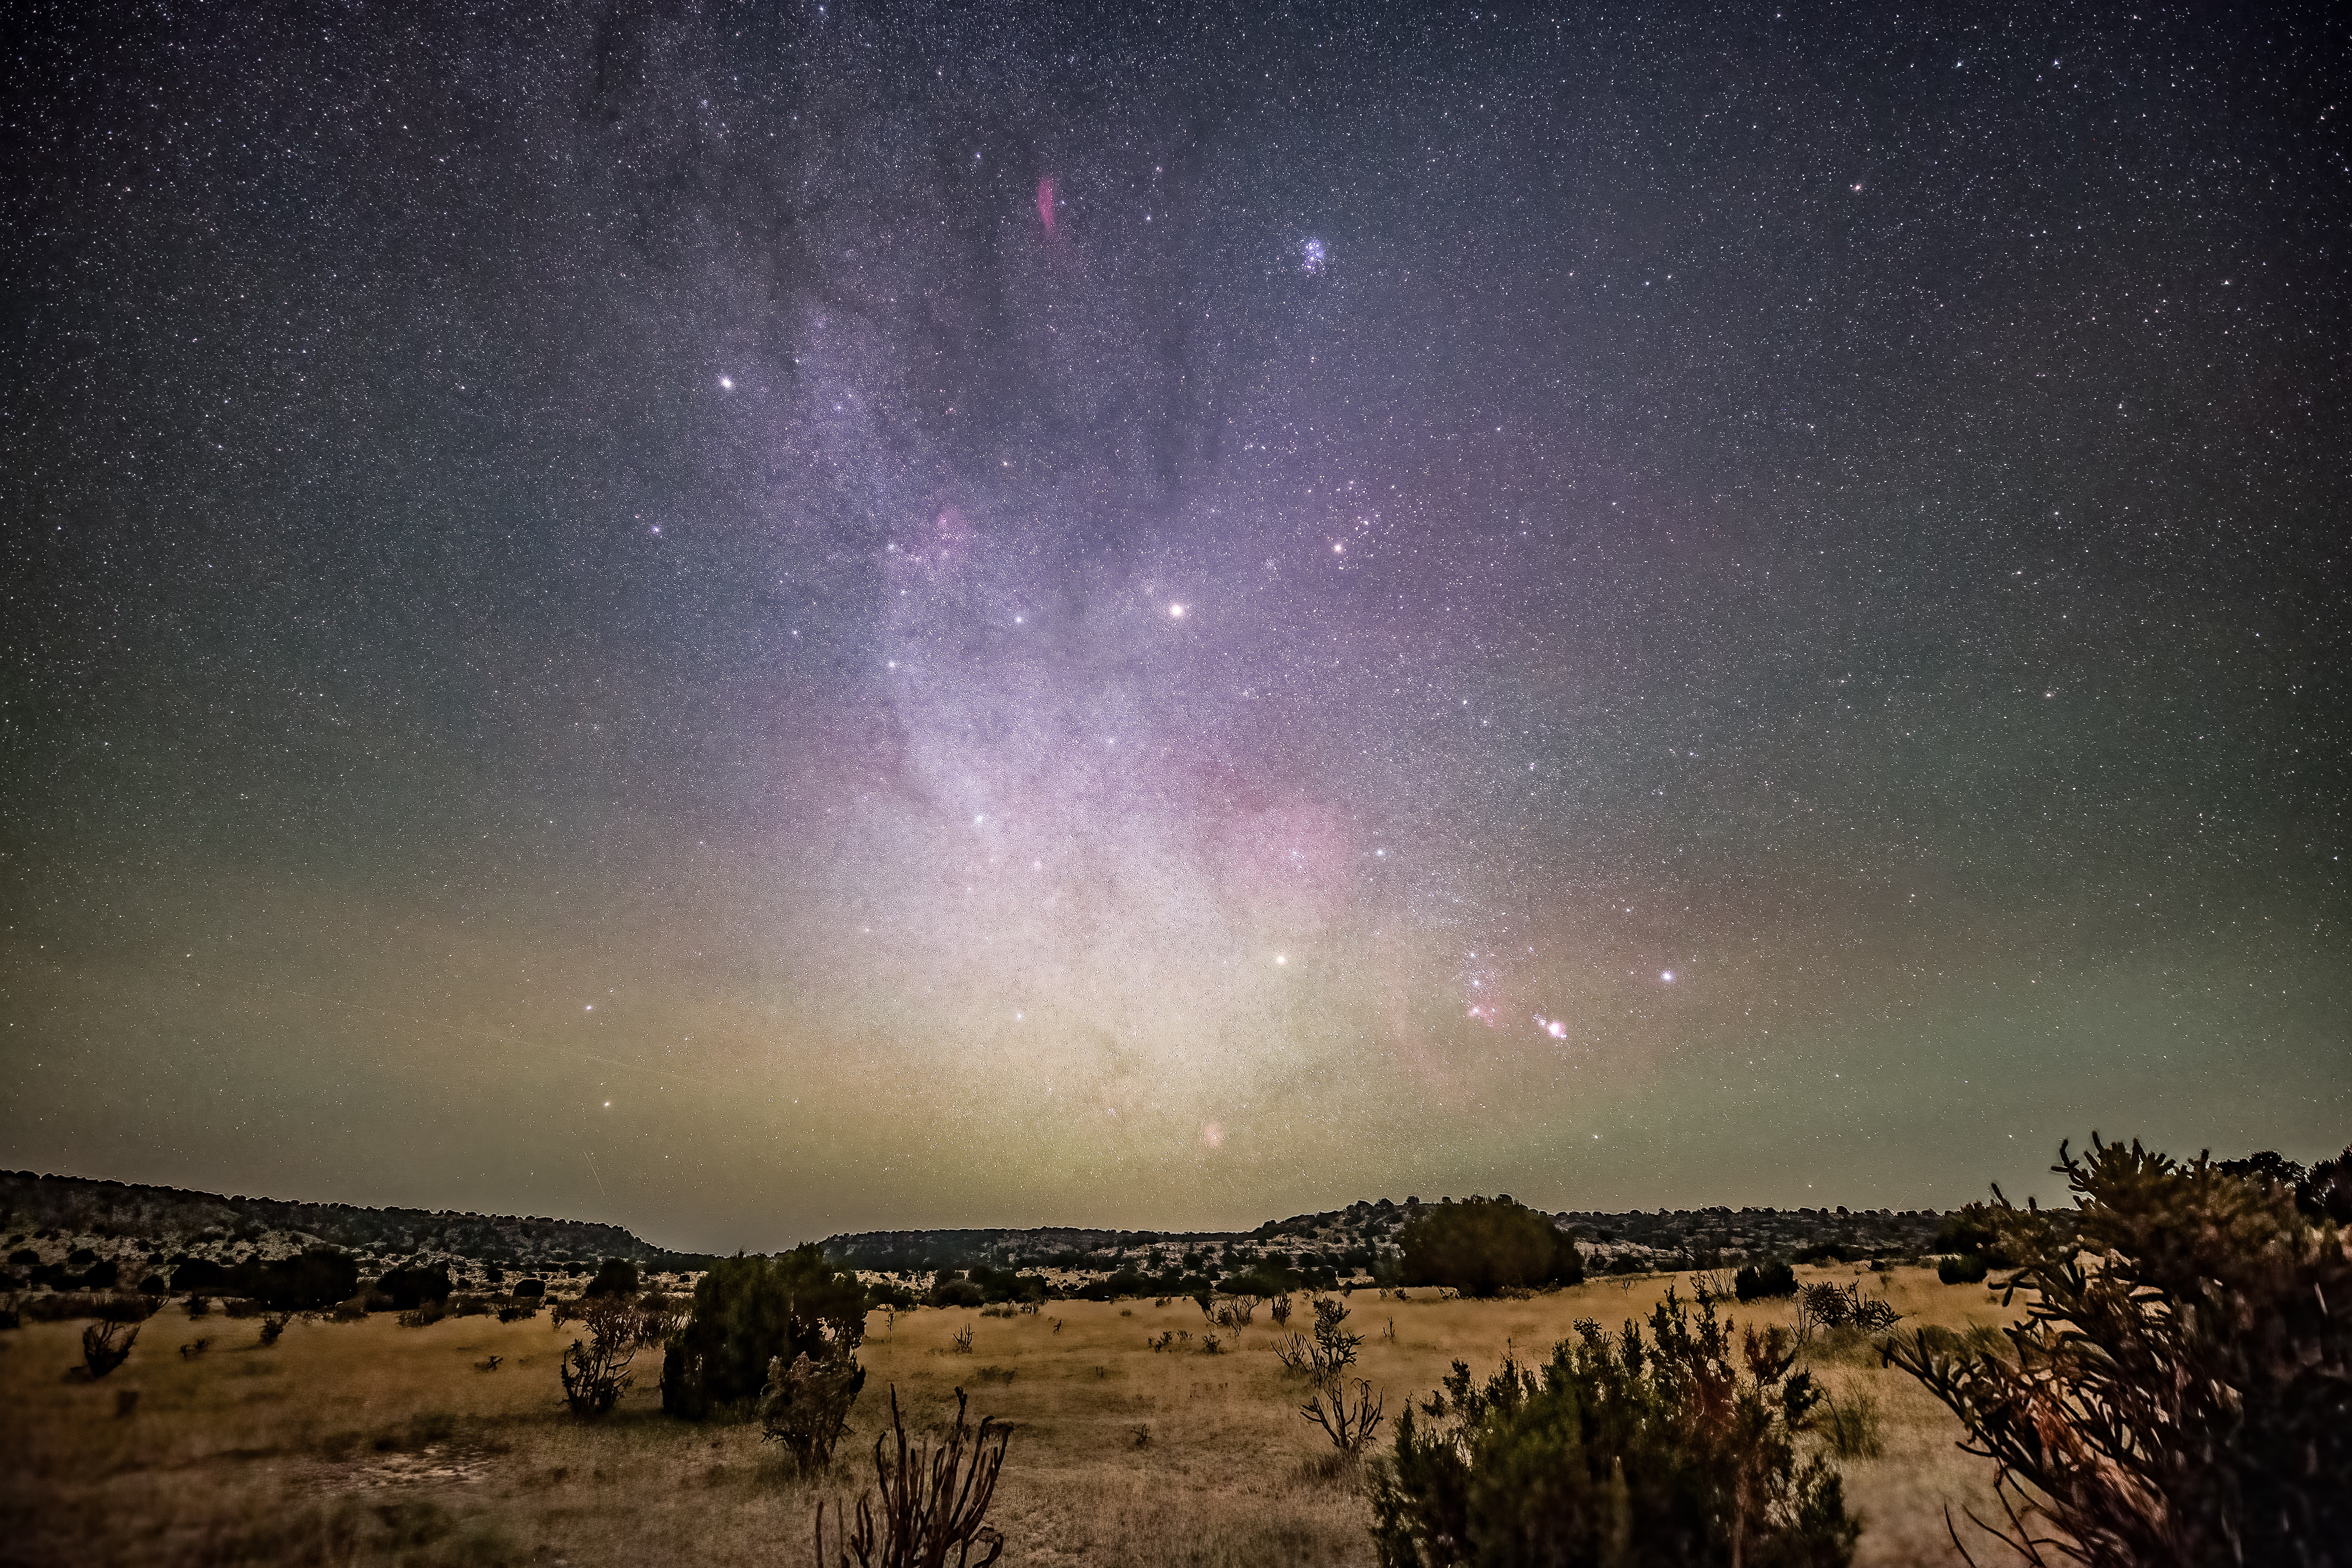
For instance, a picture I took in Kenton, OK. It speaks to why I like doing wide-field images. Orion is rising at the bottom of the frame. Most astroimages from this region are close-ups of one or more objects. But in this wide-angle nightscape, we can see dust lanes and bright clusters, and get an overall view of what this galactic arm looks like from our point of view. For instance, the Rosette Nebula (NGC 2237–9/46) is a pinkish blob just above the horizon. Close-up photographs make this large emission nebula look impressive, but you get a sense of scale when you capture its light among all of the larger structures near it along our line of sight.
Also consider the California Nebula (NGC 1499) and the Pleiades (M45) at the upper center of the photograph. In a wide view, it’s clear that these objects lie next to a lot of dust and gas. But an astrophotographer shooting those objects in close-up might easily mistake the galactic dust and gas for noise or an unwanted artifact, and remove it. If they were to look at this wide-field image and realize just how close those objects are to the Orion Arm, they would understand that they weren’t getting noise or artifacts at all, but close-ups of the Milky Way. In fact, astrophotographers have now realized that there is galactic dust and gas everywhere we shoot in the night sky, and are “discovering” structures that were always there but never imaged as the main target.
Planning nightscape shoots
I often read social media posts or receive direct messages from fellow photographers who tried nightscape photography for the first time. They were going to be at a dark site and figured they would capture the Milky Way.
But things don’t always go to plan. Sometimes they are clouded out. Other times, they’ve chosen a time when the Moon is Full or nearly Full in the sky.
Photographing the Milky Way comes with challenges that may be new to those with a daytime-photography background. The Milky Way moves with the night sky and, at certain times and places, can be nearly impossible to image without specific equipment. And you can’t shoot it through clouds, either — although, if you know what you’re doing, you can use clouds to frame the Milky Way in your composition.
What I’ve learned from my years capturing the night sky is to plan, plan some more, and then have a backup plan. The following is a good checklist for planning a Milky Way imaging session in a dark sky.
First, know the lay of the land where you will be photographing and get comfortable with being there in the dark. I’m a solo imager, but bringing a friend is not a bad option. If you don’t know the area, visit it during the daytime first.
Use software to plan how you want your shot to look. The smartphone and tablet app PhotoPills is popular with photographers, and planetarium apps like SkySafari work well, too. Keep in mind that the sky will rotate through the night, from sunset to sunrise. This determines the time that you should be at your location to take a shot. For example, in an image of Point aux Barques Lighthouse on Lake Huron, I was shooting around 4 a.m. because I wanted to capture the rising of the Milky Way core behind the lighthouse museum, gift shop, and caretakers’ quarters, which were all a part of my foreground target. If I had shown up too early or too late, I would have missed this composition.
One more resource you will need is a weather app to tell you how cloudy it’s going to be at the site you want to photograph. A general weather app like the Weather Channel’s is a good start, but there are others specifically designed for astronomers, like Clearskychart and Astrospheric. Another one I use is SpotWX, which has proven to be very good at predicting various types of cloud cover; it even shows when there will be clearings. I’ve often taken advantage of that information to gather a single shot amid otherwise cloudy skies.
Beyond that, you’ll also need to be prepared for unexpected fortunes — good or bad. You may encounter circumstances that will either ruin your shoot or make it very unique.
One example of the unexpected is the image of Lake Hudson in Michigan, which I acquired early on in my nightscape photographic journey. I noticed that night that there were meteors appearing here and there across the sky, and I’d hoped to get at least one streaking through a Milky Way shot. Well, I saw one go by — right below one of my shots, out of frame. It upset me a lot! I turned the camera back to the galactic bulge, started an exposure, and walked off frustrated.
Then someone I was imaging with asked, “Hey, did you see that meteor?” I asked him where he saw it, heard my camera click as the shutter snapped closed, and when he pointed in the direction my camera was facing, I went to check the picture. I saw a raw version of the image you see printed here. I was thrilled!
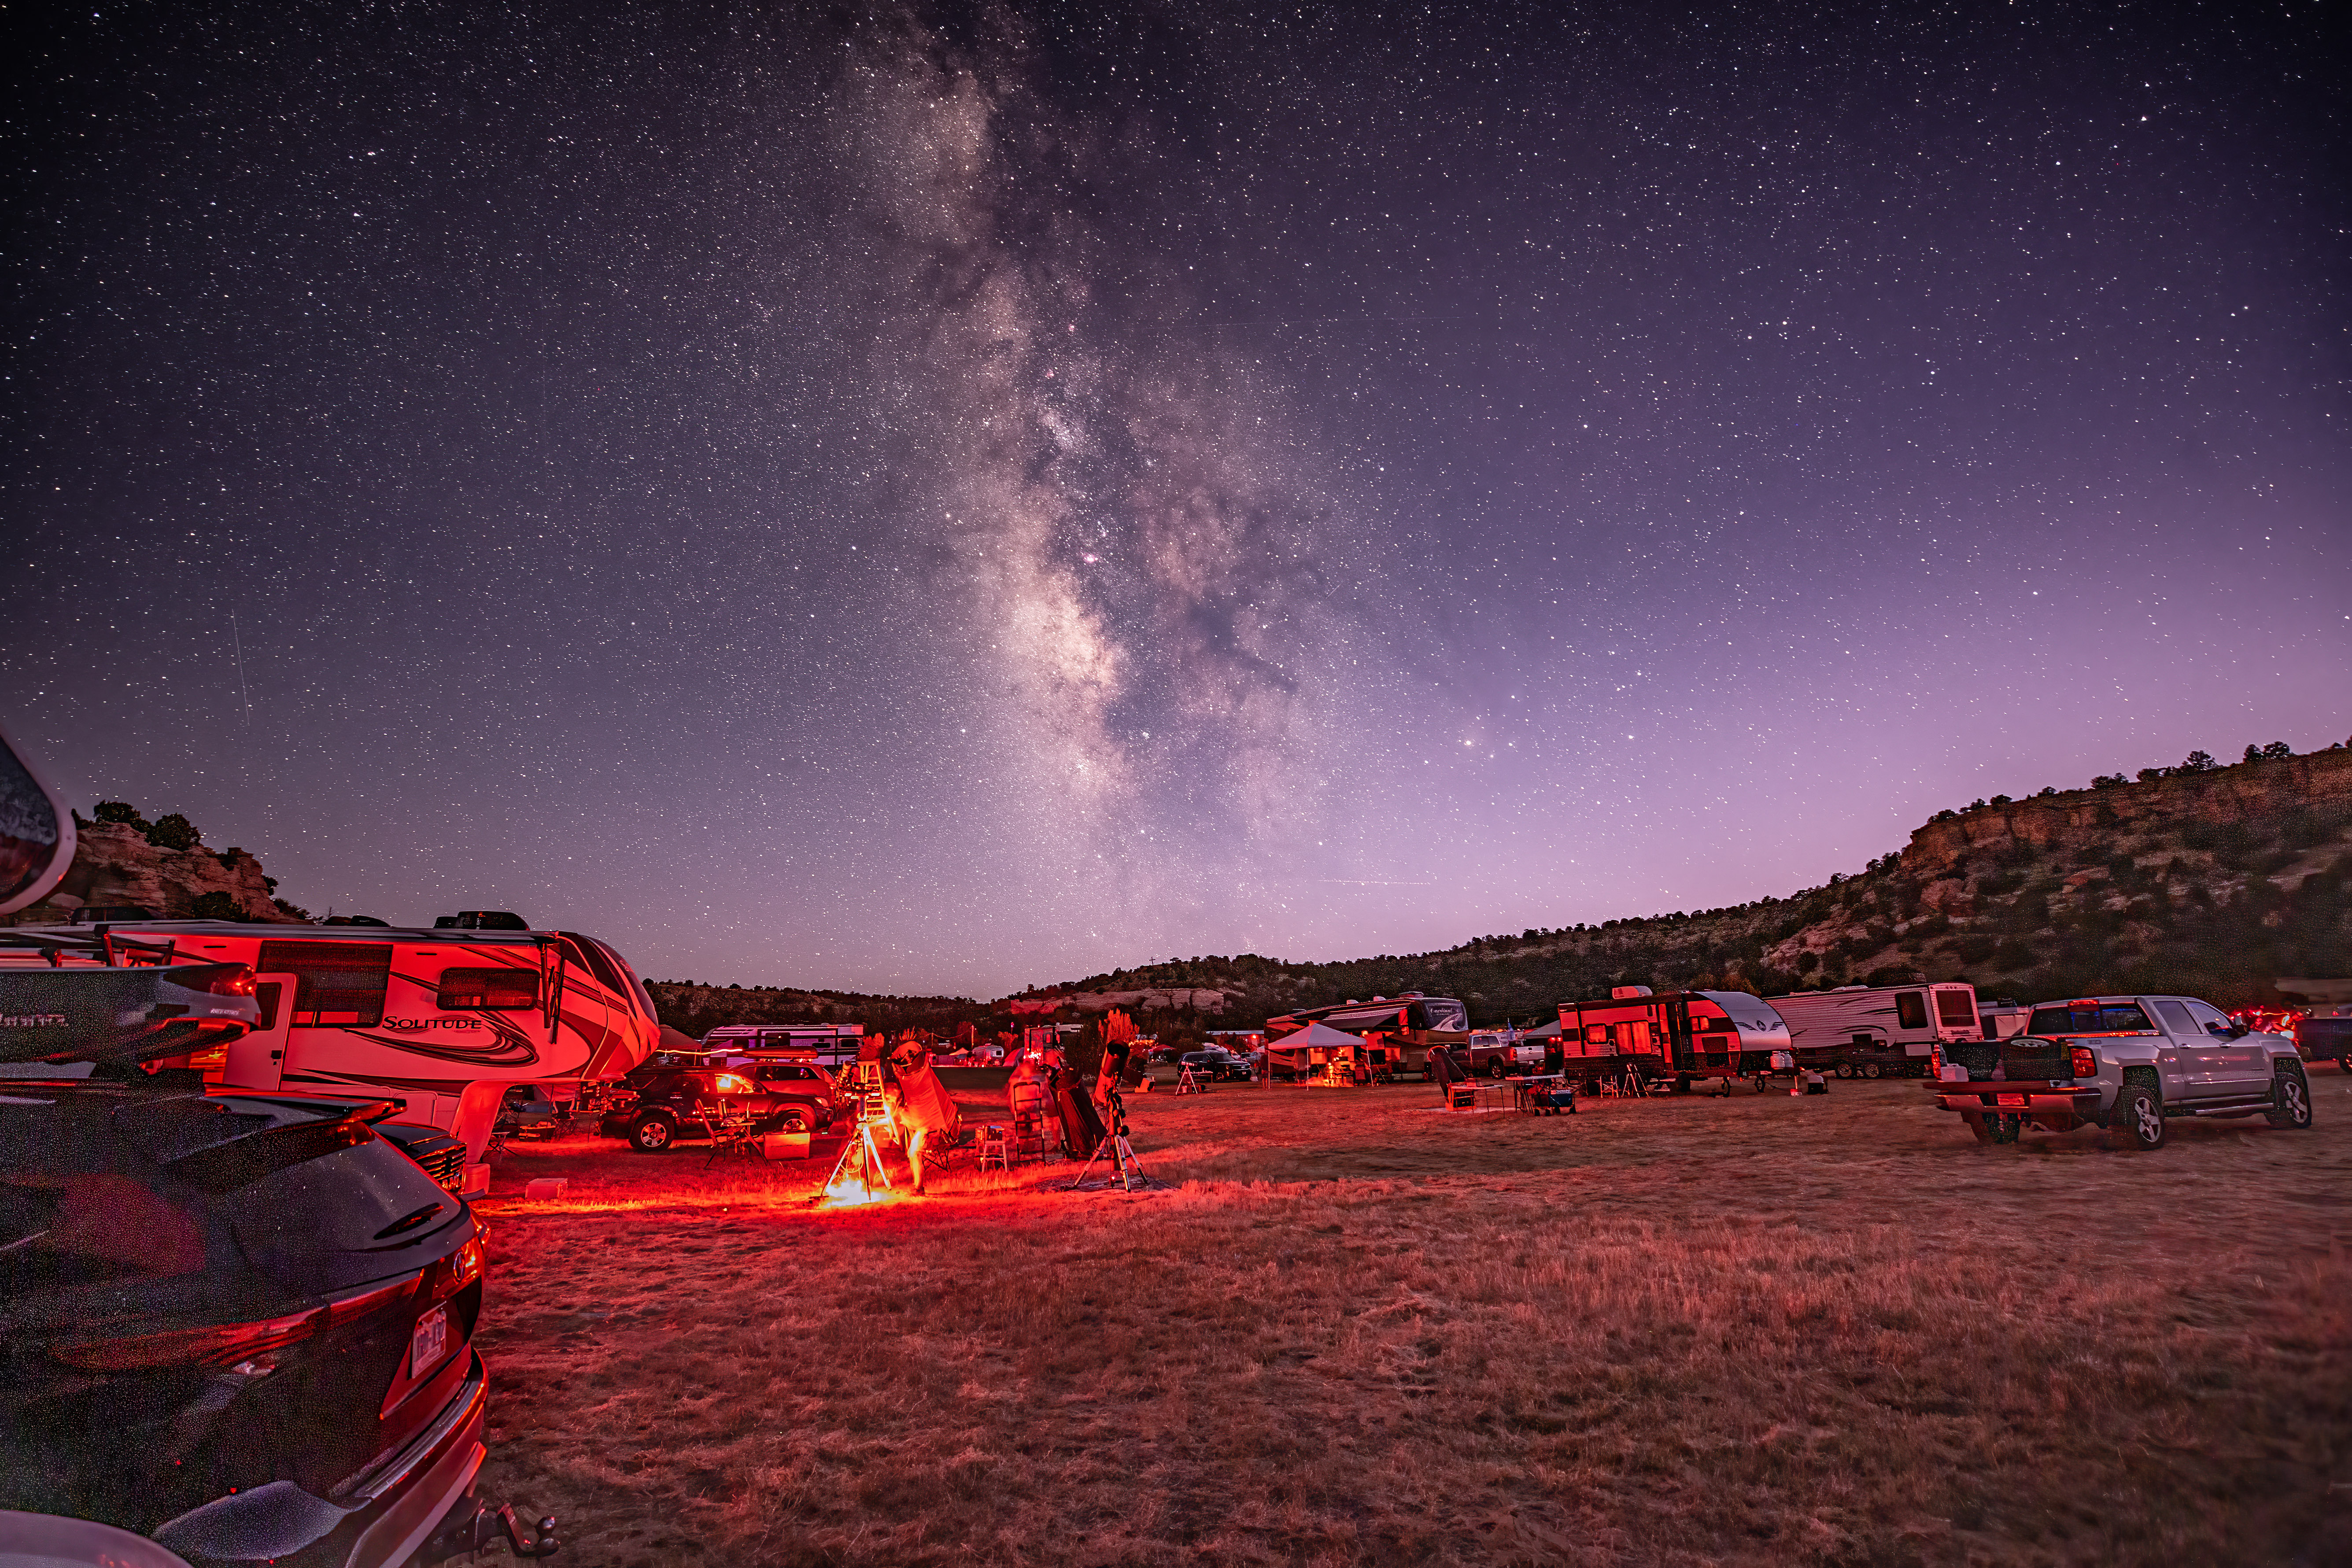
Another example is at the bottom of page 40. The first time I went to the Okie-Tex Star Party, held every year at the western tip of Oklahoma’s panhandle, I was blown away by the sight of the galactic center glowing brightly in nautical twilight — well before night had fully fallen. I was also blown away by the fact that when Orion rose, the zodiacal light rose with it, intersecting the Milky Way and creating an X in the sky. All of this goes to show that while there’s no substitute for preparation, it also pays to be flexible.
Packing light
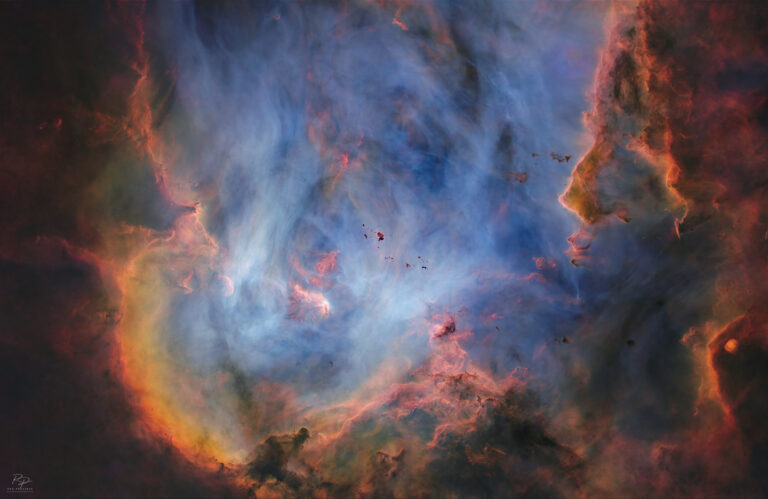
I try to keep my equipment light for night-sky imaging. I own both a Canon EOS 6D DSLR and a Sony A7R4 mirrorless camera; both are full-frame cameras. The Canon camera is modified to be more sensitive to Hydrogen-alpha (Hα) light. Deep-sky targets emit light across the electromagnetic spectrum, and nebulae, in particular, emit in Hα. Our naked eyes can’t isolate that wavelength, but a modified or filtered camera can. In the image above, note the red nebulae visible along the plane of the galactic center.
In addition to a full-frame camera body, I use:
- A wide-angle lens that can shoot at f/2.8 or faster. A sturdy tripod. (Mine is made of carbon fiber.)
- A tracking mount like the Sky-Watcher Star Adventurer or the Move Shoot Move rotator. This allows you to take longer exposures of the night sky for composite shots, revealing more detail in the Milky Way. I find that a two-minute exposure gets pretty good results.
- A way to trigger the camera remotely so that you don’t disturb and shake the camera by pressing the shutter button. You can use a wired connector or, in a pinch, use the delay setting for your shutter so that the tripod and camera are sitting still before it begins the exposure. But the best way is to use a remote shutter with an intervalometer. That way, you can take a number of shorter exposures and stack them later with software like Starry Landscape Stacker.
- Software packages to process the images. I use Adobe products (Lightroom and Photoshop), as well as Topaz DeNoise AI. The thing to remember about nightscapes is not to get overzealous with processing, and make sure you don’t process away your landscape.

Other favorite targets
Sometimes, you can lose patience waiting on skies to clear and an opportune time to image any part of the Milky Way that you can get. But the night sky can be beautiful in other ways, and I like to challenge myself to capture what I see, especially with the Moon involved.
Moonscapes are more difficult because the Moon is so bright, while everything else is relatively dimly lit. But it can be done.
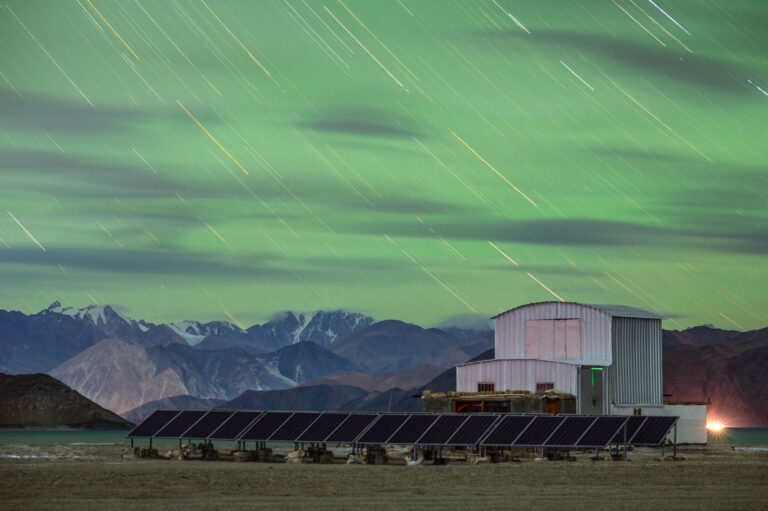
Light pillars are rare and you have to be at the right place at the right time, when there are ice crystals in the air. But when you capture it, it makes for a magical night.
It’s easy to mistake light pillars for aurorae, but once you capture real aurorae, you instantly see the difference.
Finally, there is an often-overlooked way to shoot the Milky Way itself, and that’s at the start of nautical twilight, an hour or so before sunrise. Once it begins, you have about five minutes to image a fading Milky Way before it gets washed out by the oncoming Sun.
I believe timing an image of the Milky Way at sunrise or even moonrise is harder than a sunset or moonset. That’s mainly because with sunrises, you are losing your target by the second and must make sure everything goes right with your capture or you will miss it. Of course, the darker the site, the more time you have to acquire the shot.
My astroimaging journey has cost me a lot of sleep, not to mention time spent traveling long distances and taking photos that didn’t come out before I got to a point where most of them do. But there’s no better way under a dark sky to get to know the Milky Way, the galaxy that we call home.
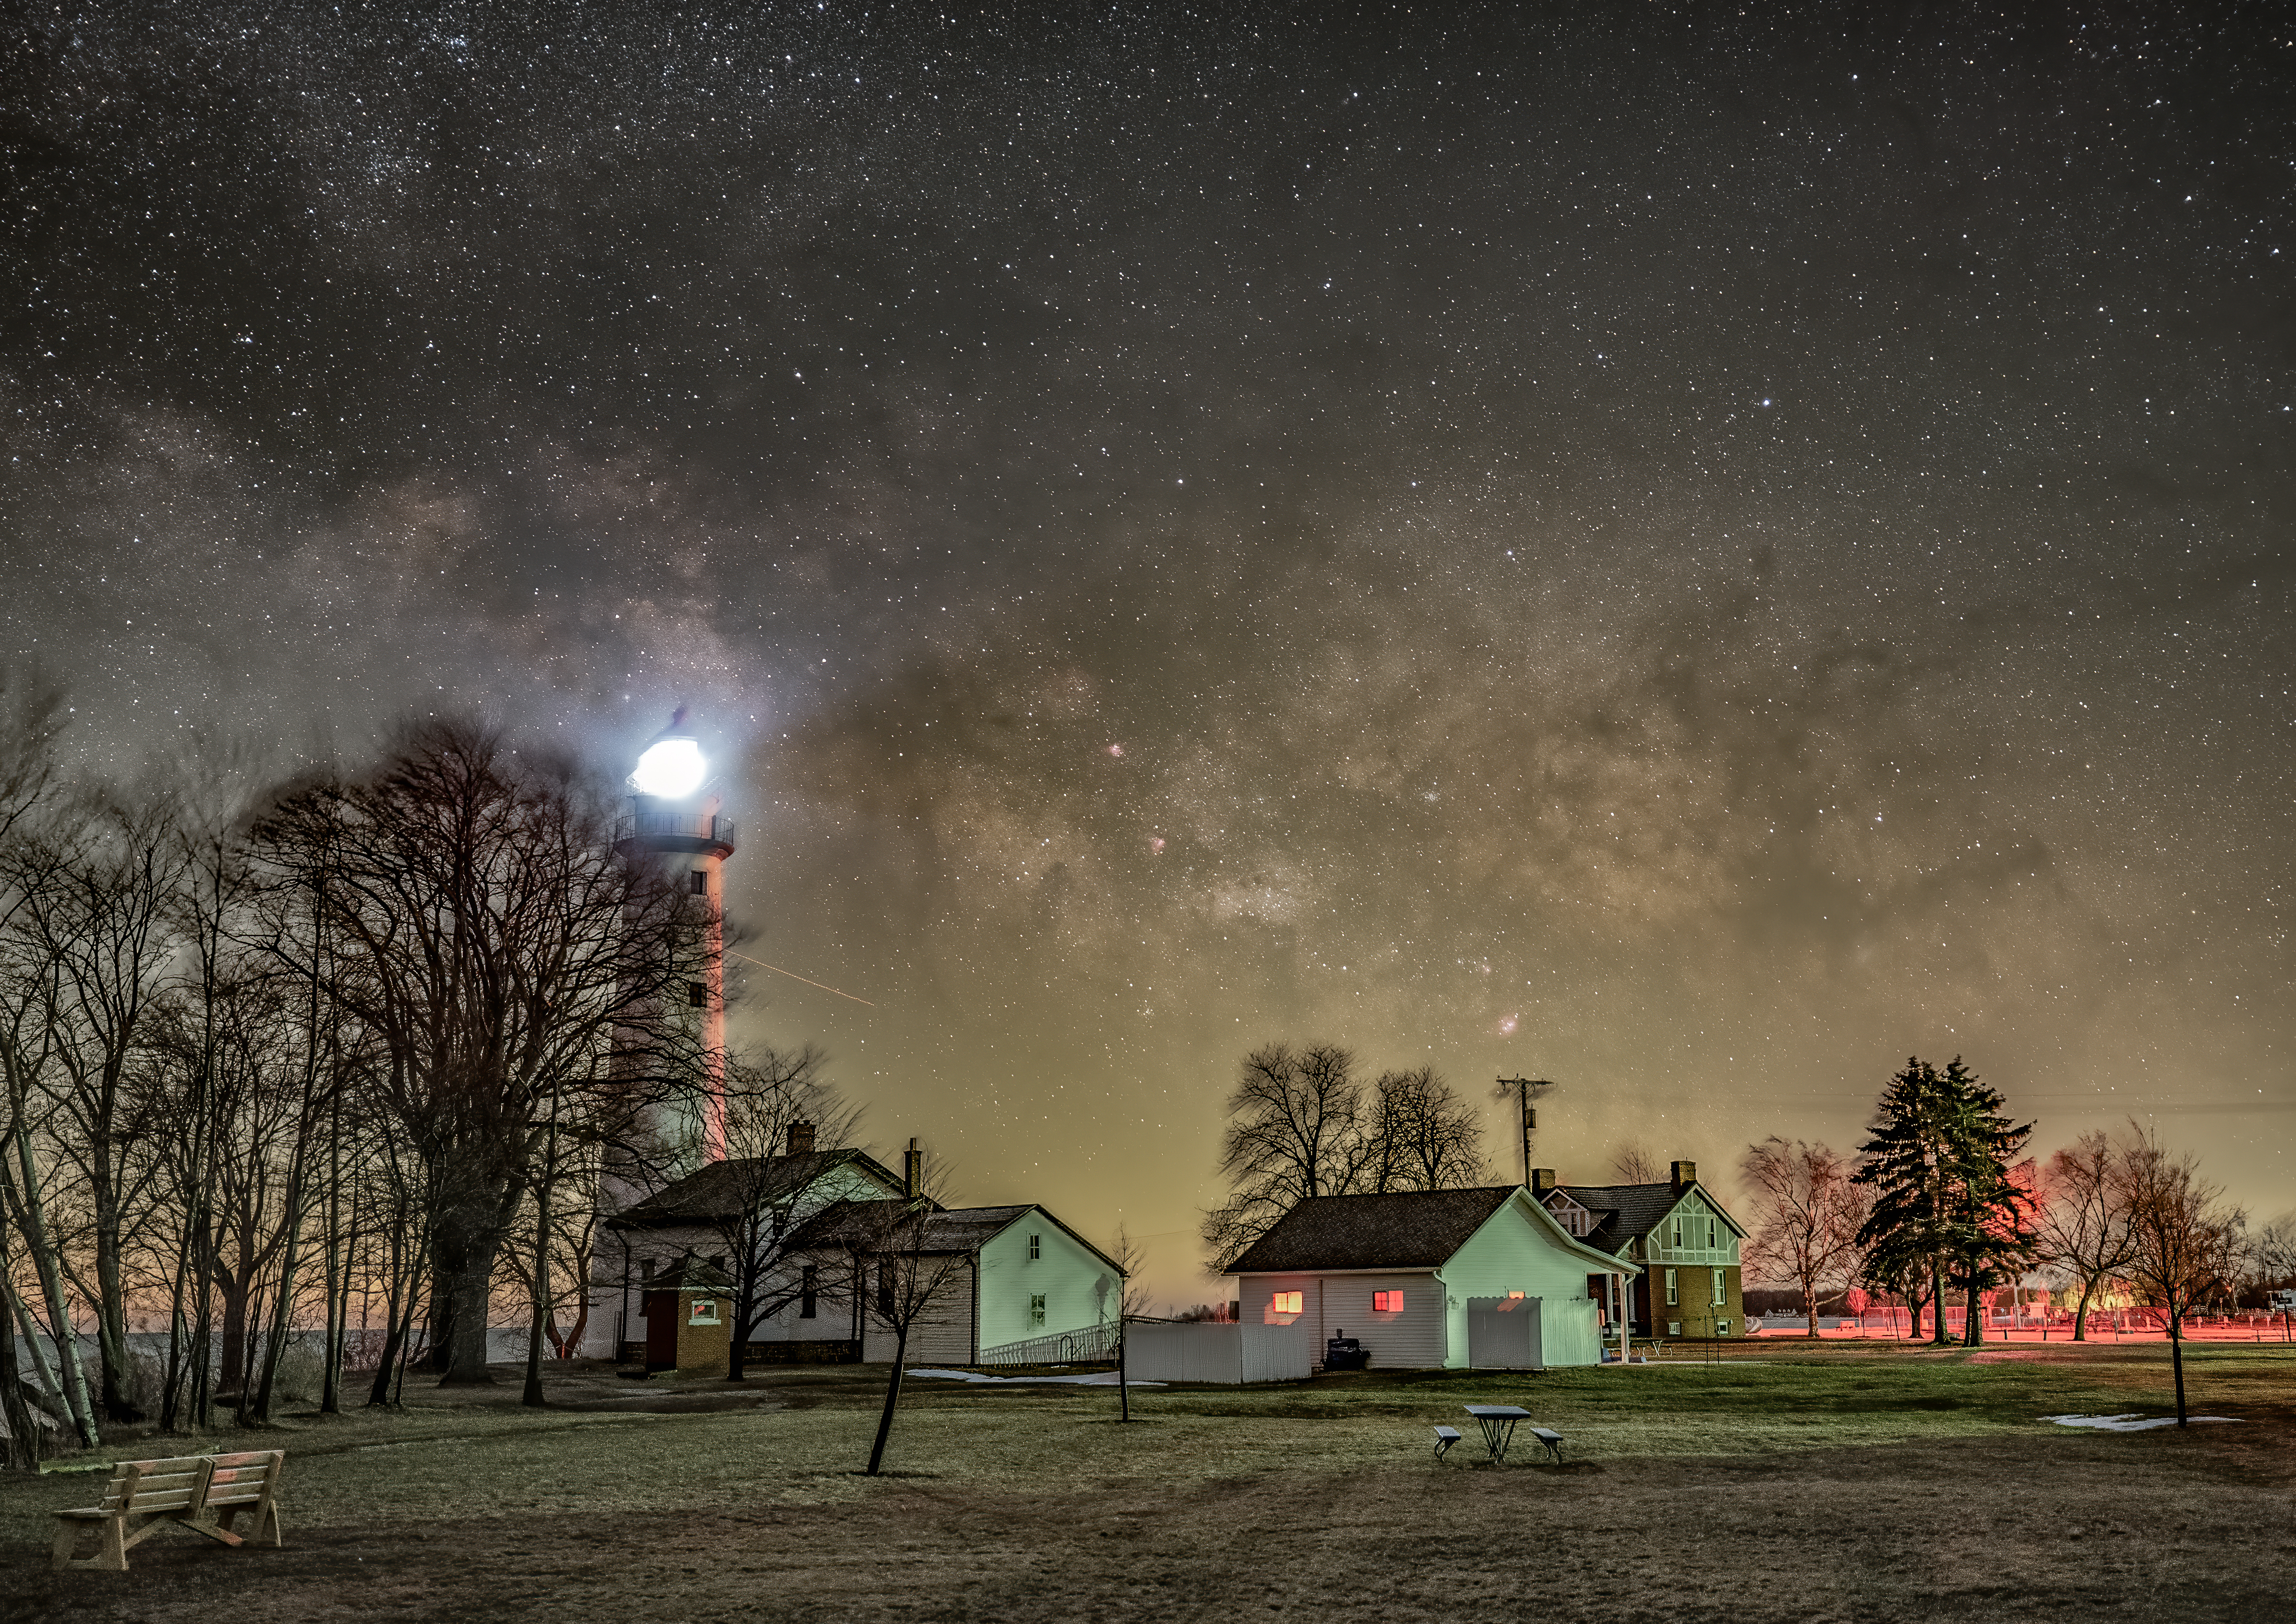
The Milky Way rises over the Point aux Barques Lighthouse on Lake Huron. The two-minute sky and ground frames of this composite were taken at f/2.8 and ISO 1600. 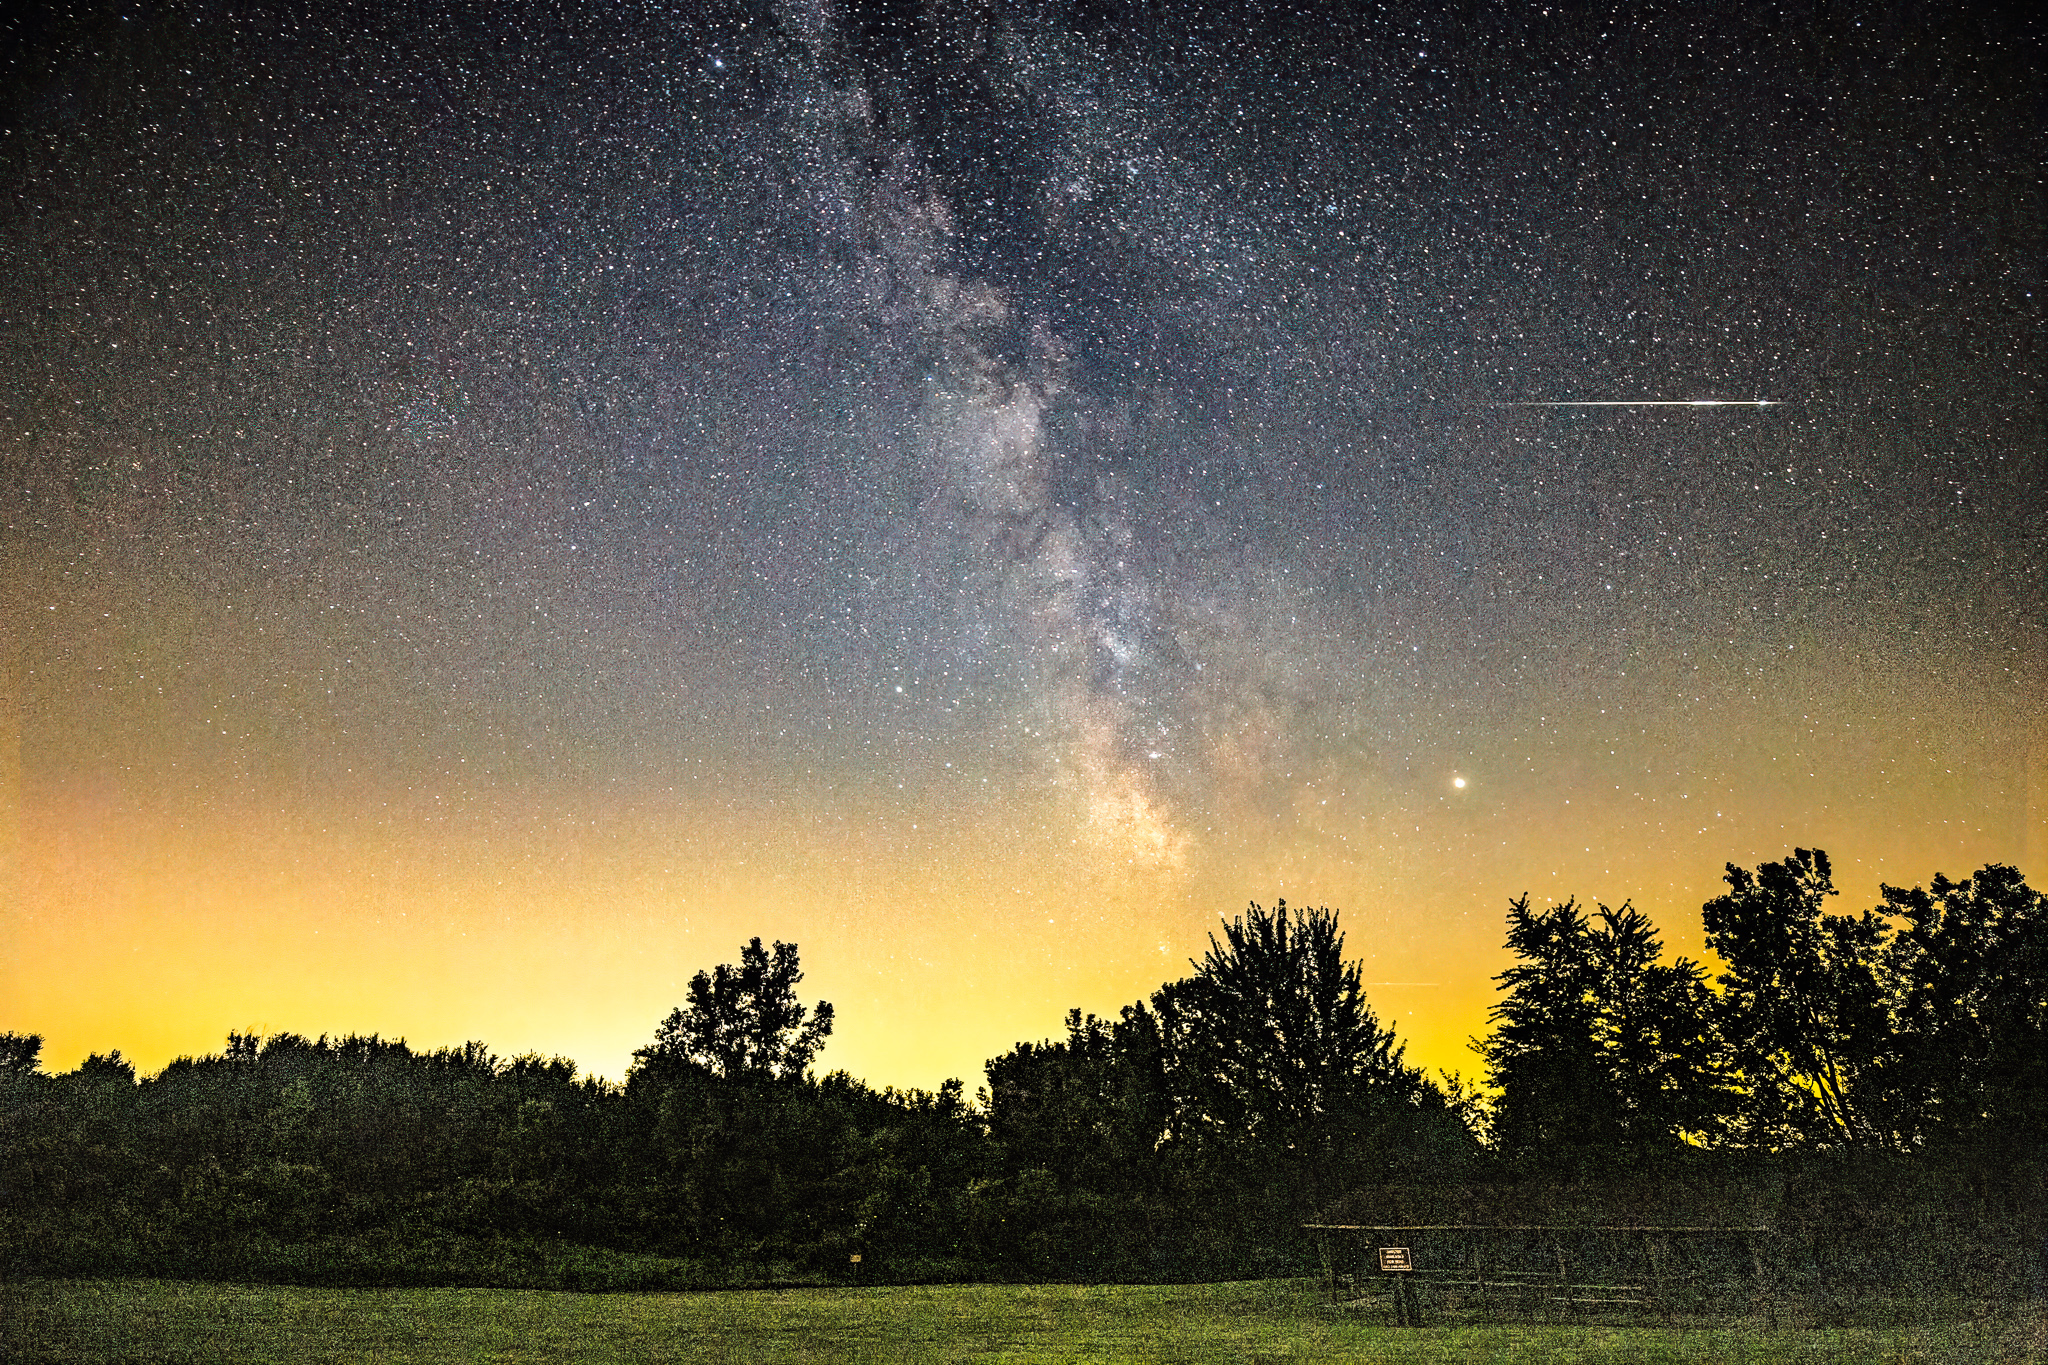
A chance meteor appears in this nightscape taken from the dark-sky preserve at Lake Hudson in Michigan. This shot is a single 20-second exposure taken at ISO 6400 with a Tamron 17–35mm lens at 17mm and f/2.8. 
The zodiacal light crosses the Orion Spur in this image taken at the Okie-Tex Star Party. This scene is a composite of two-minute sky and ground exposures taken at ISO 1600. 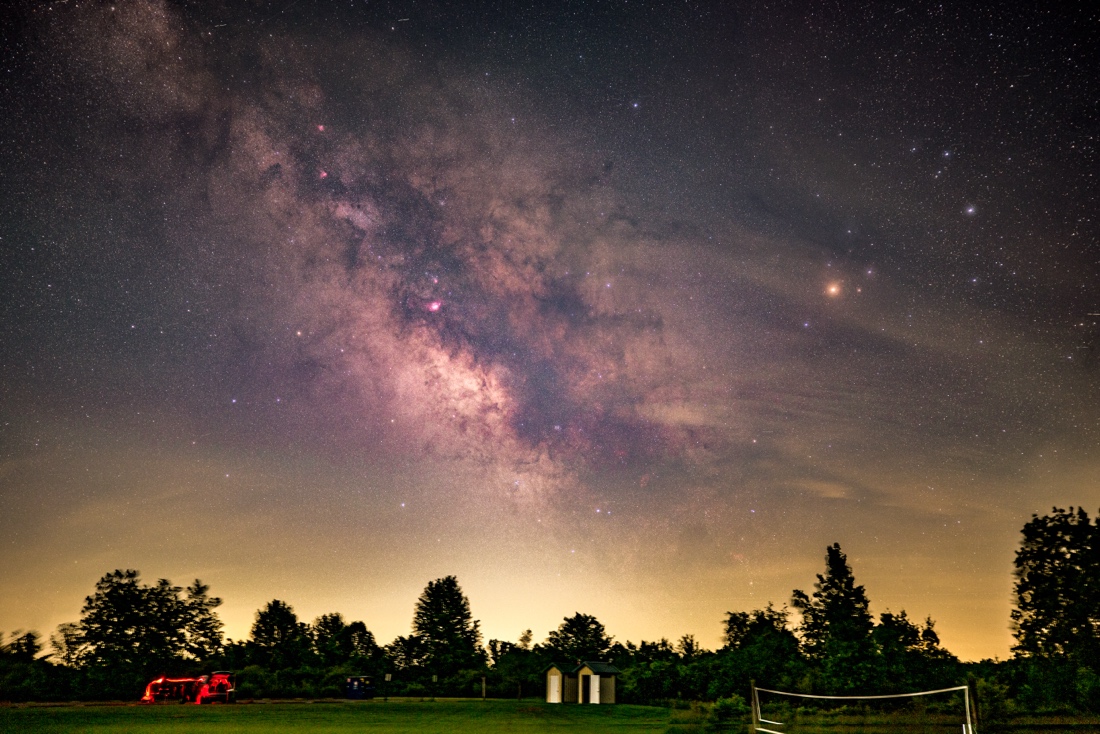
Cameras can be modified to increase their sensitivity to certain bands or wavelengths of light, like Hα. This composite of two-minute sky and ground exposures was taken with such a camera at ISO 400, and reveals clouds of hydrogen gas set aglow by the radiation of young, forming stars. 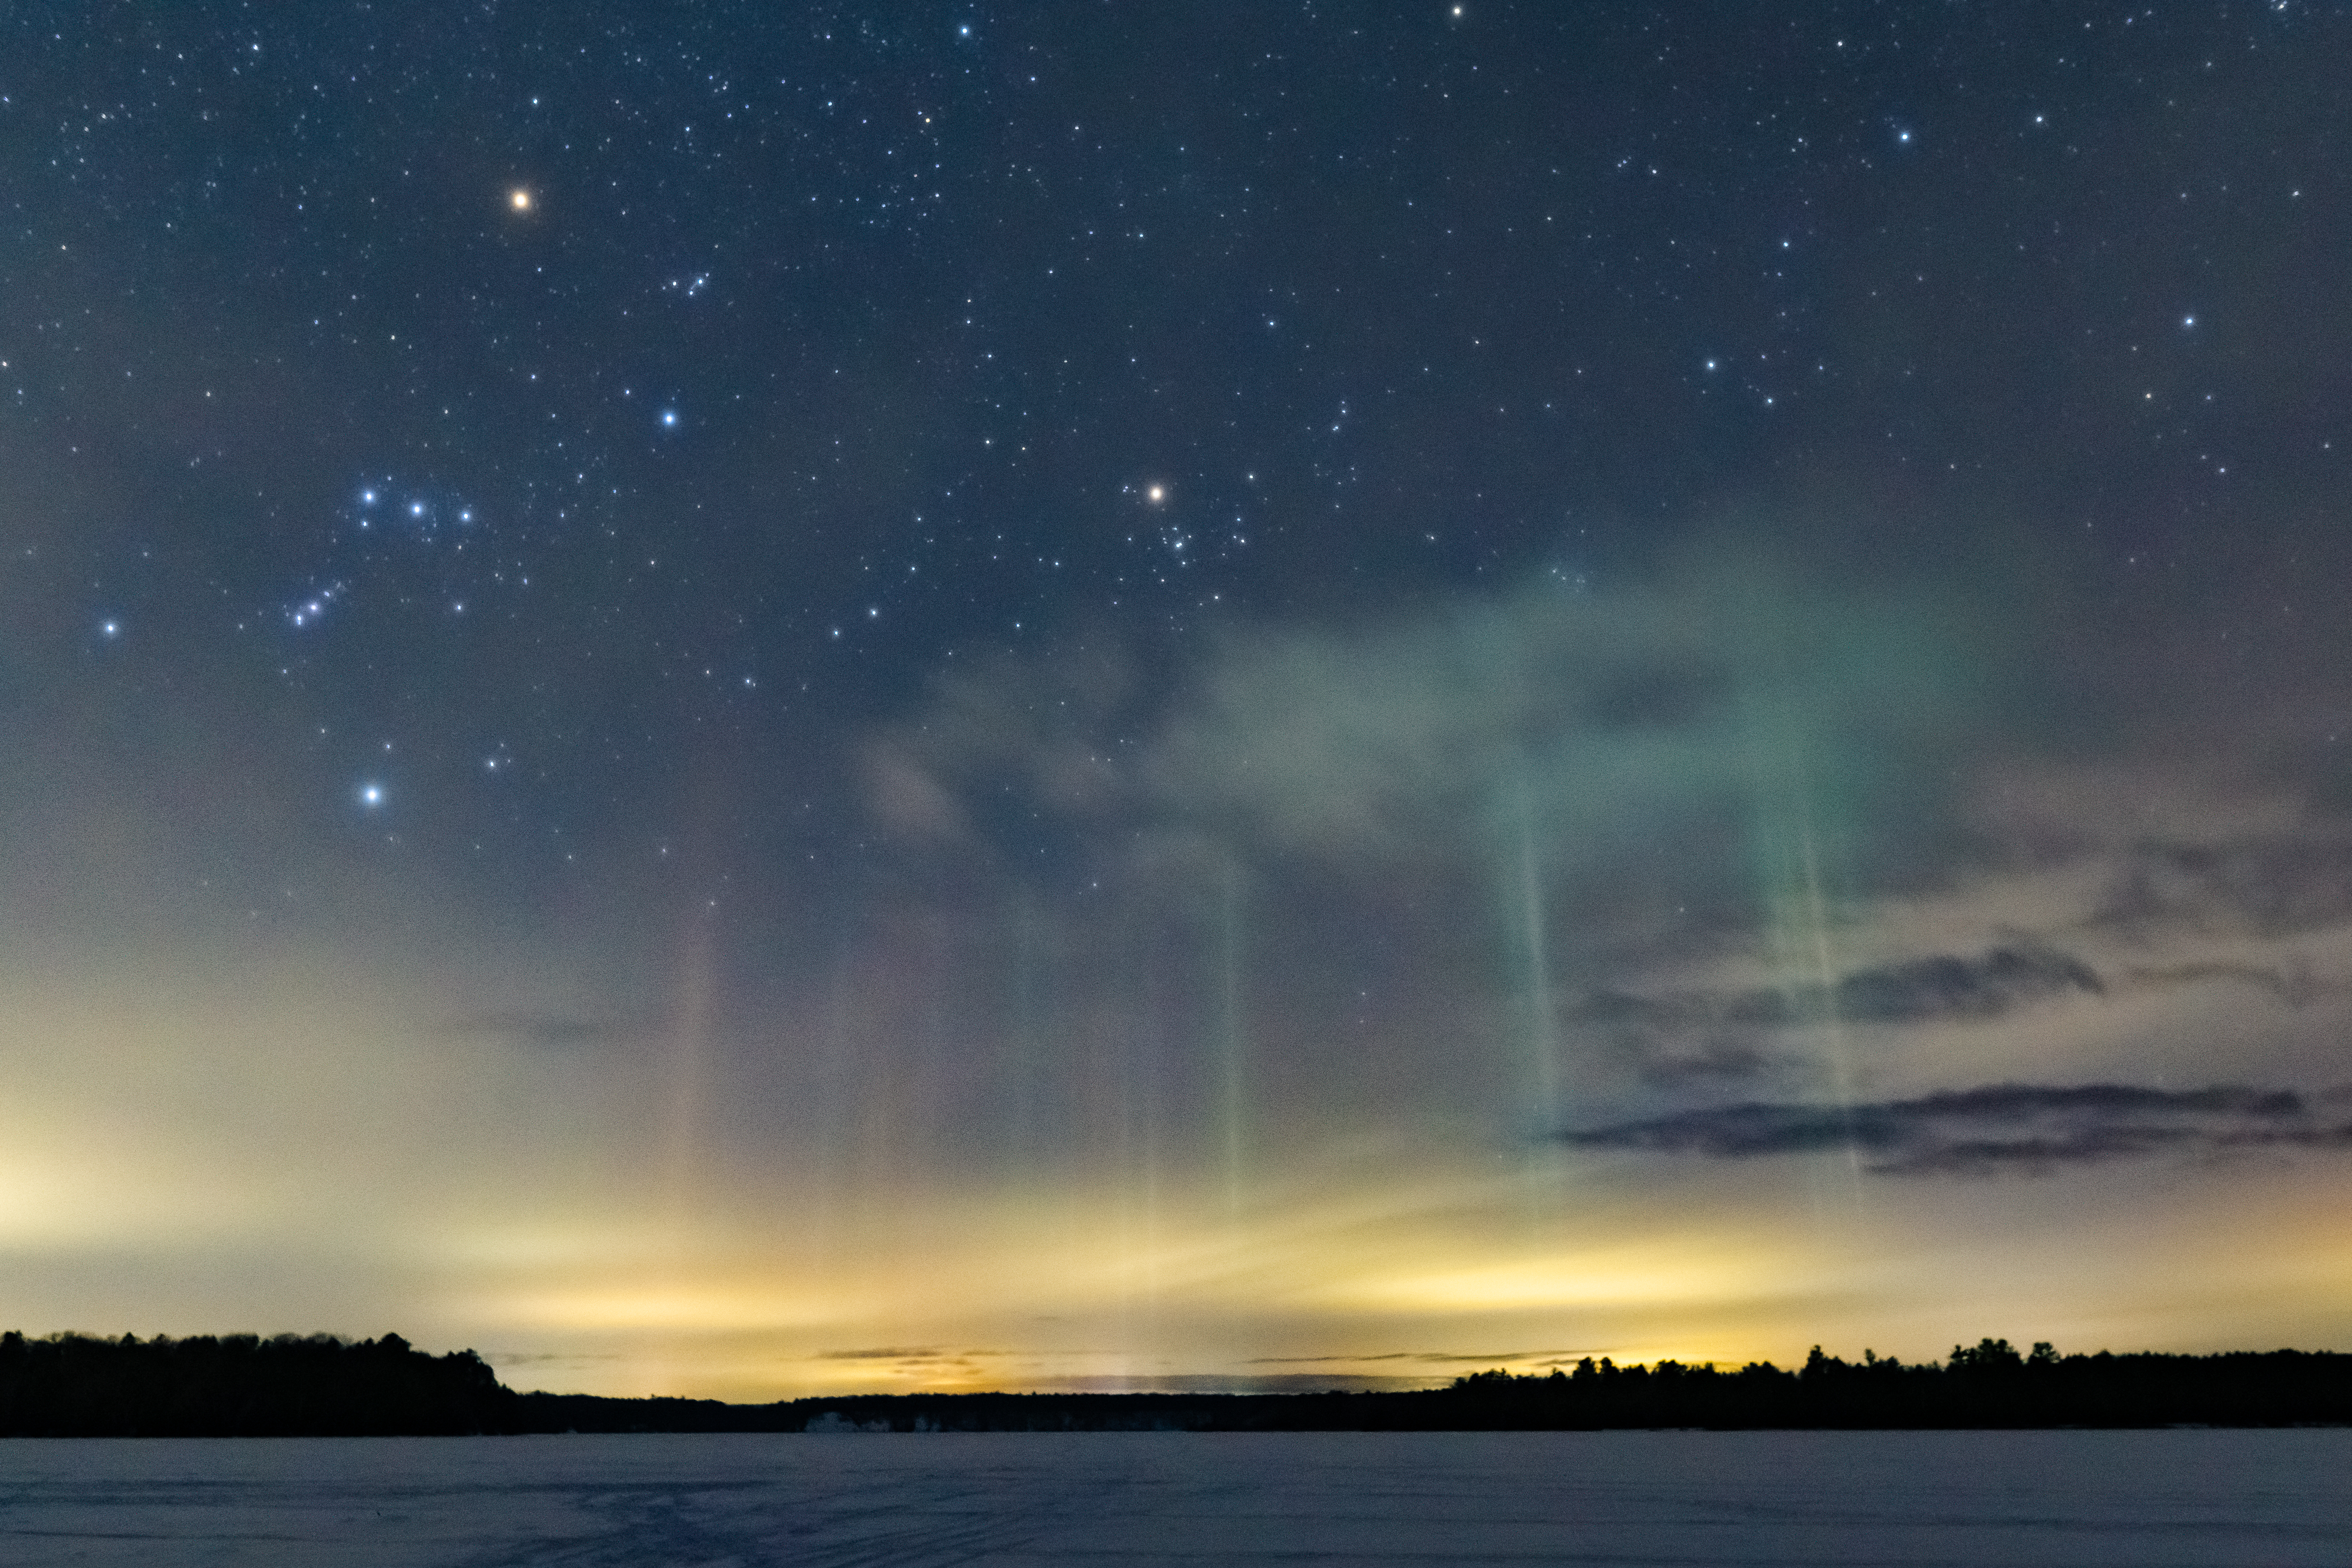
Light pillars appear in the winter sky above a nearby town in this winter scene in northern Michigan. The phenomenon is due to ice crystals in the atmosphere that reflect light. This 20-second exposure was taken with a Sony a6000 mirrorless camera and 16mm prime lens at f/2.5 and ISO 6400. 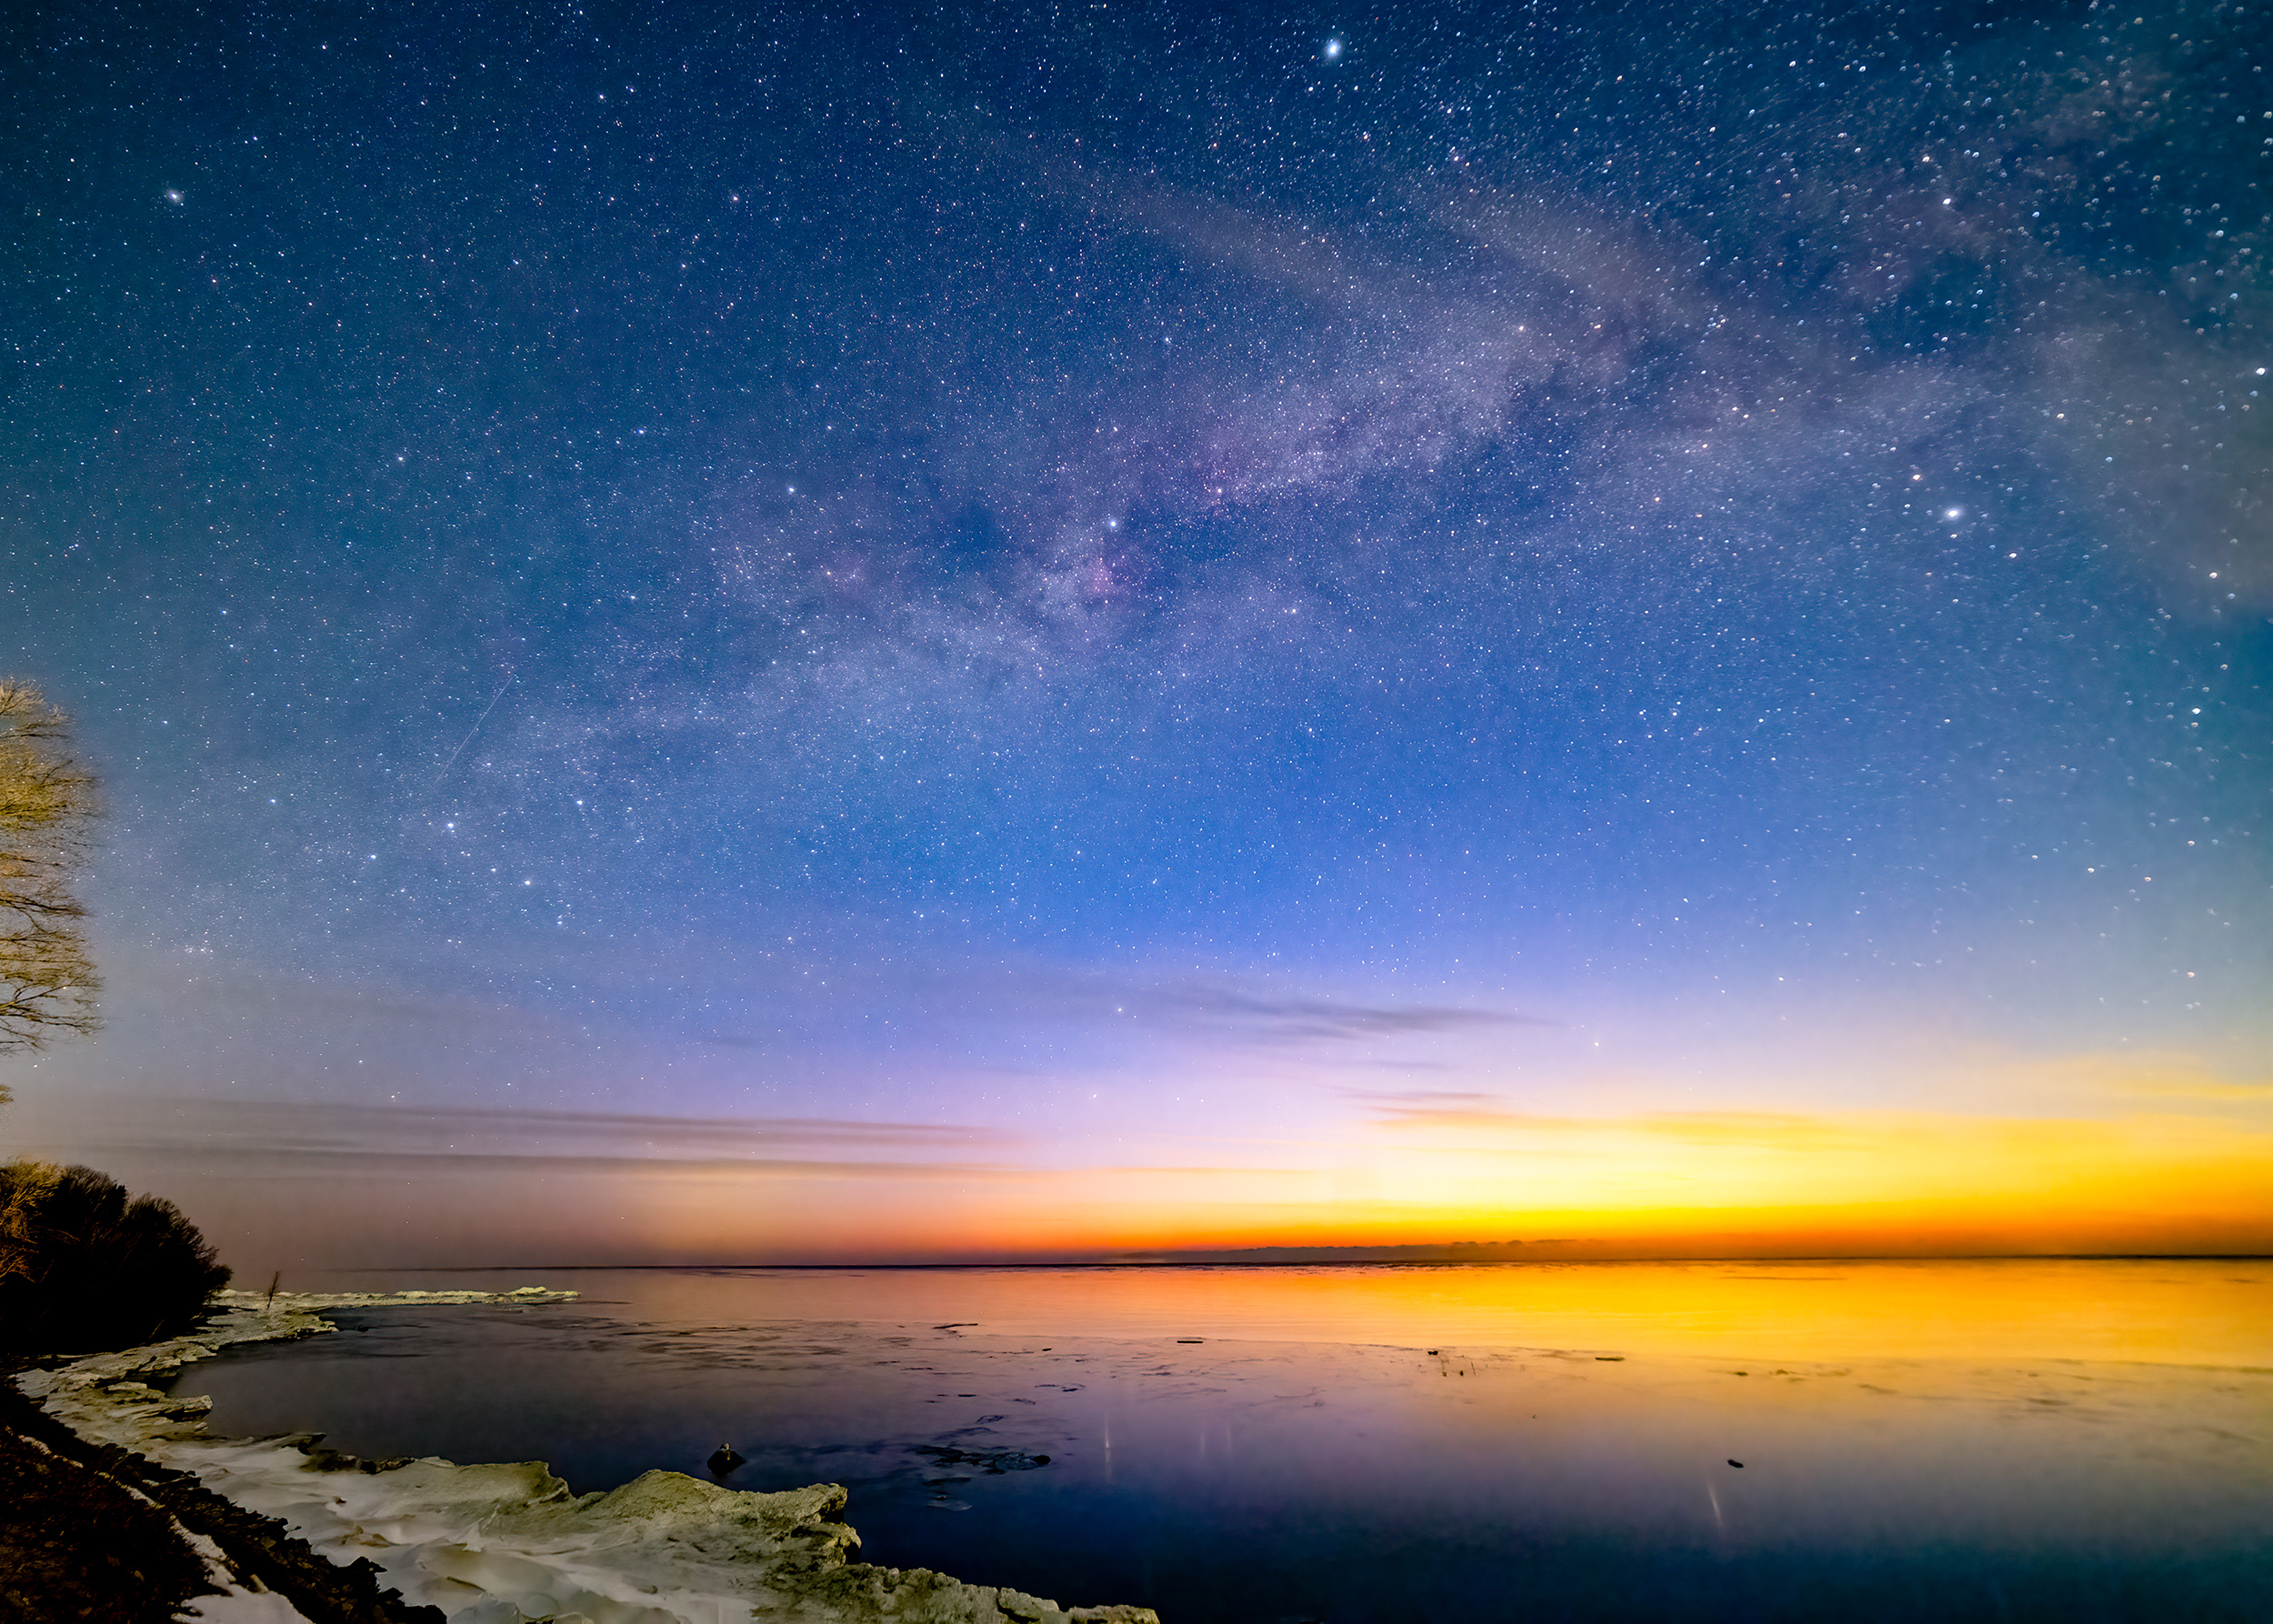
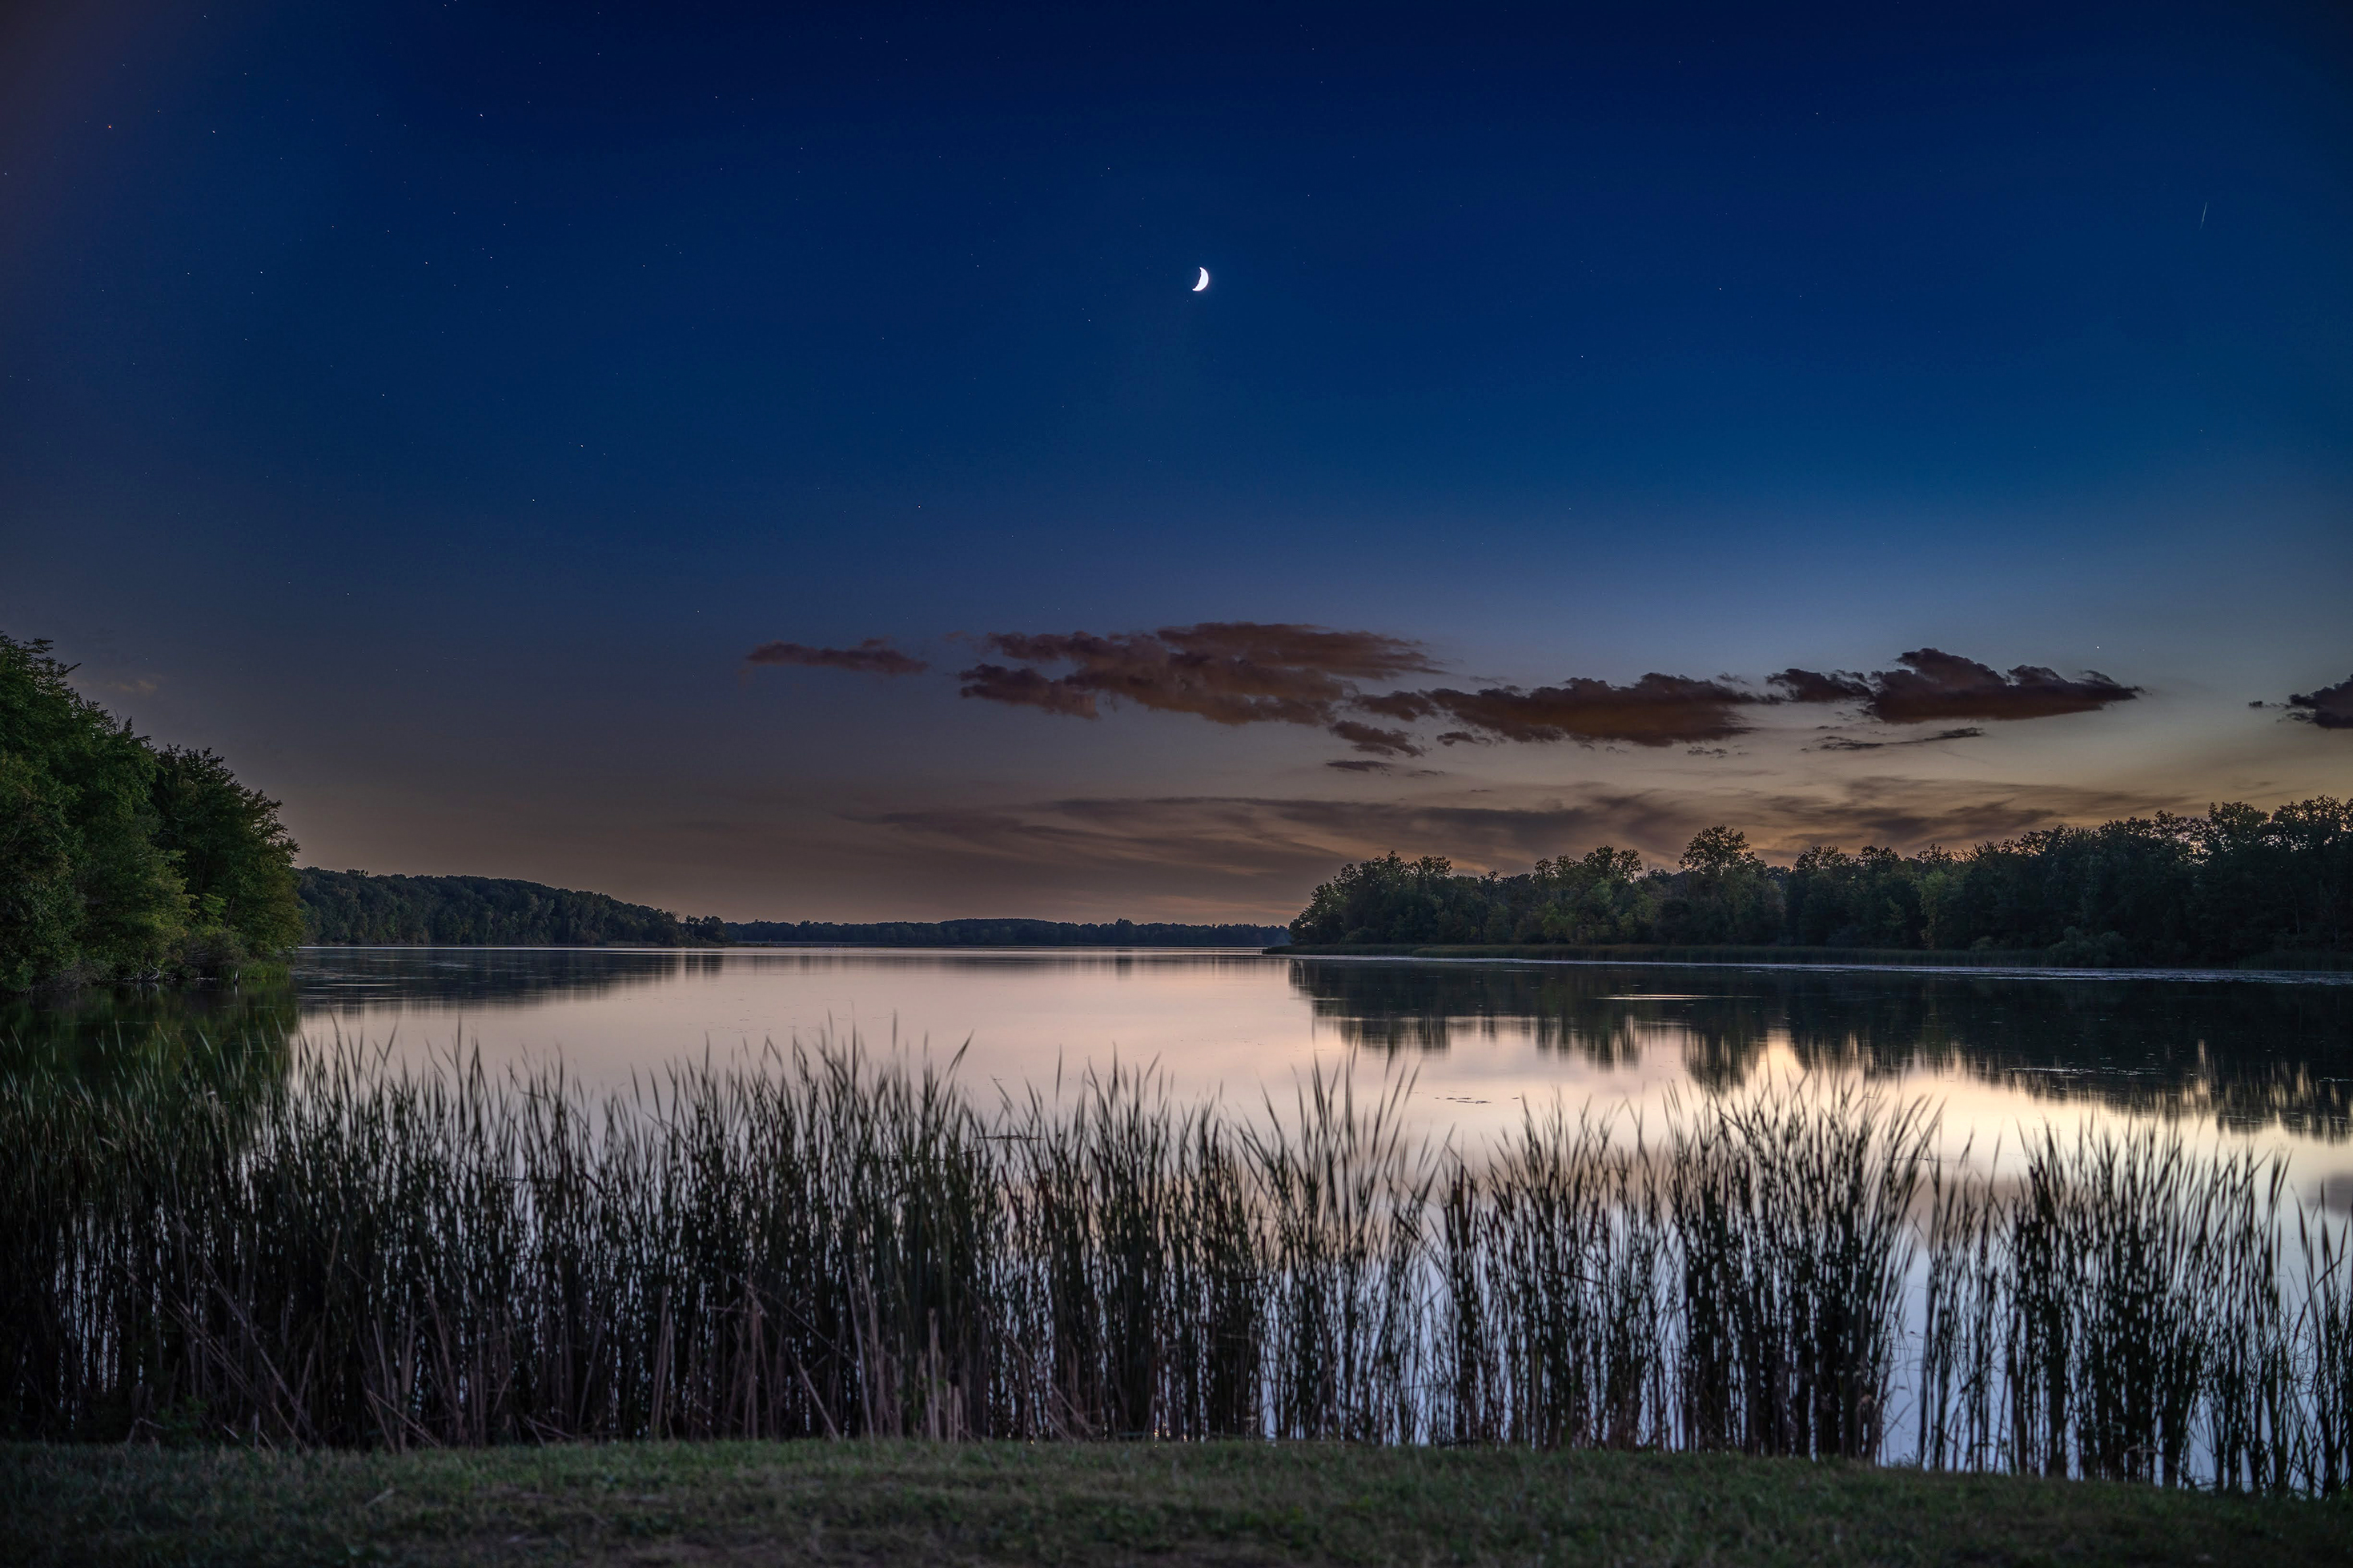
The glow of dawn creeps above the horizon in this image taken from Port Sanilac Roadside Park, overlooking Lake Huron, during nautical twilight. The shot is a 30-second exposure at ISO 6400.