Twas a time, possibly before some of you reading this were born, when astroimaging was an ordeal. Imagine a world with manual guiding. You’d spend hours staring at a star centered in an illuminated reticle until your eye teared up or you passed out into the eyepiece from fatigue.
The equipment was also heavy and a pain to transport. If you were using a Newtonian reflector, you would be standing on a ladder for hours watching the guide star. Often, after about 30 minutes, the eyepiece’s position would place you uncomfortably between the rungs of the ladder and you would be stuck in this death crouch, clinging to the ladder in the freezing cold, trying to keep the star centered on the crosshairs.
As if this wasn’t bad enough, you also had no idea — until you developed the film — if you were making a mistake. More than half the results would show trailed stars or that everything was out of focus. Such was astroimaging when I started about 35 years ago. The average “lifespan” of an imager back then was three to five years. After that, most people couldn’t take it anymore.
In the coming years, the Santa Barbara Instrument Group produced the first autoguider that actually worked: the SBIG ST-4. It immediately changed everything. Imagers could digitize film using a scanner and then process the image on a computer using an early (and now considered crude) version of Photoshop. After that, the first CCD (charge-coupled device) cameras became available. They were tiny things, some smaller than a postage stamp.
At first, CCD images were a curiosity, certainly no match for hypered — sensitized by a gas — large-format film images exposed through superb telescopes. But little by little, CCD technology improved. What finally elevated it above film was its quantum efficiency.
With film, you were lucky if it recorded 3 to 5 percent of the light that fell on it. With a CCD, that number ballooned to over 50 percent. Suddenly, images were being made that were not possible just a year before, and amateur astronomers were capturing new details on familiar objects for the first time.
Soon after the CCD appeared, another new detector arrived: the CMOS, short for complementary metal-oxide semiconductor. Unlike a CCD, where data is downloaded in rows and read at the edge of the chip, a CMOS chip reads every pixel at its position. It does this with transistors surrounding each photosensitive pixel. Initially, this created two problems. First, the transistors took up real estate where more pixels could go; second, after a certain level of exposure, amplifier glow fogged the image.
But CMOS chips were easier to make and thus less expensive. They also required considerably less power to run. In addition, CMOS chips have significantly higher frame rates, allowing users to take successive images faster because the readout is quicker. Manufacturers kept improving CMOS chips until they had lower noise and higher resolution than their CCD counterparts.
With the advent of commercially available back-illuminated chips, sensitivity and quantum efficiency skyrocketed. In such a chip, all the electronics are grouped behind the pixels, allowing all the space facing the sky to be filled with photoreceptors. This means that all incoming photons strike the pixels.
Back-illuminated chips also increased the deep well capacity — how many photons can be recorded before the photo receptor site “fills up” and can’t record any more data. The Sony Corporation accomplished much of this progress and most of today’s high-end CMOS astronomy cameras contain Sony chips.
In fact, many manufacturers have ceased to make CCDs.
Enter the QHY 600
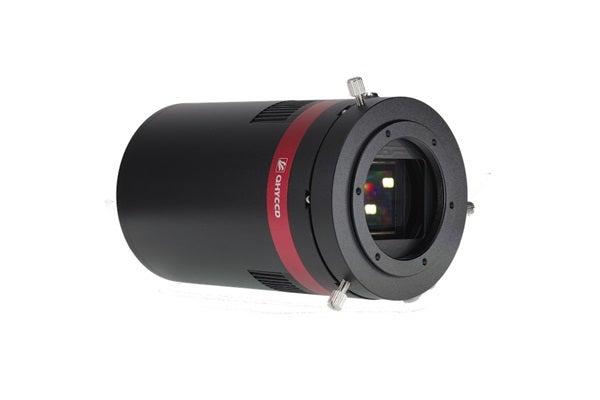
The QHY600PH mono CMOS chip camera that I am currently using is the beneficiary of all this history and technology. It is the brainchild of Qiu Hongyun, more commonly known as Dr. Qiu, who founded QHYCCD in 2003. Dr. Qiu has degrees in optical science and engineering, including specialties in noise reduction as it appears in hardware and software — quite useful when designing astronomy cameras.
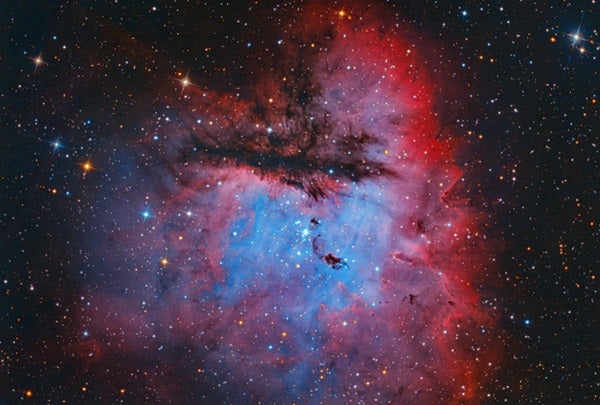
The QHY 600 camera utilizes the latest Sony IMX 455 CMOS BSI chip. (BSI stands for backside illuminated.) The pixel size is 3.76 microns. In the full 35mm frame, this creates an image that is 9576×6388 pixels in resolution, or 61 megapixels in size. That pairs nicely with wide-field telescopes like small refractors.
The camera can also be binned 2×2 (where four pixels are combined to act as one) for approximately 7-micron pixels and lower file size. I do this when I use my Planewave CDK17, which has a focal length of 3,000mm and matches well with 7-micron pixels.
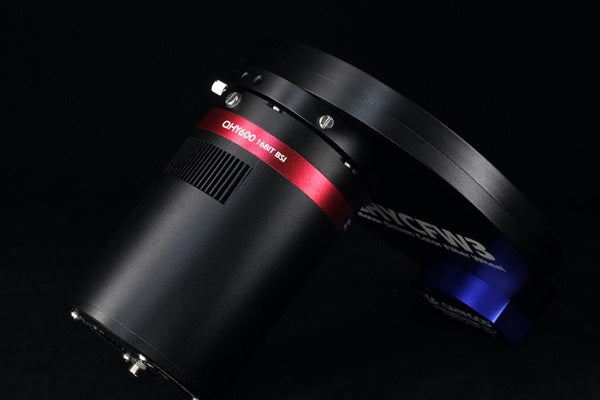
The QHY 600 mono camera works well with the QHY CFW3 medium filter wheel, which attaches to the camera and plugs into it. The wheel is threaded for 2″ mounted filters and the openings are 50.8mm. If you use 50.0mm filters like those from Chroma, you’ll need spacers to fill in the small gap. Several are available online and work well.
The IMX 455 CMOS chip is the first to capture data in true 16 bits. Most cameras use chips that capture data in 14 bits and interpolate up to 16 bits. True 16-bit data has an incredible number of tonal values so stretching can be performed without the image falling apart. By capturing in 16 bits, you have the full range of 65535 density levels, which allows you to pull out more detail during processing. If you’re simply stretching 8-bit data, it doesn’t look good because of the limited number of tonal values.
The QHY 600 is available in both mono and color versions, and in a variety of configurations depending on how you plan to use the camera. I spoke at length about shooting color versus mono in my review of the QHY 410C color camera, which appeared in the February issue. To sum it up, traditionalists like myself prefer shooting mono with separate filters for the RGB and narrow bands.
It does get a bit more complicated, however. A color camera records all colors simultaneously utilizing a Bayer matrix. This makes creating colored images a lot easier and can be an advantage for imaging certain objects, like comets. If you are used to working with a mono CCD camera, the switch to a CMOS mono camera should not be difficult.
The one difference that I have found between the two is that because CMOS has such low noise, you only need RGB exposures to create an image, with no luminance exposure required. If you feel you do need a luminance, you can fabricate one by averaging all the color data.
Due to the large size of the files and the fast download speeds, QHYCCD built in a 2-gigabyte DDR3 image buffer to smooth data transfer to the host computer. The data from the QHY 600, in addition to its real 16-bit depth, are also true raw data, meaning the recorded data have undergone no adjustments, such as noise suppression or hot pixel removal. It is the original signal, which can be processed and manipulated as the situation necessitates. The camera has one other great feature: There’s zero amplifier glow even with extended exposure times.
Dew, condensation, and reflections have always been problems with digital cameras. The QHY 600 addresses them with a desiccant plug for the hermetically sealed CMOS chamber, high-end anti-reflective coatings on all glass surfaces, and a heater to keep external windows moisture-free. The sensor is cooled by a regulated two-stage thermocouple device to maintain a constant temperature.

Creating images
I try to keep my processing as simple as possible, yet I sacrifice nothing in producing the final results. I use MaxIm DL for my initial processing: the creation of master darks, flats, and bias frames. I also use it to reduce and combine all my data files. I find that the sigma combine function works great to maintain as much information as possible and still remove outliers like hot pixels. Be careful with these. Some hot pixels change value so that the dark frame does not remove them completely. You need outlier rejection and at least five frames to affect their removal.
After creating the master files, I save them as a 16-bit TIFF file. I then import it into Photoshop, stretching it with curves or levels to bring out all the detail. CMOS data have such low noise that certain plug-ins work wonders. These typically are Luminar, Topaz II, and the real secret weapon, the sharplet filter in the Redfield suite. There are numerous star reduction methods, which include Russ Croman’s Star Shrink and the minimum filter in Photoshop. In all cases, I use these powerful tools with the stars selected and feathered.
Large stars can be reduced using the liquefy filter and choosing the pucker tool. If it sounds like there are a lot of tricks to make striking images, you’re right. But the challenge can be part of the fun.
If noise does show up in your image, it’s usually in the shadows. Make a duplicate layer, generously apply the noise filter, then use a mask paint where the noise reduction should be applied. You can adjust the overall power of the noise reduction by adjusting the opacity of the layer.
One of the great differences between CCD and CMOS is that with a CCD, you are stuck with whatever gain, or sensitivity, is built into the camera. With a CMOS camera, you can adjust the gain, similar to setting the ISO on your digital camera. Be aware, however, that as you raise the gain you forfeit some deep well capacity. This means that your stars and bright parts of your image can block up more easily, becoming pure white with no detail in them.
On a target like a faint galaxy, increasing the gain might be useful. I would combine a medium increase in gain with 20-minute exposures to max out recorded detail. I would also take a few much shorter exposures to keep all the stars colorful without washing them out. These can be added to the final image to replace the blown-out stars produced by the increased gain.
My conversion to CMOS is an ongoing learning experience. The QHY 600 is a good example of what is possible today. It is a versatile camera that is at home on many scopes, from a refractor to a Cassegrain reflector. I look forward to creating many excellent images with it.
Product Information
QHY600PH
- Sensor: Sony IMX455 back-illuminated
- Sensor size: 36mm x 24mm (full frame)
- Image buffer: 2 gigabytes
- Pixel size: 3.76×3.76 micrometers
- Effective pixel area: 9576×6388
- Output: 16-bit with 65535 levels
- Exposure range: 40ms to 3600s
- Computer interface: USB 3.0
- Weight: 30 ounces (850 grams)
- Dimensions: 5.2 x 3.5 inches (131.8mm x 90mm)
- Price: $4,599