Celestial sketcher Erika Rix explains how to remove rough edges around stars — a whole field at a time.
By Erika Rix |
Published: January 25, 2016 | Last updated on May 18, 2023
Regardless of the effort I put into drawing perfectly round stars, every jagged imperfection reveals itself once I scan the sketch and display it on my computer monitor. In a previous issue, I explained how to remove the rough edges around individual stars with a cloning tool found in image-processing software. Now, I’d like to share a technique that tackles the entire star field in one swoop so that you can tidy even open star clusters like NGC 1502 with ease.
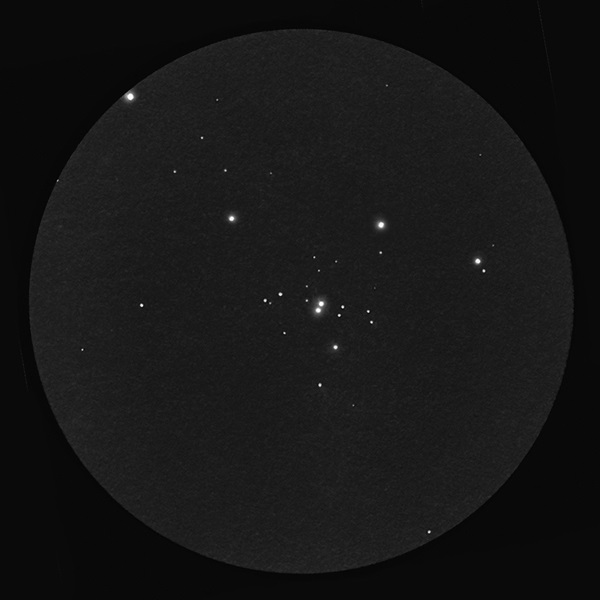
Near the Giraffe’s tail in the constellation Camelopardalis, a 2.5°-long chain of stars commonly known as Kemble’s Cascade tumbles from the northwest to the southeast and splashes into NGC 1502. Measuring 8′ across, the cluster shines at magnitude 6.9 with Struve 485, a 7th-magnitude double star, glowing brilliantly at its heart. Several members, including Struve 484, pair up to resemble a runway spanning east to west through the length of the cluster. Through a 4-inch telescope, nearly two dozen of its stars form a glistening triangular shape at 125x. With larger instruments, this striking cluster appears bright and compact with a concentration of over 40 stars.
For both observations, the author used a 4-inch f/9.8 refractor on an equatorial mount and oriented the sketches so that north is at the top and west to the right. She used white printer paper with 8B, 2B, and 2H graphite pencils, a blending stump, and a kneaded eraser. She observed NGC 1502 with an 8mm eyepiece for a magnification of 125x.
All sketches by Erika Rix
I used Adobe Photoshop after scanning my sketch, but any similar software will do. After opening the file, I clicked on “Layer” and then “Duplicate layer” to create another copy of the sketch within the same document. With the top layer highlighted, I selected “Dust & scratches” (within the “Filter,” “Noise,” options) and adjusted “Radius” and “Threshold” until I found the right combination to soften the stars without losing the faintest ones in the process. I adjusted the “Opacity” of the top layer to bring forward the sharper details of the original underlying sketch.
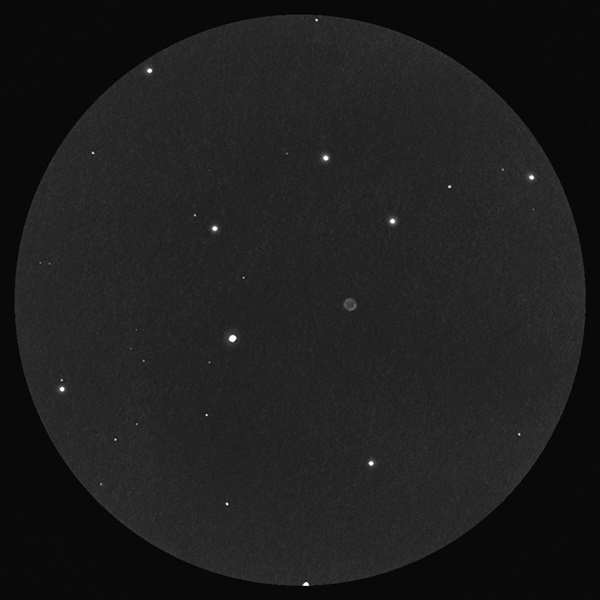
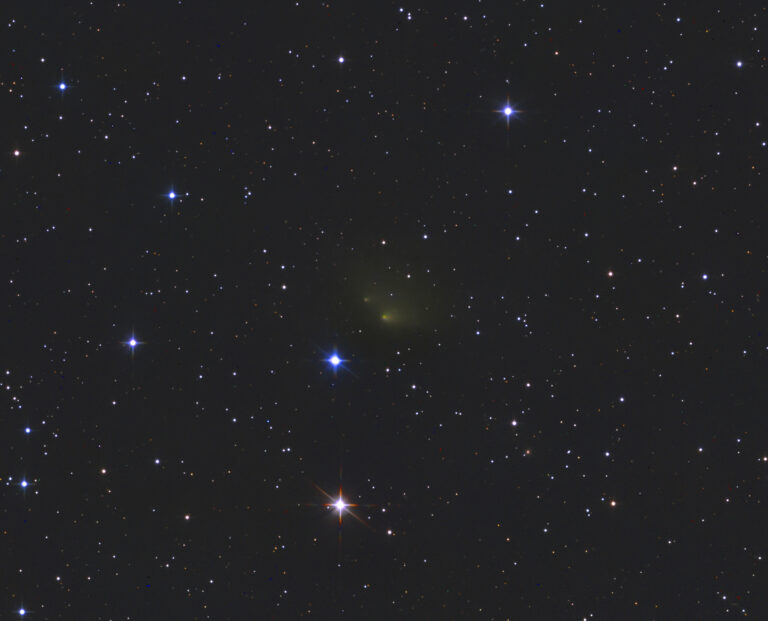
Next, I’ll use the sketch of the Oyster Nebula (NGC 1501) to demonstrate the process for other types of objects. This planetary nebula lies 1.5° south of NGC 1502 and spans 56” by 48” at magnitude 11.5. It appears as a faint, soft disk at 100x through a 4-inch telescope. Oxygen-III and ultra-high contrast filters will improve the ring’s appearance. Viewing through an 8-inch telescope reveals a brightened southwest rim and two knots on the northeast rim. With increased aperture, the darker central region appears mottled, and you may be treated to a glimpse of its 14th-magnitude central star.
The author observed NGC 1501 with a 12mm eyepiece for a magnification of 83x. She used an Oxygen-III filter to add contrast to the planetary nebula.
I used the same Photoshop technique in my sketch of the Oyster Nebula as I did for NGC 1502. In this instance, the “Radius” and “Threshold” adjustments improved the soft appearance of NGC 1501. However, if you wish to leave the nebula untouched and only soften the stars around it, you need to add a mask to the duplicated layer. To achieve this, click on the “Add a layer mask” icon in the “Layers” panel. You can then use the “Brush” tool to remove the nebula from the duplicated sketch and expose the original version below.
Questions or suggestions? Please feel free to contact me at erikarix1@gmail.com.