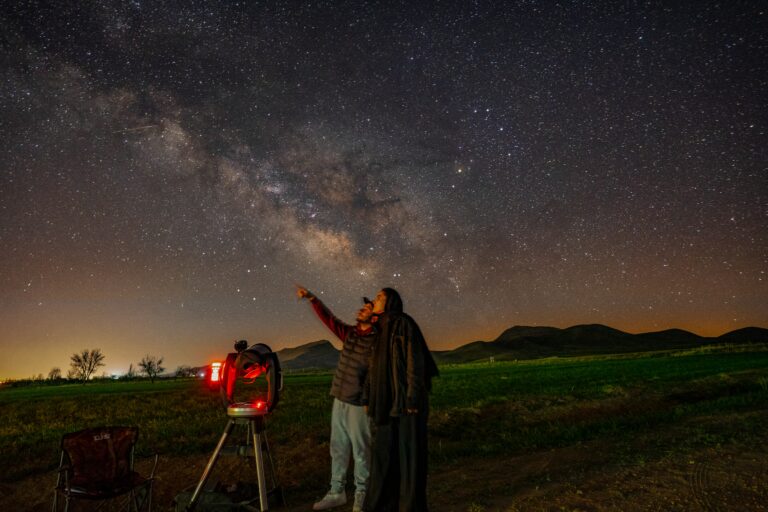
To get you through this trauma, I’ve created a simple, easy-to-follow procedure to evaluate your optics. It requires you, your telescope, and a night of good seeing (atmospheric steadiness).
Testing a telescope under the stars is a critical examination. Nearly all telescopes have some peculiarity. A noted optical designer once told me, “You pick what aberrations you want to correct for and what you can live with.” So remember, nothing’s perfect. Don’t judge too harshly. I’ve never seen perfect optics; that said, most of the issues I have seen have been either easy to correct (collimation, tube currents, retaining ring too tight, not enough cool-down time) or really don’t affect the view much.
If you’re looking for a more in-depth approach, you can find numerous books and web articles on this topic. There are also software programs that help you identify exactly what you’re looking at in the defocused patterns, artificial stars that allow you to test your scope during the day, and products that make testing even easier, like Ronchi gratings. As a last resort, you can have the optics checked professionally.
Before you test
First, check your seeing. The atmosphere must be calm to perform a valid test. In my home state of Michigan, it’s rare to get conditions that are steady enough to test any scope with an aperture over 8 inches. Here’s a tip: If the stars are twinkling wildly, don’t bother testing your telescope that night.
Next, allow enough time for your telescope to cool down. At least an hour, maybe longer depending on the temperature change you’re putting it through. If you can, store your scope somewhere where the temperature will be the same as outside. If the temperature keeps dropping through the night, your optics never will stabilize. And when that happens, you’ll see a laundry list of issues.
Third, choose your testing eyepiece. You’ll want either a simple design like a Plössl or something well corrected, like a modern wide-field design. Choose an eyepiece that provides moderate to high power, typically one that magnifies 40 to 60 times per inch of aperture. For example, if you are using a 4-inch scope, pick an eyepiece that magnifies between 160 and 240 times. Alternatively, choose one that matches the focal ratio of your telescope. So, for an f/5 scope, pick a 5mm eyepiece.
Fourth, be sure your telescope is collimated. If the scope’s optics are out of alignment, you’re not getting the best performance. This makes any sort of test pointless.
Finally, if you use a star diagonal, do the test with it both in and out of your scope. Remember, you’re looking at the entire optical train, starting with the star and ending with your eyes and brain. I typically test optics the same way I observe. And remember, if your observing eye has some astigmatism, you’ll see that in the star test. So, wear your glasses.
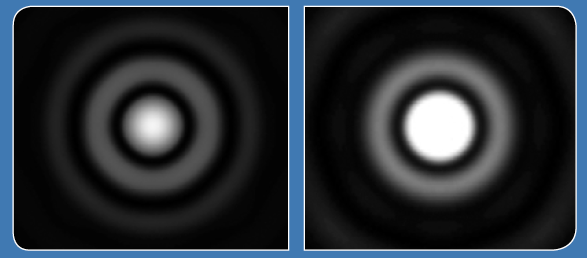
When you look at a star at high magnification, you should see a small disk and a diffraction ring (or set of rings) surrounding it. That disk is the Airy disk, the best focused spot of light that a telescope with a circular aperture can make. In a perfect system with no obstructions (like a secondary mirror), the bulk of the light is concentrated in the Airy disk, with only a small amount spilling out to form a ring.
Pick a bright star at least 55° high. If your mount doesn’t have a drive, you’ll want to pick a star close to the celestial pole. Just how bright a star you’ll need depends on your scope’s aperture. A little experimentation goes a long way. Your eyepiece must show the Airy disk and a diffraction ring, otherwise you can’t do the test. You may have to use slightly lower or higher power depending on conditions. Make sure you keep the star centered in the field of view to avoid eyepiece edge aberrations creeping in and confusing things.
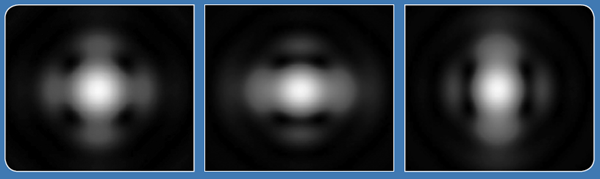
If you see a broken diffraction ring, it probably means your scope is slightly miscollimated. If you see a comet-shaped blob, the problem could be several things, including severe miscollimation or coma. Both are fixable. It’s worth the time to learn to collimate your telescope properly. That single action will do more to improve performance than anything else. The instruction manual that came with your scope will show you how to collimate it. And numerous online guides also exist.
By the way, coma is inherent in all Newtonian reflectors, but not unique to them. It’s usually caused by miscollimation. Stars turn into comet-shaped blurs, and the problem gets progressively worse as you view from the center of your eyepiece’s field to the edge.
Next, check for spherical aberration, which is common in mass-market reflectors. It indicates that the mirror was ground too shallow or too deep. To test for this, use the snap test. As you focus on the star (the Moon also works), is there a definite place where it snaps into focus, or is there a range where the focus is the same? The latter could be due to seeing or other factors, including spherical aberration. Observers call this range the “zone of confusion.” There’s no “best focus” with spherical aberration. The snap test reveals that a high percentage of the star’s light winds up in the diffraction rings.
For the next test, aim at a star if you’re not already pointed at one. Defocus slightly. Does the star look elongated? Now, roll your focus knob to the other side of focus. Did the direction of the elongation change? If so, that’s astigmatism. But is it your telescope or your eye?
Rotate your head around the eyepiece. If the elongation moves as you turn your head, see your optometrist. If you’re testing with a star diagonal, remove it and see if the astigmatism goes away. Pinched optics often cause this aberration. Give your scope some time to cool further and test again.
At some point, head over to the Moon to see how high a power you can use. Good optics should deliver a nice image between 30x and 40x per inch of aperture. Excellent optics can stretch it a bit beyond that, even as high as 60x per inch.
To get a good feel for your optics, repeat the entire process on several other nights. Never judge your scope by one session. Again, it bears repeating that evaluating optics — even in an informal approach such as this — is a demanding test of quality. Be prepared to forgive minor transgressions. Above all, remember to take a good look at the focused image. We don’t waste time observing out-of-focus objects. Ultimately, the scope has to make you happy, and if you’re satisfied, that’s all that matters.
The aforementioned procedure will give you a quick, basic evaluation. For other aberrations, you’ll need to look at a star’s image on both sides of focus. Here are two more that can occur in any optical design — and note that I’ve isolated all of these aberrations. In real life, you’ll probably see a combination.
Field curvature: Ever seen a photo where the center is in focus, but the edges aren’t? That’s because the focal plane isn’t actually a plane; it’s a sphere. If you image through your scope, you’ll probably wind up purchasing a field flattener to compensate for this.
Distortion: There are two types of distortion: rectilinear and angular. To envision rectilinear distortion, picture two parallel lines. If the lines curve inward (towards each other), your optics show pincushion distortion. If they curve outward, that’s barrel distortion.
The other type is angular distortion. You’ll see that objects become stretched out when you move them away from the center of the field of view. The most common proof of this distortion is if the Moon becomes egg shaped when you put it near the edge of the field.
Don’t be discouraged
The first telescope I owned probably had the worst optics I’ve seen. It was a standard 8-inch “beginner’s” Dobsonian-mounted Newtonian reflector I purchased from a popular company. At that time, it was customary for manufacturers to enclose the mirror in a couple of layers of particle board and duct tape for good measure. The problem was, the mirror never cooled down.
Furthermore, the secondary mirror was on a single stalk and impossible to align. The focuser was one step below a bad plumbing job, and the mount was so stiff, I constantly overshot my targets. With all that going against it, do I even need to talk about the quality of the optics?
My point, though, is that I got years of enjoyment out of that telescope. It was my first vehicle to the stars, and that makes me look back at it fondly. So, remember that a telescope is just a tool to help you explore the universe. Enjoy the journey. Don’t sweat the tool. That said, a little star-testing will hone that tool into one you’ll enjoy even more.