Key Takeaways:

I do not consider myself an expert at using a digital single-lens reflex camera (DSLR), but I have experimented enough to pass on some useful ideas. In my November 2012 column, I outlined briefly my method for processing DSLR data. In this article, I want to explain how I actually take the images.
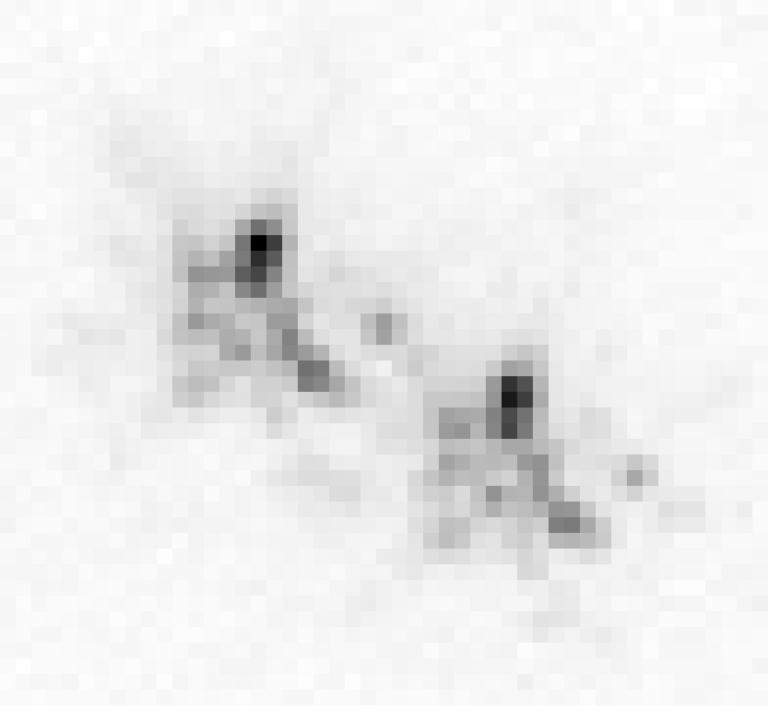
The specific noise that plagues most DSLR imaging is not the hot pixels and cosmic-ray hits that plague CCD imaging, but “color mottle.” Take a single DSLR image shot at ISO 3200 of a faint object, and enlarge it. Most likely you will see magenta or green — and sometimes brown — patches of color permeating the image. That’s color mottle.
The patches typically extend five to 10 pixels in size, and shooting flats and darks does not get rid of them. Only one method can address this major noise source: massive dithering. By this, I don’t mean dithering a few pixels — I mean three to five star diameters! The setup for dithering in most software is sufficient if you’re shooting through a large telescope, but for camera-lens-type imaging, you will need to manually dither the image. To accomplish this, I use a small mount, specifically the Vixen GPD2 that I reviewed in the June 2013 issue. It is perfect for this task, allowing manual slow-motion movements in both right ascension and declination sufficient to cover the size of the mottle.

My favorite lenses for imaging are the Canon 70–200mm f/2.8 L IS II and the Nikon 14–24mm f/2.8 G used via the Novoflex adapter for the Canon camera body. My favorite camera is now the Hutech-modified Canon D6, which I have found to be more sensitive with less noise than any other. This is costly equipment, but you get what you pay for — specifically, a flat field with very little secondary spectrum.
I try to shoot at least nine exposures, each with the lens at f/4 and an ISO of either 1600 or 3200. I determine the length of the exposures by placing the histogram in the center of the graph. To view a histogram after you take an image, press the information button on the back of the camera.
A histogram is a graph the software creates that works within a zone of 0 to 255, where 0 is black and 255 is white. The horizontal axis, therefore, shows how bright or dark your data is. The vertical axis shows how many pixels have a specific value. So the “bell curve” of most histograms shows that you have just a few pixels in the dark values. Toward the midtones (moving to the right toward white), a lot more pixels per brightness unit appear, so the curve goes up. Then as we approach pure white, the number of pixels plummets, and the curve moves down to represent this.
I started my session by taking a 2-minute exposure. When I examined the histogram, my bell curve was way over to the left, indicating that I did not have enough midtone pixels. In other words, I needed to make the image brighter overall. So I added an extra minute and got just the curve I wanted. If I had exposed for six minutes, the bell curve would have been all the way to the right, indicating an overexposure.
Between each exposure, I dither the image significantly. Oh, and I shoot everything in “Camera Raw.” I do not want the camera to do any processing of the image, just the recording.
Once I am back home, I process the images and then combine them using RegiStar, which I detailed in October’s column. The final result is free of most, if not all, mottle, and it shows a smooth, beautiful background. Happy shooting!