This article provides specific information you’ll need to succeed with digital astronomy. Many of the roadblocks to early CCD successes hinge on the fact that digital imaging is radically different from normal photography. Armed with the knowledge of what to expect in an imaging session, however, you’ll be well on your way to recording the digital sky.
Even with limited computer savvy, you should expect to have the image acquisition software installed and the camera hooked up within about 60 minutes. (Be sure to read the manufacturer recommendations prior to installation.) Many cameras use a parallel connection to communicate with the computer; hardware hookup is as simple as connecting the camera and computer with a parallel cable. Other cameras require an interface card (an add-on computer board) that has to be installed inside the computer. This takes a bit longer and requires some extra PC knowledge.
Sometimes, after connecting the hardware, a mismatch occurs between the actual connections and the software settings. In other words, the software “looks” for the camera in the wrong location. This problem often waylays neophytes and causes undo delays. Carefully matching the cable connections to the software settings will ensure that the software detects the CCD camera.
After setting up the equipment, you need to test the system. Your camera’s “first light” should be tested on something much closer to home such as the neighborhood kids or a nearby tree. Because a telescope is usually too powerful for initial testing, a camera lens should be placed on the CCD camera head for this procedure. Begin by taking a series of short exposures (1 second or less) with the camera lens set to its highest f/ratio setting (f/32, f/28, etc). If everything is connected and operating properly, you should see an out-of-focus image appear on the computer screen. Continue to expose as you adjust the lens for proper focus. When you get a sharp image, you can be assured that you have a fully operational CCD camera.
When you’ve passed the testing phase and are ready to take astroimages, you’ll quickly discover that a CCD camera may reveal flaws in a telescopic system. Telescopes adequate for visual use may require improvements for CCD imaging. Flimsy focusers, shaky mounts, shifting optics, or poor drive systems will become a source of frustration and ultimately limit the potential of your images.
Beginners struggle primarily with two aspects of astroimaging: focusing the camera and locating objects on the CCD array. Astroimagers don’t have the advantage of instantly seeing focusing and centering adjustments as they look into an eyepiece or camera viewfinder. Instead, an astroimager must wait for images to be downloaded from the CCD camera and can only view the images indirectly, on the computer monitor. This takes some time to get used to.
Begin initial focusing by placing the camera into the telescope’s focuser and entering the software’s focusing mode (continuous exposures). With exposures set for a second or two, point the telescope at a starfield and adjust the focuser so that the star images visible on the monitor get smaller and tighter. The trick here is to make adjustments only after the image on the screen catches up to your changes in focus (due to download times). I generally wait for two exposure cycles before making another focusing change.
Once sharp star images are formed, exposures should be reduced so that the camera does not overexpose (referred to as “blooming” in CCD vernacular). This simple method of watching, waiting, and adjusting will produce reasonably sharp star images that are good enough for your early imaging sessions. However, if you want to equal the great images seen in the pages of Astronomy, you’ll have to employ a more rigorous focusing method (see “Eight Steps to Perfect Digital Focusing”).
Once you’re in reasonably good focus, you’ll want to center your target for imaging. Because a CCD array has a smaller physical size than a 35mm film “chip,” it has a correspondingly smaller field of view. That makes the task of placing objects on the array much more difficult than with traditional astrophotography equipment. The smaller the CCD array, the more daunting the task.
Many methods exist for locating and centering an object on a CCD array, and each has its strengths, weaknesses, and associated price tag. Methods range from visually centering objects using an eyepiece to using telescope mounts that can slew and center objects accurately enough to image a dozen objects per hour. The main advantage to the more costly alternatives is that you don’t have to remove the CCD camera from the telescope focuser. This is a time saver that will net more images per hour than using an eyepiece and replacing it with the CCD camera.
An evening of imaging should start with collimating the telescope optics and allowing them to reach ambient temperature. Both steps are critical in getting crisp digital images. Every telescope requires a period of time (usually an hour) for its tube assembly to reach the same temperature as the outside air. Producing CCD images during this time, whether they be of deep-sky objects or planets, is not recommended because the delicate shape of the optics will temporarily deform as the scope reaches thermal equilibrium. A cooldown period is particularly critical for planetary work because even small optical errors are magnified as you enlarge the planet so that it can be imaged. Spend time simply enjoying the sky as the scope cools down.
Improper collimation (optical alignment) is another “image killer.” It’s important to check and adjust the optics prior to each imaging session; that’s the only way to get the most out of your telescope. (Even refractors, which are optically stable, should be occasionally checked.) In addition to collimation and cooldown, I recommended that you locate your telescope away from heat sources such as parking lots, concrete buildings, and rooftops, as they retain heat and emit it back into the surrounding air at night. This effect will destroy local seeing conditions for hours.
The key factors for good deep-sky imaging are accurate focus, good tracking, and adequate exposures. That implies a beefy, solid mount for the telescope and a solid focuser to hold the CCD camera. Fortunately, many of today’s telescopes have kept pace with CCD imaging and offer designs that are CCD friendly.
Start by achieving good focus. First, coarsely adjust focus as described above. Center a moderately bright star in an eyepiece and then replace the eyepiece with your CCD camera. Adjust the focuser until out-of-focus star images can be seen on the PC monitor. As star images begin to form, reduce the exposures (0.5 to 0.25 second) so the CCD camera doesn’t oversaturate or bloom. (Bloomed star images have daggerlike spikes at the ends.) Continue making focusing adjustments until sharp star images appear. If your camera has a zoom function, use it to grab a smaller section of the array surrounding the star. This will dramatically reduce download time and also highlight any focusing errors. Once you’ve reached the best focus possible, take the following steps to reach perfect focus.
The CCD camera that I use (an IMG 1300) has a software feature that indicates the “maximum pixel” value based on the highest photon count as seen by the CCD. This value increases as focus is approached and drops when the image moves away from sharp focus. (Many camera systems, such as the series made by the Santa Barbara Instrument Group, have similar software settings.) Optimum focus is reached once the value is consistently at it highest. Perfect focus is possible by carefully watching the maximum pixel value as the focuser is adjusted. I’ve used this simple technique in conjunction with a dial indicator to resolve a focuser’s location to 0.001 inch, for excellent results.
An equatorial mount, set to the sidereal rate, is required to take deep-sky images. Unlike with astrophotography, many digital deep-sky exposures are brief enough to avoid guiding completely. Many mounts can accurately track the stars for unguided exposures of 2, 3, or even 5 minutes — long enough to capture hundreds of deep-sky objects. Beyond the 5-minute mark however, star trailing can become troublesome as a mount’s right ascension and declination errors become noticeable.
Guiding a telescope corrects for these errors. I manually guide deep-sky exposures of 5 to 10 minutes using a separate guidescope and an illuminated-reticle eyepiece. Manually guiding makes sense for these exposures — setup is easy and the exposure is complete before fatigue sets in. For “deep” digital exposures of 15 minutes and longer, I switch to an auto-guider. Long exposures are tedious to guide manually, and justify a larger investment in setup time.
An autoguider is a CCD camera designed to continually monitor and correct for a mount’s tracking errors. Even with experience, setup usually takes 10 minutes or longer. The time is well spent, though: autoguiders are accurate and will guide a telescope for hours. Once it’s operational, you’re free to take a nap, enjoy the night sky, or get a bite to eat.
But why bother guiding for long exposures if a CCD has the ability to capture deep-sky images in a few minutes? The answer to that question lies in an image’s signal-to-noise (S/N) ratio. Longer exposures increase the signal (light from a galaxy, nebula, etc.) as the noise level, inherent in every exposure, is left behind. Long exposures show noticeable improvements in image quality as the S/N ratio increases. If the incoming signal isn’t strong enough, the final image will be “noisy” and grainy in appearance. An image’s S/N ratio ultimately depends on many factors such as the CCD chip architecture (design), its operating temperature, and the length of the exposure.
The success factors for lunar and planetary imaging are slightly different than those required for deep-sky work. Accurate focus is still paramount, but tracking issues are nearly nonexistent since exposure times are kept brief to minimize atmospheric effects. While most deep-sky imagers try to grab a large section of the sky, lunar and planetary imagers grab small sections of the sky at high power, with eyepiece projection. Finally, a planetary imager must be keenly aware of how steady the evening sky is — something that many deep-sky imagers never consider.
Atmospheric steadiness is a prerequisite for lunar and planetary imaging, without it fine detail is difficult, if not impossible, to record. Before imaging, I check an evening’s conditions by observing a planet at moderate power (generally at 150x to 200x). If the views are blurry and difficult to focus, I’ll wait until conditions improve before imaging. On the other hand, if there is an abundance of detail visible with very little movement in the eyepiece — that’s the time to strap on a CCD camera for planetary imaging.
The planets provide a small target to image, and amateur telescopes need a boost in focal length to properly image them. Increasing a telescope’s focal length can be accomplished by eyepiece projection. A camera-to-telescope adapter holds an eyepiece, which in turn projects an enlarged image onto the CCD. The effective focal length of the setup depends on the eyepiece: its distance from the CCD chip and the original telescope focal length.
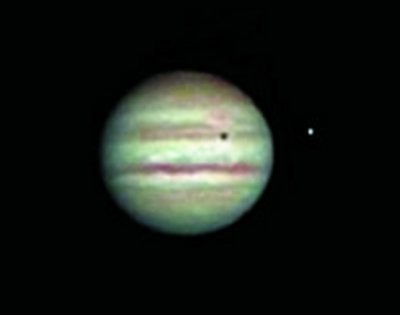
Fortunately a CCD camera requires much shorter focal lengths than photography did in the past. The benefits of short focal lengths are short exposures, allowing a CCD camera to capture the planet during brief moments of atmospheric steadiness. In fact, a typical planetary CCD exposure is usually 1/10 that required with film. I normally image Jupiter and Saturn at f/25 with exposures of 1/3 and 1/2 second respectively; Mars requires a longer focal length — typical exposures are 1 second at f/40. Venus is so bright that some type of filtration is needed to image it.
Although longer focal lengths are employed, lunar and planetary focusing techniques are similar to those used for deep-sky imaging. The basic steps are to locate, center, and coarsely adjust focus. Final focus is achieved by using the CCD’s maximum pixel values. The trick is to interpret the readings since long focal lengths magnify atmospheric turbulence as well as the subject.
With the planet or lunar crater centered, I place the CCD camera and eyepiece projection system into the focuser and put the software into focus mode. In this mode, images are continually “flashed” on the computer monitor, which makes it a simple matter to adjust and visually focus the camera. I then achieve fine focus as discussed earlier. However, at f/25 to f/40, you can’t rely on a single exposure to determine focus; many images will be distorted and fuzzy due to poor seeing while others will be sharp during steady moments. When close to focus, I generally make a small adjustment and watch 10 exposures to see if an improvement occurs. Perseverance is key to success; 10 or 15 minutes are often required to ensure that focus has been achieved.
Once the camera is focused, the process of exposing, sorting, and saving images begins. A huge advantage of using a CCD camera is the ability to see the images seconds after an exposure. Lunar and planetary imaging is really a process of separating the poor images from the “keepers.” Unlike deep-sky imaging, 80 percent to 90 percent of exposures are thrown away, unsaved. Don’t let this necessity to toss out images disturb you. You’ll soon develop a feel for which images are worth keeping and which are not.
Regardless of the type of astroimaging you pursue, start with a basic approach and refine your techniques to suit your equipment. Although a digital camera is a complex piece of equipment, its power can be realized through simple and effective techniques. While there are many CCD types and designs to choose from, the same principles of operation exist for each. The basic skills of focusing, finding, and exposing can be applied to all. Ultimately, the rewards for attention to detail and continual improvement will be superior digital images.