galaxy-rising-part-twohttps://www.astronomy.com/observing/galaxy-rising-part-two/Galaxy rising, part two | Astronomy.comcategories:Astrophotography | tags:Astrophotography, Magazinehttps://www.astronomy.com/uploads/2021/09/Image-1.jpgInStockUSD1.001.00astrophotographyarticleASY2023-05-182013-02-2546952
April 2013: Here's a second way to put the Andromeda Galaxy or any other celestial image right where you want it.
By Tony Hallas |
Published: February 25, 2013 | Last updated on May 18, 2023
In last month’s column, I showed you how to bring in the image of the arch on top of the Andromeda Galaxy (M31) as a layer, select the blue sky, and delete it from the stack. This process allowed us to see M31 underneath.
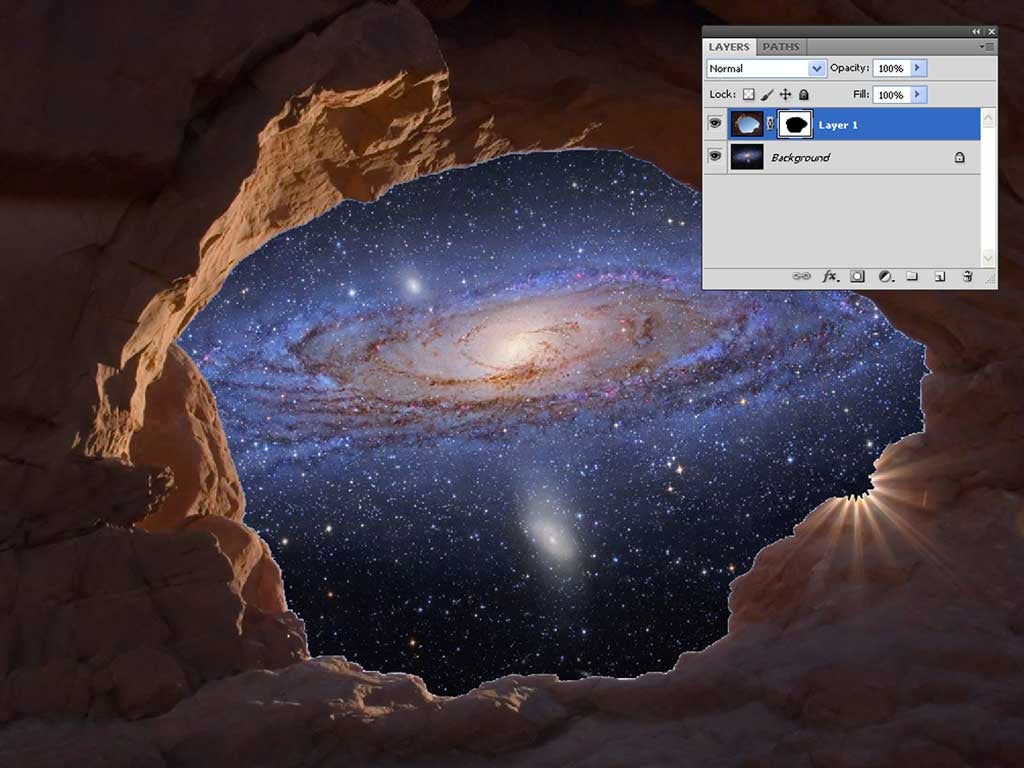
Now let’s go about this in a different way. Starting in Photoshop from the same layer stack (without deleting the sky), select the blue sky once again, but this time go to “Layer,” then “Layer Mask,” and then “Hide Selection.” What you’ve just done is to turn the selection into a layer mask that is holding back the blue sky. The advantage of using a mask is that you can refine it.
With the image of the arch lying on top of the Andromeda Galaxy (M31) image, select the blue sky and choose the “Hide Selection” option. This allows M31 to come through. // All images: Tony Hallas
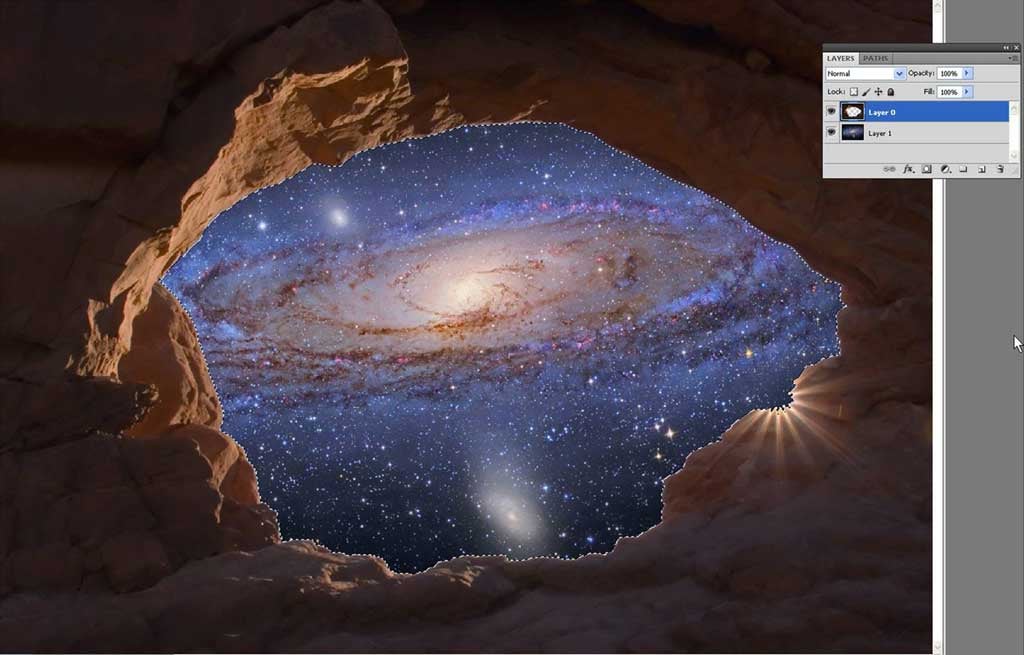
So, right-click on the mask icon and choose “Refine Mask.” Once this palette opens, note “View Mode” at the top. Click in this icon box, and notice all the ways that you can view the mask. For this exercise, choose “On Black.” This will let you see any trace of the sky remaining within the masked area.
Next and below this option, you’ll see the “Edge Detection” dialog box. Here, you’ll find ways to improve your selection. One tool I suggest you become familiar with is the “Brush” tool that you can use to refine spots in the selection. Continue to do this until there is no sky showing. Then click “OK.”
Right-click on the mask icon and select the “Refine Mask” dialog box. Doing this opens up many options, including being able to see any trace of the sky remaining by turning the mask black.
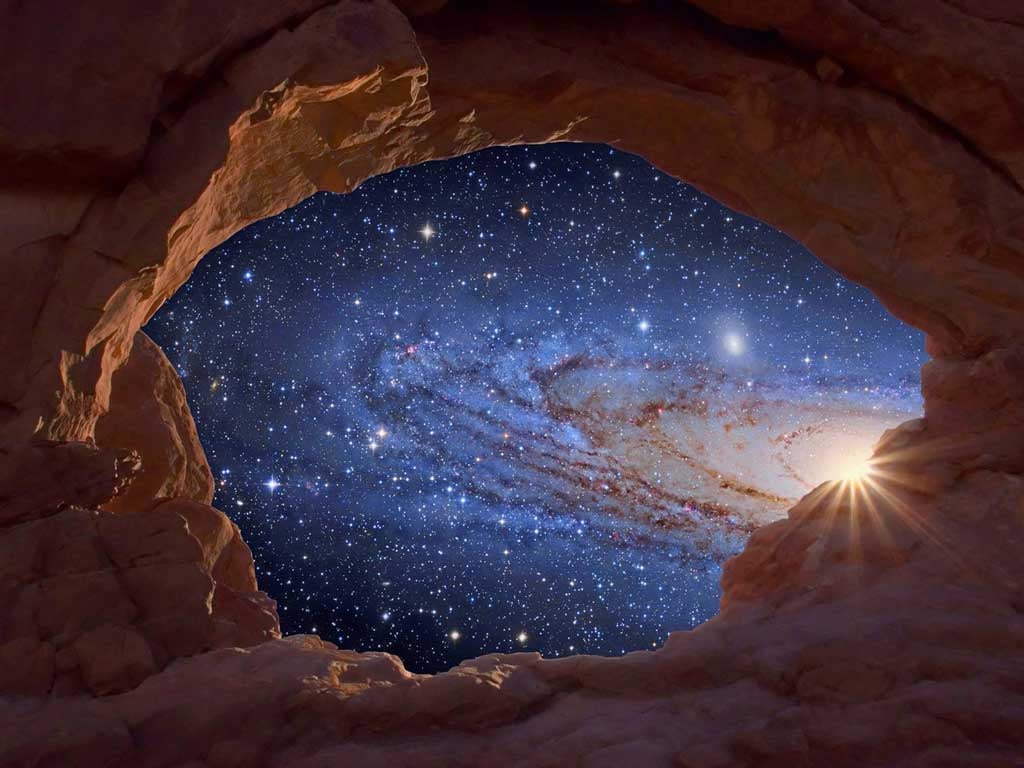
Finally, with the M31 layer active (on the bottom), hold down the Control key and, using the mouse, move M31 until the galaxy’s nucleus is where the sunburst was. As it turned out, the image of M31 was too small to fill the hole in the arch. In such a case, hit Control-T to transform the layer to a larger size. While you’re doing this, rotate the layer so that the galaxy is at the proper angle. And by “proper,” I mean the angle you like best. Press Enter when you’re happy with the proportions in the picture.
The finished picture sports an exact match between the edges of the galaxy and the rocks. It also reveals the author’s preferences for scale. Yours may differ.
At this stage, take a final look at your image because this is the last point you will be able to independently adjust each of the layers. Do the rocks look correct? What about M31 in relation to the rocks? When you are satisfied with your results, save the layered image as a Photoshop (PSD) file in case you want to go back and change something. Then flatten it for regular use and turn it into a TIFF or JPEG image.
This technique works with a wide variety of images. In fact, I think you’ll agree that the sky is the limit!