Key Takeaways:
- Colored filters enhance lunar details by improving contrast and reducing glare.
- Different colored filters highlight various features; yellow and blue filters are particularly useful.
- Neutral-density filters reduce brightness without altering color.
- Polarizing filters dim the Moon and darken the background sky.
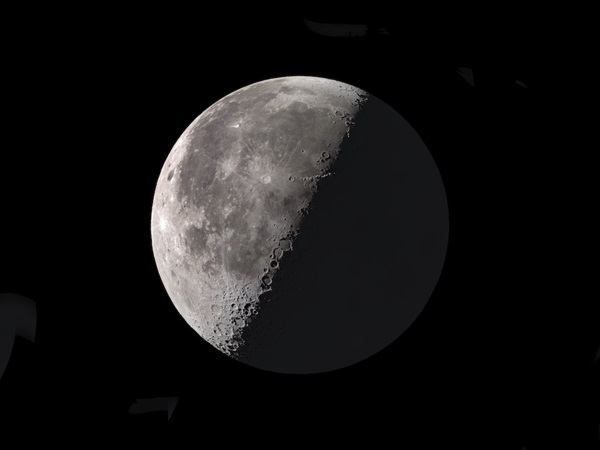
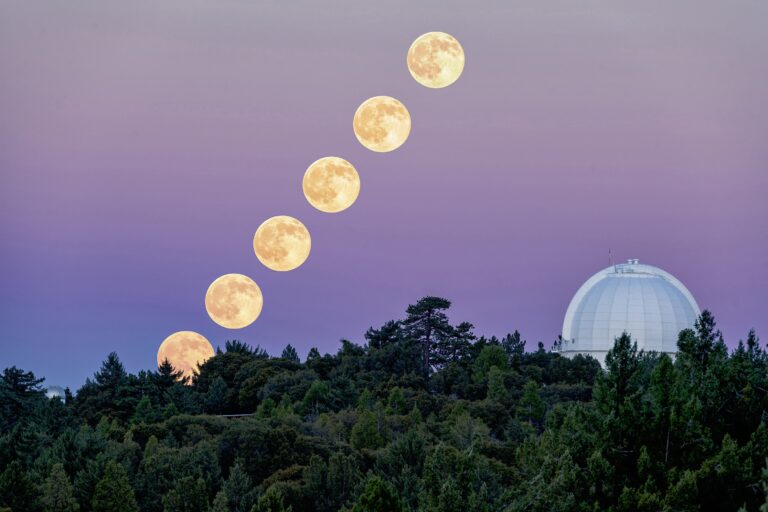
The Moon is an obvious target for the beginning observer. It’s easy to find. Its mountains, impact craters, and rays of debris are spectacular. And, above all, it’s bright.
In fact, you will learn very quickly that it can be painfully bright in any telescope with an aperture larger than about 3 inches, whenever the Moon is more than half Full. From our vantage point during these phases — First Quarter to Third Quarter — the Sun is shining more directly overhead, and, therefore, more brightly on the Moon’s surface.
To dim such an overpowering Moon, we can use several types of eyepiece filters, including neutral-density filters and polarizing filters.
But perhaps the most useful are colored filters, made of glass coated in gelatin-dye. At first glance, adding a color tint to your view of the Moon may not seem like an improvement. But colored filters can overcome image deterioration caused by the properties of light. In particular, they can enhance lunar details that are difficult to pick out in white light, and improve the subtle differences between adjoining areas.
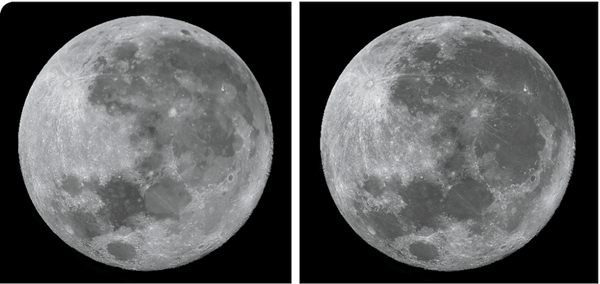
Colored filters reduce irradiation, which is when the edges of bright areas on a celestial body encroach upon darker areas, distorting the boundary between them. This can blur the edges of lunar shadows, which are especially prominent along the terminator — the line dividing the lit area of the Moon from the unlit portion. Some filters sharpen shadow boundaries, making them stand out and giving greater contrast to your entire view.
Colored filters can also help overcome the effects of hue contrast, which is the blurring of shades of colors at their boundaries. Although most of the lunar surface appears gray, there is a vast spectrum of grayness, in subtle hues spanning white to black. And colored filters can reveal them.
Know before you buy
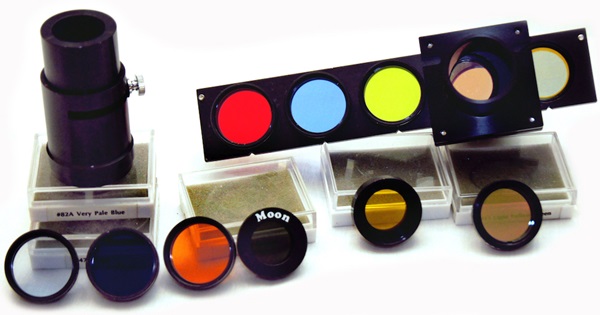
Colored filters useful for observing the Moon are sometimes sold as “Moon filters” or “planetary filters.” The housings for these filters are threaded in order to screw into the field end of eyepieces. You need to buy them in the correct size for your eyepiece barrel size (0.965, 1.25, or 2 inches), not by focal length. Be sure that the filters you purchase are made of optical quality glass and not plastic. Plastic filters may distort your view and scratch more easily than glass filters.
Pictured is a sample of eyepiece filters and a Lumicon 5-filter holder. The tube on the left is a Meade polarizer. The dark filter below the polarizer is a no. 47 violet filter. The filter labelled “Moon” is a neutral-density filter.
Kodak history
The numbering system generally used today for colored filters for eyepieces and cameras was developed in 1906 and 1907 by Charles Edward Kenneth Mees, while he was the chief scientist and managing director of the Wratten and Wainwright Company in Croydon, England. In 1912, George Eastman purchased the company and brought Mees to Eastman Kodak to establish a research and development laboratory. The identifying number assigned to these filters is still called the Wratten number, though some manufacturers use different color names for certain filter numbers.
Mees originally designed his filters for photographic work, but they are also very useful for visual lunar observing. Usually only a single filter is used at a time, but sometimes I will combine two filters of varying shades of yellows and blues to enhance the contrast between features. Stacking filters, however, also decreases the intensity of the light transmitted to your eye, thereby dimming your overall view. Experiment with colored filters and discover what combination works best for you during different lunar phases.

A colorful toolkit
In my opinion, the three most versatile filters for enhancing lunar observing are No. 80A (labeled medium-blue under the Kodak Wratten system), No. 12 (yellow or deep-yellow), and No. 15 (deep-yellow). A No. 80A reduces some glare, and a No. 12 or No. 15 both enhance contrast while reducing glare. These three color filters are probably the most versatile filters for enhancing lunar observing.
Also beneficial are the No. 8 (yellow), No. 11 (yellow-green), and again the No. 12, which all help to cancel the bluish fringes caused by chromatic aberration in two-element and low-quality refractors while simultaneously enhancing lunar surface detail.
In general, the lighter-color filters are best to use between New Moon and around First Quarter, and between Third Quarter and the last days of a waning Moon. When the Moon is more than half Full, you can dim its brightness with a Moon filter, a polarizing filter, or the No. 47 (violet) filter.
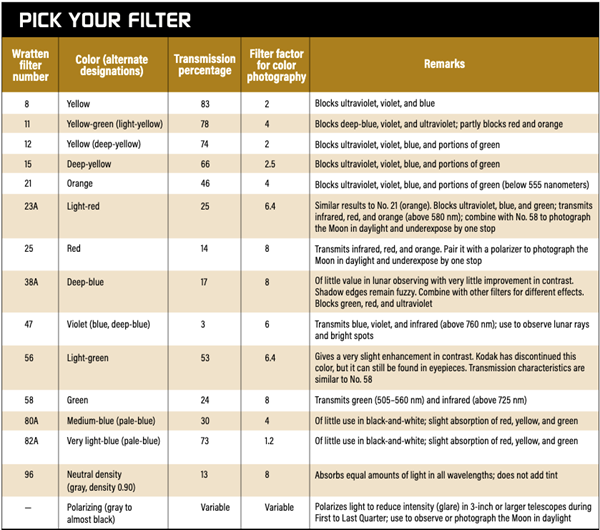
The following is a list of some of the color eyepiece filters that are commonly sold for lunar observing:
No. 8 (yellow) gives sharp contrast between shadows and illuminated surfaces. Small features stand out, such as the individual peaks in Theophilus and shallow rilles that are not visible in a No. 21 (orange) filter.
No. 11 (yellow-green) has a slight improvement in contrast over the No. 8 (yellow). Either filter is good for observing at low solar illumination angles near the terminator. It also aids in locating lunar domes.

No. 12 (yellow or deep-yellow) improves hue contrast and sharpens shadow edges. It’s great for observing small cone craters and maria wrinkle ridges that are lit by low solar illumination, and helps in locating domes. It’s also better than lighter yellow filters like No. 8 and No. 11 at bringing out fine details in rays, such as the Messier A comet tail rays in Mare Fecunditatis.
No. 15 (deep-yellow) is slightly darker with similar observing properties as No. 12, adding finer details to images.
No. 21 (orange) sharpens hue contrasts at shadow boundaries and reduces irradiation. This filter helps to make the crater rays more visible. The Moon turns a deep orange color, which takes some time to get used to. It also slightly darkens the Moon overall.
No. 25 (red) darkens the entire Moon and provides little visual improvement for lunar observing. Shadows are not as sharp as with green and yellow filters. The Moon’s terminator fades to black without a clearly defined edge to shadows. When used in combination with a polarizer, this filter enhances artistic black-and-white photographs of the Moon in daylight by dimming the blue sky. It is used mainly for viewing the planets.
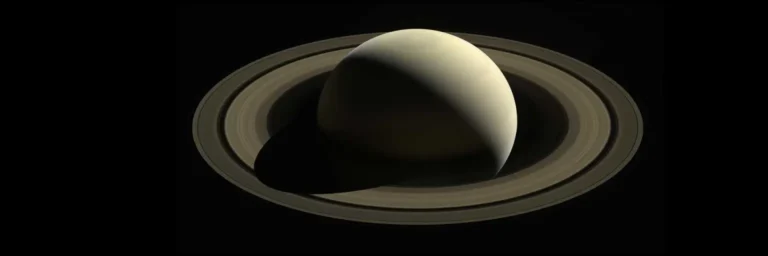
No. 47 (violet) is called deep-blue by Kodak, but sold and advertised as violet, blue, or deep-blue for viewing Venus, Saturn’s ring structure, and clouds over the Martian poles. This filter darkens a lunar view, making it easier to observe the ray systems during the bright lunar phases. While this filter is too dark for use during the crescent phases, it is outstanding for the phases between First and Last quarters.
No. 58 (green) aides in observing thin shadows, such as crater wall terrace valleys, and very sharp shadow boundaries. It brings out subtleties in shading of mare surfaces. One can also pick out finer details with this filter than with no filter at all.
No. 80A (medium-blue) reduces glare and enhances contrast between areas of varying grayness.
No. 82A (very pale-blue) also helps to reduce chromatic aberration in low-quality refractors. The Moon appears gray in a No. 82A. However, shadow edges are not as crisp as with orange and yellow filters.

Polarizing tips
You can buy single polarizing filters and stack them up under the eyepiece, crossing their polarization at right angles to darken the view. But I prefer to use an adjustable polarizing filter system that contains two polarizing filters in a holder (see page 48) that slides into the focuser. The eyepiece barrel slips into the polarizer. The polarizing system allows you to vary how much light will pass through by sliding a lever or knob on the housing, allowing from 3 percent to about 50 percent of the Moon’s light to pass through.
One annoying problem of using a polarizing system is having to refocus the telescope when installing or removing one. This is because the polarizing system moves the eyepiece away from its normal spacing in the eyepiece holder where you have focused the image. When you remove the filter, the previous spacing is restored and you have to restore your original focus.
Even with a polarizing filter in place, plan to make your lunar-observing session a short one to avoid hurting your eyes. After just a short session of looking at the Moon during the bright phases, I have looked away from the telescope and seen everything in a blurry distorted red shade. Always use care when looking at the bright Moon (between First Quarter and Third Quarter phases) through any telescope.
An underappreciated gem
I discovered just how useful the No. 47 (violet) filter can be for lunar observing by accident. In the dark one night years ago, I installed this filter into the base of an eyepiece. At first, I was startled by the view. Then I marveled that I had never heard anyone mention using this filter for lunar observation. In fact, I have yet to find any mention of this in other lunar observers’ guidebooks, books on astronomy filters, or filter catalogs. None of those sources say anything positive about the use of the No. 47 filter for lunar work — and at least one advises against it.

True, this filter gives lunar features blue to purplish hues and reduces the overall contrast between gray features and shadows. Shadow edges are not as sharp as with the yellow and orange shades. But the small lit craters are even more noticeable because there is greater contrast between the features that appear white and those that become blue. The rays appear almost white and are therefore easier to observe against the blue and purple background.
In this filter, rays stand out like 3D images. Shortly after First Quarter, the rays emanating from the northeastern crater Thales become hard to detect in white light. But they are very noticeable through a violet filter. I find that many of the branches of the extensive Tycho ray system are easier to detect in violet than when observed at Full Moon through a polarizing filter. I have also noticed that, because a No. 47 filter allows only about 3 percent of the light to pass through it, I do not have to use a polarizing filter to reduce the brightness of a gibbous or Full Moon.
Neutral options
No. 96 (neutral-density; also sold as “Moon filters”) reduces the brightness of the Moon evenly across the entire spectrum without adding a color tint. Depending on the density, these filters block out a fixed percentage of the light, thereby reducing some of the glare without introducing false colors. They come in a wide range of densities, but usually you will find eyepiece filters having a density of 0.90 with a transmission rating of 13 percent. (A warning: Never use photographic neutral-density eyepiece filters for viewing the Sun. Instead, use a properly designed solar filter that fits over the aperture of your telescope or camera.)
Polarizing eyepiece filters are designed to reduce the lunar glare and darken the background sky, thereby making it easier to view the Moon from First through Third Quarter. Your view of the Moon through a polarizing filter will be in darkening shades of gray to almost black. These filters are also great for observing the Moon at First or Third Quarters in daylight because sky light is most polarized 90° from the Sun.
The Moon may be the easiest object to find in the night sky, but observing it is endlessly rewarding. This list of filters and ways to use them is far from exhaustive. Never be afraid to experiment with different combinations of color filters and find new ways to enhance your views and photographs of our nearest celestial neighbor.