From the October 2014 issue

Using masks, part 2

Astroimager Adam Block shows how you can use masks in Photoshop to improve your images.
By | Published: October 27, 2014 | Last updated on May 18, 2023
AdamBlock_2013
When you begin to apply masks to reveal and hide parts of a layer, you’ll realize the economy of global image processing. That’s because few processes are equally good on all scales, colors, and brightness levels.

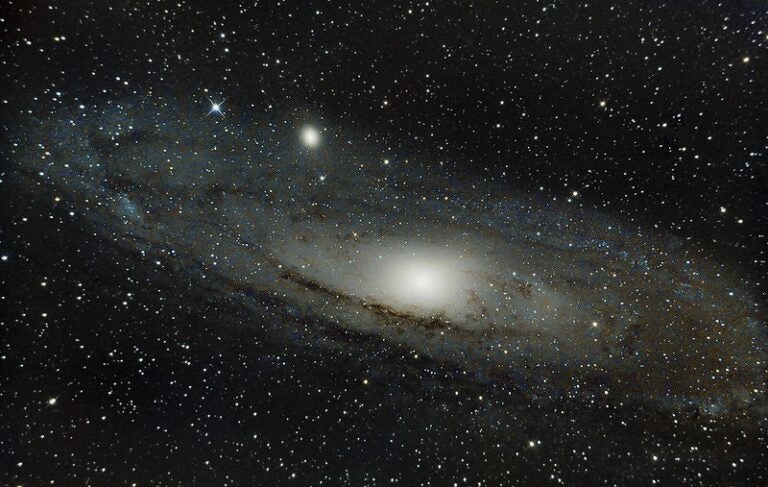
This philosophy reaches its greatest achievements through the use of object masks because they are self-referential and strongly correlated to the luminance and spatial mapping of the image itself.

Although how software generates object masks varies from program to program, their application is almost always the same. Here, I used Photoshop.

The author inserted a copy of the image of NGC 5426 into the layer mask for the upper image.
1. The author inserted a copy of the image of NGC 5426 into the layer mask for the upper image. Enter the layer mask by left-clicking with the ALT key depressed. You’ll find a high-resolution version of the image at http://skycenter.arizona.edu/gallery/galaxies/ngc5426.
All images: Adam Block
I began by making a copy of the image (in this case, interacting galaxies NGC 5426 and NGC 5427) in which I wish to minimize noise and created a new layer with it. Then I created a layer mask on this upper layer, and I pasted the image (it is still in memory) into the layer mask.

To enter a layer mask in Photoshop, press (and hold) the ALT key and then left-click on the layer mask icon. This brings you into the layer mask space, and you can paste the image.

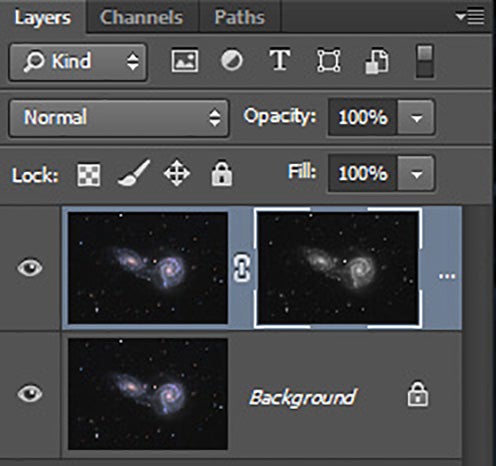
Your “Layers” palette should now look like mine (see image #1). If you start with a color image, once you paste it into the layer mask, it will be a grayscale image and represent opacities (see November’s column).

You need to adjust this mask in two ways. First, the mask shows bright elements of the object as white and the sky background as black. Once you apply noise reduction to the upper layer, you want the mask to reveal the areas that need the smoothing and hide (protect) areas that have high signal.

Next step is to apply a noise-reduction algorithm
2. The author’s next step is to apply a noise-reduction algorithm. The mask color inverts and contrast increases so only the background sky portions of the upper layer show. Black parts of the mask “protect” object features by hiding the smoothed upper layer and leaving only the lower (original) layer visible.
This means you expect the mask to be white where it coincides with the sky background of your upper layer. So, you need to invert the colors of the mask to make the object parts black and the sky background white.

In Photoshop, navigate through the “Image” menu to “Adjustments.” Apply “Invert” (CRTL+I). For the second adjustment, use “Levels” to make more of the object (including stars) black in the mask.

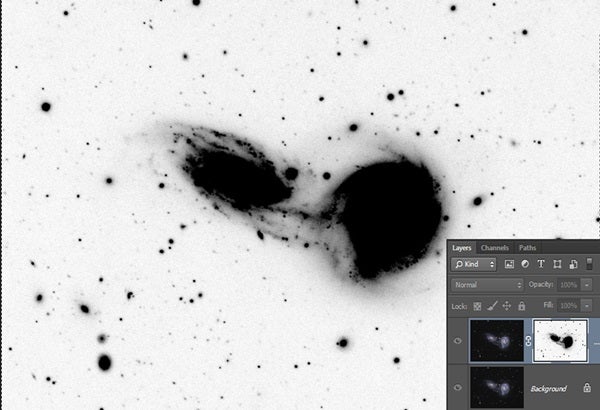
You now have constructed what I call an inverted threshold object mask. Most things that are above the sky background level — real things — are now black, and the smoothed layer will not contribute here (see image #2).

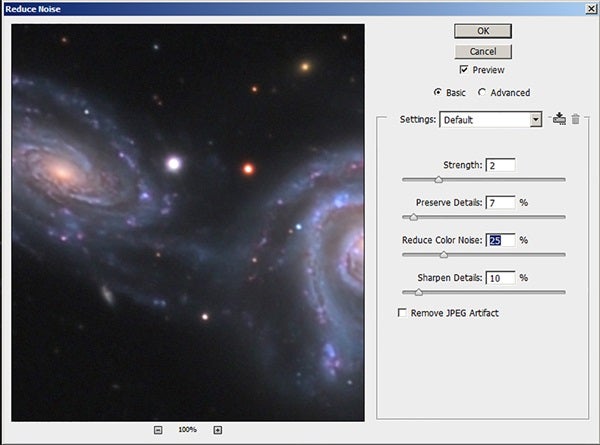
After making the upper layer active, I smoothed the image by first reducing “Noise” under the “Filters” menu. Typically, I set the strength to 2 or 3 with the other slider adjustments being small values (see image #3).

This screen shot shows typical settings for the "Noise" selection under the "Filters" menu in Photoshop.
3. This screen shot shows typical settings for the “Noise” selection under the “Filters” menu in Photoshop. When used in combination with the “Dust and Scratches” selection, as the author demonstrated in the text, the result is comparable to many other commercially available noise-reduction algorithms.
Then I apply an additional application of the unusually named “Dust and Scratches” filter at a one-pixel level. I fade this until the perception of some graininess remains, but not too much. You will need to zoom in 300 percent or more to monitor this process.

Finally, consider using one more of my image-processing tricks: Modify the black of the mask to a dark-gray value.

This will let you apply less noise reduction to the bright areas of the image. Using “Levels,” move the “Output” slider instead of the normal “Input” upper slider, and turn the black of the mask gray.

This isn’t a necessary step for all images, but it is a powerful variation when needed. In my next column, I’ll continue with masks and show you how to blend a deconvolved image with an original image using an object mask.