Storing your scope
Nothing affects a telescope’s life span more than how and where you store it when you’re not using it. A good storage place should be dry, dust-free, secure, and large enough to get the telescope in and out easily. Ideally, you should keep your telescope at or near the temperature outside. Doing so reduces the cooling (or warming) time required when you set up at night.

Bringing the universe to your door. We’re excited to announce Astronomy magazine’s new Space and Beyond subscription box – a quarterly adventure, curated with an astronomy-themed collection in every box. Learn More >>.
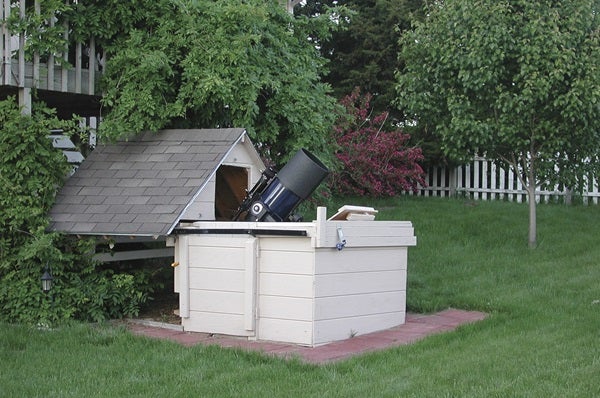
Without a doubt, the best place to keep a telescope is in an observatory, which offers a controlled environment and easy access to the night sky. Of course, not everyone can build an observatory, nor is one always warranted or desired.
Closets in unheated garages and wooden toolsheds share many of the advantages of an observatory, although you may have to vent them to the outside so air can circulate. Metal, vinyl, or plastic sheds are not as good because such materials trap heat more than wooden enclosures.
How about an unheated basement? Basements certainly are secure and large enough to qualify. They also provide easy access if a door leads directly to the outside. While these considerations weigh in their favor, most basements fail when it comes to being dry and free of dust. If a basement is your only option, invest in a dehumidifier.
Regardless of where you store your scope, always cover the optics. Usually, this is simply a matter of putting a dust cap over the front of the tube and plugging the focuser or covering it with a small plastic bag. Do this diligently. If the telescope did not come with a dust cap, or if it has been lost over time, a plastic shower cap often makes a great substitute.
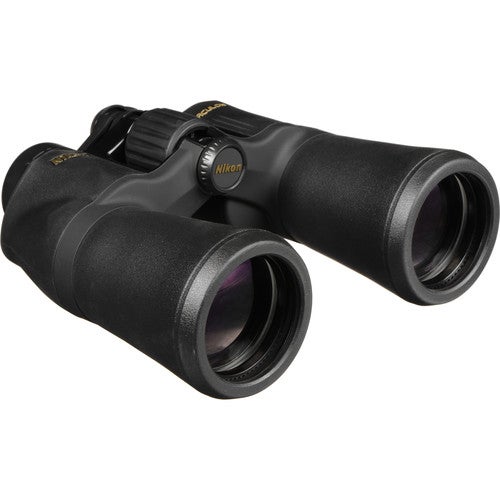
If your telescope or binoculars came with a case, use it. Not only will a case add a second seal against dust, it also will protect the instrument against accidental bumps.
A dark, damp telescope tube is the perfect breeding ground for mold and mildew. To avoid the risk of your scope becoming a petri dish, be sure all of its parts are dry before you store it. Tilt the tube horizontally to ensure that no water puddles on the lens, mirror, or corrector plate.
No matter how careful you are, dust will contaminate your optics eventually. A moderate amount, surprisingly, has little effect on a telescope’s performance. But if there’s a lot of it, or if the optics have a coating of mildew, images will appear dimmer and lack clarity.
Consider cleaning an optic only when stains are apparent; otherwise, leave well enough alone. Never clean a lens or mirror just for the sake of cleaning it, because every time you touch it, you run the risk of damaging it.
The methods I describe here are for cleaning outer optical surfaces only. Unless you really know what you’re doing, I strongly advise against dismantling sealed telescopes (such as refractors and catadioptrics), binoculars, and eyepieces. Dirt and dust will never enter a sealed tube if you store and protect it properly.
If an interior lens or mirror surface in a sealed telescope becomes tainted by film or mildew, take or send it to a qualified professional for disassembly and cleaning. Attempt this yourself, and you may discover that the telescope is much easier to take apart than to put back together. Contact the instrument’s manufacturer for its recommendations.
Cleaning lenses and correctors
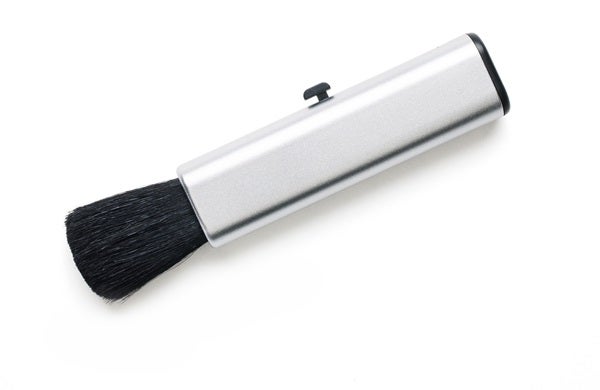
Begin the process by removing all particles that have found their way onto the surface. This does not mean blowing across the lens with your mouth; you’ll only spit all over it. Instead, use either a camel hair brush or a can of compressed air. Some brushes come with air bulbs that let you blow and sweep at the same time. If a brush is your choice, lightly whisk the surface of the lens in one direction only, flicking the brush free of any accumulated dust particles at the end of each stroke.
Many amateur astronomers prefer to use compressed air instead of a brush because nothing touches the surface. Hold the can upright with the nozzle away from the lens at least as far as recommended by the manufacturer. If the can is too close or tilted, some of the propellant could strike the glass surface and stain it. Also, best results come with several short spurts of air instead of one long gust.
After removing the dust, you’ll want a gentle cleaning solution for fingerprints, skin oils, stains, and other residue. You can brew one of the best lens-cleaning fluids right at home: In a clean container, mix 3 cups of distilled water, ½ cup of 99 percent (or as pure as you can get) isopropyl alcohol, and two or three drops of a mild liquid dishwashing soap.
Dampen a piece of sterile surgical cotton or lens tissue with the solution. Don’t use most off-the-shelf cotton balls, bathroom tissue, or facial tissue. They’re rougher than you might think.
Squeeze the cotton or lens tissue until it’s damp, not dripping, and gently blot the lens. Never use elbow grease to get out a stubborn stain — the only pressure should be from the weight of the cotton wad or lens tissue. Then use a dry piece of lens tissue to blot up any moisture.
The steps for cleaning the corrector plate of a catadioptric telescope are pretty much the same. The only difference is in the blotting direction. Begin with the damp cotton or tissue at the secondary mirror holder, and move out toward the edge. You might want to point the telescope straight up when cleaning it. Doing so allows you to channel the excess liquid toward the corrector’s edge.
Follow a spoke-like pattern around the plate, using a new piece of cotton or tissue with each pass. As you clean, turn the cotton or tissue in a backward rolling motion to carry any grit away from the surface before it has a chance to be rubbed against the optical surface. Overlap the strokes until the entire surface is clean. Again, gently blot dry if necessary.
When you clean a mirror, take special care not to damage the fine optical surface. The mirror’s thin coating of aluminum is extremely soft, especially when compared to abrasive dirt, and you can gouge it easily.
Cleaning a telescope’s primary or secondary mirror typically requires you to remove it and the cell that holds it in place from the telescope. Consult your owner’s manual for specific instructions.
With the mirror lying on a table, use compressed air to begin the cleaning. Don’t use a brush for this step, to avoid any possibility of damage.
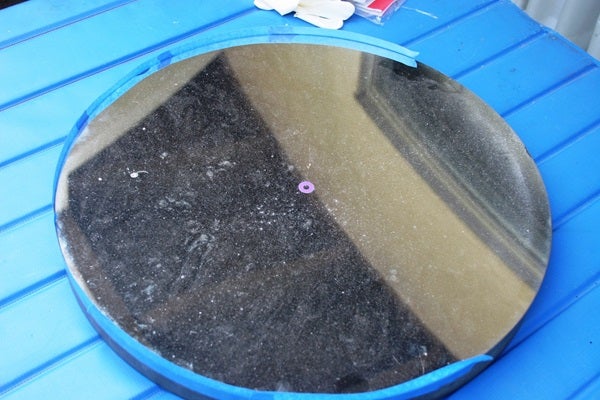
Next, inspect the mirror’s coating for pinholes and scratches. A good coating can last 10 years or longer if the mirror has been well cared for. To check it, hold the mirror, reflective side toward you, in front of a light. It’s not unusual to see a faint bluish image of the light through the mirror if the source is bright, but its image should appear the same across the entire mirror. If not, there may be thin, uneven spots in the coating.
Any scratches or pinholes in the coating will become immediately obvious, as well. You can live with a few, but if scratches or pinholes abound, or if you detect an uneven coating, you’ll want to send the mirror out for recoating.
If the coating is acceptable, bring the mirror to a sink. Be sure to clean the sink first and lay a folded towel in it as a cushion just in case the mirror slips. Gently run lukewarm tap water across the reflective surface. This should lift off any stubborn dirt particles that refused to dislodge themselves under the compressed air.
Next, fill the sink with enough tepid tap water to immerse the mirror and add to it a few drops of gentle liquid dish soap. Carefully lower the mirror into the soapy water and let it sit for a minute or two.
With a big, clean wad of surgical cotton, sweep across the mirror’s surface ever so gently with the backward rolling motion I described earlier, being careful not to bear down. Roll the cotton a half-turn backward, discard it, and use a new piece. If stains remain after this step, let the mirror soak in the water for five to 10 minutes and repeat the sweeping with more new cotton.
With the surface cleaned, drain the sink. Run tepid tap water on the mirror and its holder for a while to rinse away all soap. Then turn off the tap and pour room-temperature distilled water across the surface for a final rinse.
Finally, rest the mirror on a towel and let it dry. I usually rest it against a pillow on my bed. Tilt the mirror at a fairly steep angle (greater than 45°), its edge resting on the soft towel to let any remaining water droplets roll off without leaving spots. When it’s dry, insert it into the telescope, collimate the optics, and you’re done!
More tips
Other telescope parts also require occasional attention. For instance, some focusers tend to bind if you don’t lubricate them occasionally. To prevent this from happening, use a little Teflon lubricant on the focuser’s small pinion gear or roller. Loosen the screws (typically two) that connect the plate to the side of the focuser’s housing. Squirt a tiny bit of lubricant on the pinion teeth, tighten the cover plate, and wipe off any drips, as required.
If a metal telescope mount starts to bind, lubricate the axes’ bearing points. Some manufacturers recommend this be done at specific intervals, while others make no mention of it at all. If the latter is true, then do it once a year.
The Formica and Teflon materials in most Dobsonian mounts require little in the way of maintenance. But if your Dob doesn’t move freely, take the mount apart and apply a little furniture polish or car wax to the contact surfaces. Buff, reassemble the mounting, and try it. You should notice the difference immediately. If not, consider replacing the pads with furniture slides, available at most hardware stores.
Some drives also need an occasional check to keep them happy. Carefully remove the protective housing and put a little light grease between the two meshing gears. While the drive is open, put a drop or two of thin oil on the motor’s shaft, as well. Then reassemble the drive, turn it on, and listen for any noises.
Most clock drives hum as they slowly turn. If yours seems unusually loud or if grinding noises are coming from it, turn it off immediately and contact the manufacturer for recommendations.
The bottom line
Even after lots of use, caring for your telescope doesn’t take much effort. If you show it even a little love by storing it correctly and performing periodic maintenance, it will happily show you the wonders of the universe for years to come.