Key Takeaways:
If you ever decide to head to the small town of Yellowknife (population 20,000) in the Northwest Territories of Canada and expect to get good pizza, you might want to reconsider your choice of destination. But if you go there hoping to watch and photograph some of the most amazing displays of the northern lights you will ever see, you have certainly chosen wisely.
Now, don’t get me wrong. I’m not saying there isn’t good pizza to be had in Yellowknife, but my takeout order consisted of crust, some kind of makeshift white sauce, cheddar cheese, and a slice of pepperoni or two. However, that’s just the risk you take when you venture to one of Canada’s most remote northern towns. On the flip side, coming up with a location that is better situated to catch the northern lights in North America would be next to impossible.
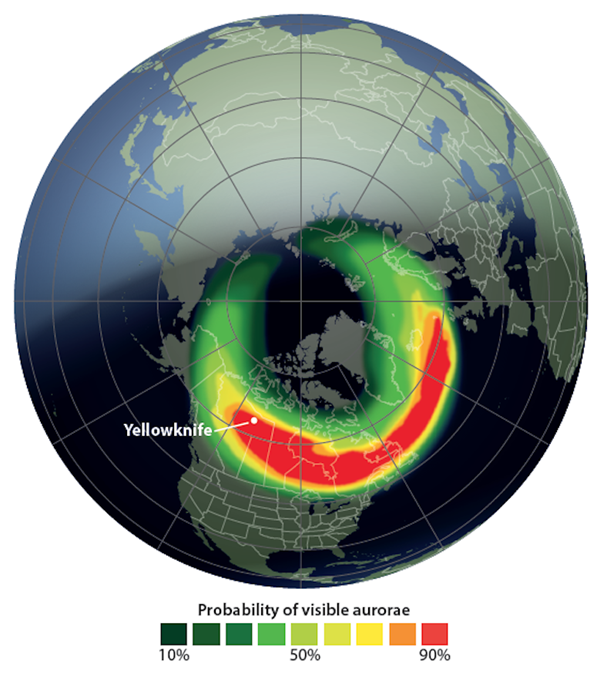
Embedded in the auroral oval
Yellowknife is about 250 miles (400 kilometers) south of the Arctic Circle. One of its most notable claims to fame is being featured on the first season of the TV show Ice Road Truckers. The town serves as the home base for convoys of trucks that brave the frozen-lake ice roads 24 hours a day, seven days a week for about two months each winter. But for us, the most important thing about Yellowknife is that it sits directly under the auroral oval.
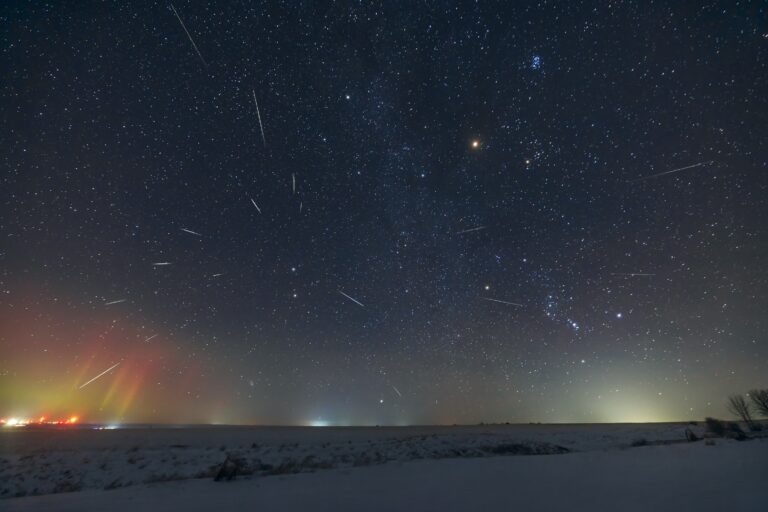
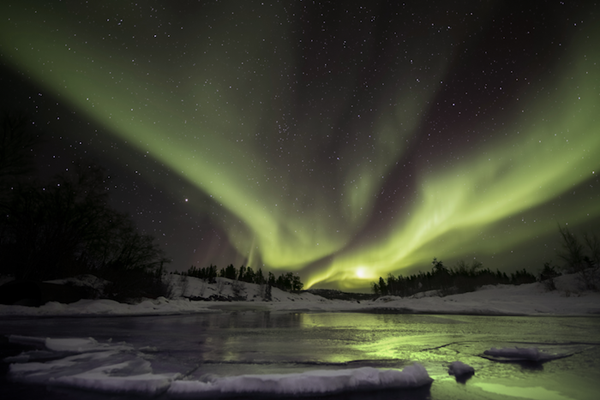
The auroral oval is a gigantic ring that circles Earth’s geomagnetic north pole. It represents the point along Earth’s magnetic field where charged particles from the Sun collide with atoms and molecules of oxygen and nitrogen in the upper atmosphere, causing them to release the colored light we call aurorae. Theoretically, aurorae could be any color in the spectrum, but the most prominent is a green hue often accompanied by violet, blue, yellow, pink, and red wisps. Besides being perfectly positioned for auroral displays, Yellowknife (for the most part) checks off many of the boxes for other criteria you would want to consider in selecting a place to capture the northern lights: its levels of light pollution, its geography, and the overall weather.
Fortunately, Yellowknife is in a region with relatively good weather, especially considering its far northern latitude. Rain isn’t a major concern for aurorae viewing, since the sky stays too bright for many displays from April through August, which is when most of the rain falls there. Snow is also surprisingly light. The region will have some amount of it for about 190 days of the year. But the monthly totals are bearable, with November being the worst, experiencing an average of 14 inches (36 centimeters), while the rest of the snowy months average less than 9 inches (23 cm).
As a photographer, the main thing you have to worry about is the cold. Temperatures early in the year can be brutal, with an average in January of –14 degrees Fahrenheit (–26 degrees Celsius). When I was there in March, the overnight temperatures dipped to –25 F (–32 C), with a wind chill of –40 F (–40 C). Luckily, I had brought along an Alpine climbing snowsuit that I stuffed with heat packs, which kept me mostly comfortable while standing outside for four or five hours. Make no mistake: These kinds of temperatures are not to be taken lightly, so you should definitely plan accordingly.

Another issue is that batteries do not perform as well in cold environments. I kept a few batteries warm in my pocket at all times. I usually needed to swap them out once or twice during a session. On the positive side of the ledger, the bitter cold temperatures lowered the amount of noise in my photographs.
The final major question to answer when deciding to photograph the northern lights is when to go. As spring arrives, the Sun sets later and later at high northern latitudes. From early April to late August, the sky never reaches astronomical twilight, and it is as bright as civil twilight from late May to mid-July. That pretty much eliminates those months as options.

Imaging aurorae
With the trip planning covered, let’s get down to brass tacks — what’s the best way to photograph aurorae?
Your gear should consist of at least two camera bodies if possible. If you’re making such a large time and travel investment to journey to the Northwest Territories, having a backup only makes sense. (My guess is that Amazon Prime won’t make next-day deliveries to Yellowknife.)
You should also bring a sturdy and reliable tripod. There are differing schools of thought about whether twist lock legs or clamp lock legs are better for the cold. Mine are all twist locks, and they absolutely were prone to freezing up as the temperatures reached double-digit negatives.
Because aurorae can appear anywhere in the sky, a fast wide-angle lens also is an important part of your kit. A lens in the 14mm to 24mm focal length range would be best, preferably with f/2.8 optics.

And, finally, set your shutter to be open for anywhere from 10 to 30 seconds. Once you’re in the field, you can experiment with the exposure time. However, keep in mind that the northern lights are constantly in motion, and they will appear “fuzzier” the longer you leave your shutter open. If you are a more advanced nightscape photographer, many of the skills you already know for Milky Way photography will also apply to aurorae photography.
Photographing aurorae is a fun and challenging experience. But if you go, make sure to appreciate the journey. And more importantly, take time away from the camera to simply look up and enjoy the show.