From the September 2015 issue

When light goes astray, part 2

Astroimager Adam Block offers a solution for dealing with scattered light in a celestial image.
By | Published: September 28, 2015 | Last updated on May 18, 2023
AdamBlock_2013
Last month, I presented frightening examples of scattered light — literal ghost images! This time we look at another scary picture and conquer our fear by completely fixing the issue.

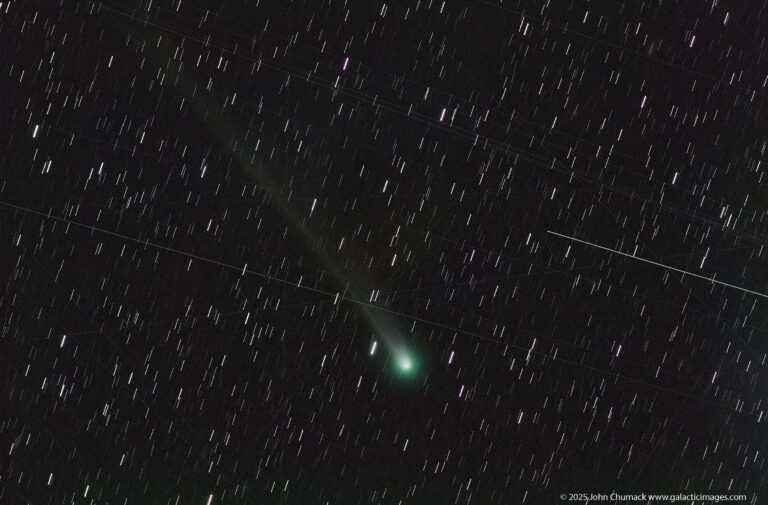
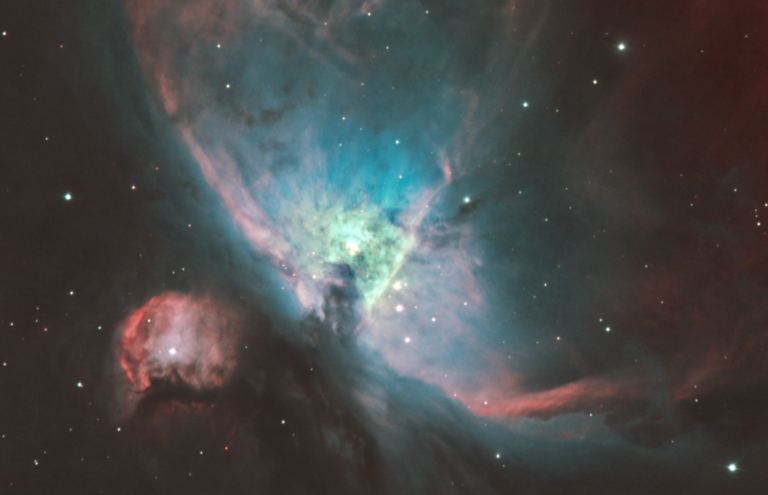
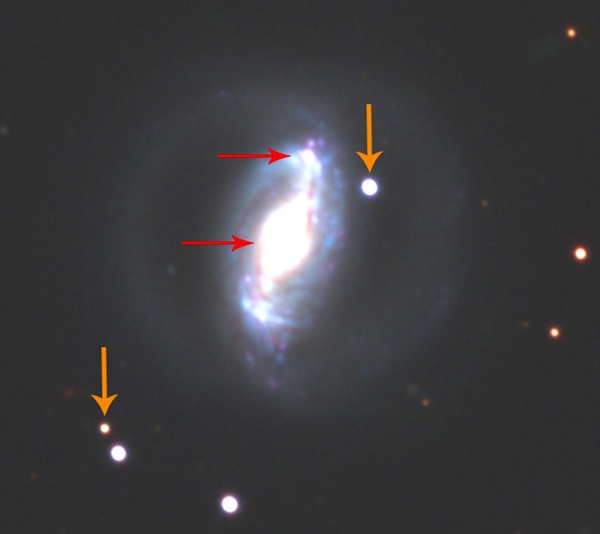
Image #1 shows an inverted, high-contrast image of NGC 2903 (a beautiful galaxy in Leo) with a band of light stretching across the field. I chose to display an inverted version to make certain the light comes across in print. But even normally displayed on a monitor, the glow is apparent and unwelcome.

Image1
Image #1. The diagonal band of scattered light is caused by brilliant Jupiter many degrees away. You’ll find the final image created by the author at http://skycenter.arizona.edu/gallery/Galaxies/NGC2903.
All images: Adam Block
The band of light was initially quite a mystery to me because there are no bright stars in the vicinity and in years past (been doing this a while) the same scene showed no hint of excess light. To this day, I find the answer to the mysterious light remarkable. Jupiter, more than 6° away from NGC 2903, is the source! I was not convinced of the planet’s complicity until I blinked two images separated in time by two weeks and saw the band shift in a way that mimics the motion of Jupiter.

To deal with this, I developed a simple five-step process using Photoshop that will let you fix any similar glow superimposed on the darker background sky.

Step 1: Create a duplicate layer. On the upper layer, select the area that needs to be worked on with a “Lasso” tool. I used the “Polygonal Lasso” tool to quickly select the region. Feathering the selection is not necessary. Remember this only works for glows against a dark sky, so in this case I did these steps for each side of the galaxy.

Image2
Image #2. Right click inside the selected region with an active selection tool, and you will be presented with a “Fill” menu. Choose “Content-Aware” as the fill method. This choice is available in later versions of Photoshop.
Step 2: Right click on the selected region, and “Fill” using “Content-Aware” pixels (Image #2). Now remove any newly created content (stars, galaxies, etc.) using the “Healing” brush. The “Content-Aware” algorithm does a fantastic job of matching the sky grain and color. You will now have a blank section of sky inside the selection.

Step 3: With your selection still present, press the “Add Layer Mask” button at the bottom of the “Layers” palette. Remember that selections and masks are interchangeable. If you accidently removed your selection, you can “Reselect” (“Select” menu) to bring it back and then create the mask. After you create your mask, the selection will disappear, and the mask, with the selected region being white (fully visible), will be in effect.

Image3
Image #3. Change the upper layer’s opacity to 50 percent and paint with a small brush (round circle) on the mask using black. Note “Brush” is highlighted with the foreground black color in the “Tools” palette. I have “poked holes” in the mask to show objects in the lower layer.
Step 4: Temporarily change the opacity of the upper layer to 50 percent (Image #3). This will allow you to see the real objects hidden by your new blank sky. Using a very small brush, paint on the mask using black at 100 percent. This will “poke holes” in the blank sky you created and show objects in the original lower layer. Tip: Display your selection (“Reselect”) while painting on the mask. This will help you see the boundary of the region you are working in.

Step 5: Bring the opacity of the upper layer back to 100 percent, and check your work. Occasionally, some fine adjustments to the mask where you clicked are necessary to blend the new sky with the objects you are showing. Once complete (and after you flatten the layers), you should have your original background stars and galaxies with a sky created from the “Content-Aware” algorithm.

This treatment is great for fixing errors like dust doughnuts, amplifier glow in the corner of some chips, and even halos around bright stars.