Astroimager Adam Block shows readers how to set up field-of-view indicators based on their telescope and CCD camera.
By Adam Block |
Published: June 29, 2015 | Last updated on May 18, 2023
Field of view (FoV) indicators are fundamental tools for imagers. They can show you whether an object will fit in the FoV created by the combination of the optical system and the sensor size.
If an object does not fit, you can use FoV indicators to construct a mosaic of fields to shoot. Finally, if you’re using an autoguider, FoV indicators also can determine if guide stars are available. In this article, I describe how to use the Aladin Sky Atlas (imagers usually just call it Aladin) to make your own FoV indicators.
Image #1. Here is the initial screen for the Aladin Sky Atlas. Type an object’s name or designation in the “Location” field highlighted in yellow near the top, and a Digitized Sky Survey image will load in the square viewer window.
All images: Adam Block
Normally, you would construct FoV indicators using commercially available planetarium programs. As part of my job at the Mount Lemmon SkyCenter, I make telescopes available for remote observing (see http://skycenter.arizona.edu). So, I face the problem of communicating what the FoV is for a given telescope without requiring users to own software. Aladin is a great solution because it is free and displays this information and more. Visit http://aladin.u-strasbg.fr to download the program.
When you run Aladin, it presents you with a screen that looks like Image #1. By default, the program uses the color images of the Digitized Sky Survey (DSS), although you can select other all-sky surveys. Simply type an object name or a coordinate in the “Location” field, and press “Enter.” You will see the DSS image of that region of sky. Using the controls to the right of the sky image, make adjustments by panning and zooming.
Image #2. Load the “Instrument FoV” under the “File” menu to enter this screen. Create a FoV (once) and then load it each time you use Aladin. Press the “Submit” button to overlay the FoV, then look back at the main screen.
Look in the “File” menu and select “Load Instrument FoV” to see a list of presets astronomers often use (Image #2). I highlighted the entry for the 32-inch Schulman Telescope at the SkyCenter (you are supposed to be impressed). After pressing the “Submit” button, the DSS image will have an overlay with your chosen FoV. Aladin treats overlays just like a layer in Photoshop. You can modify their attributes in the “Stack” controls section (Image #3). Zoom out enough to see the entire FoV, or it will look like it just colors the screen.
So now you can plan your imaging sessions for the Schulman Telescope at your leisure! However, you may want to do this for your own system, so in the FoV section, find a button called “Create your Own.” In the video associated with this article, I show you how to calculate the FoV for your telescope and camera, create rectangles and circles with the correct dimensions, and then save the result. You will have created a file with a VOT extension that you can load any time you need to.
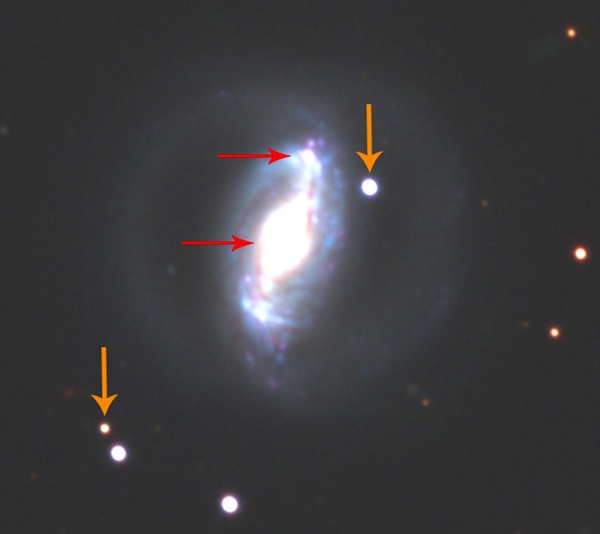
Image #3. A FoV indicator is now an overlay. Controls are to the right. Right click on the FoV layer to adjust its properties. The FoV shown here is for a dual-chip camera with an internal autoguider represented by the small rectangle. Stars between the outer rings are potential guide stars.
Separate autoguider chips require a little more effort because they are offset from the center of the FoV. You will need to determine offsets for internal guiders by looking up the published separation of the chips for your system in milli-meters and converting to arcseconds. For an off-axis guider, you can determine the separation of the chips on the sky by centering a star on each chip and recording how far the telescope moved in arcseconds.
Not only is Aladin fun to use, but its FoV indicators should be one of the essential tools you have in your astrophotography toolbox. In my next column, I will discuss dark frames and the use of master darks that persist for extended periods of time.