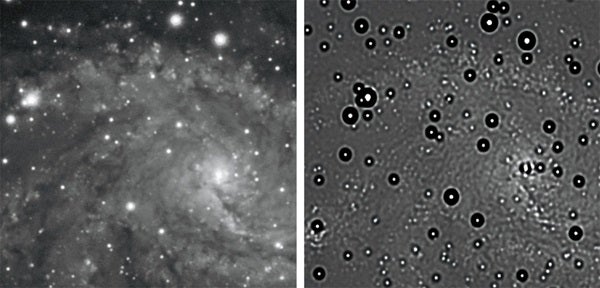
Our goal will be to deconvolve a slightly blurred image and make it look sharp. Be warned, however: Two bad things can happen if we don’t have the settings correct.
The first is an overly noisy background; the second is dark circles around our stars. If we don’t have a high enough signal-to-noise ratio, the same process that sharpens detail also will sharpen noise!
And applying too much deconvolution by having too high a point-spread function (PSF, which is the amount of blur of your stars) or too many iterations will create dark circles around stars.
Many deconvolution routines are available. My favorite is the one in the original AIP4WIN software. Open the program, and go to “File,” then “Open,” then “Enhance,” and finally, “Deconvolution.”
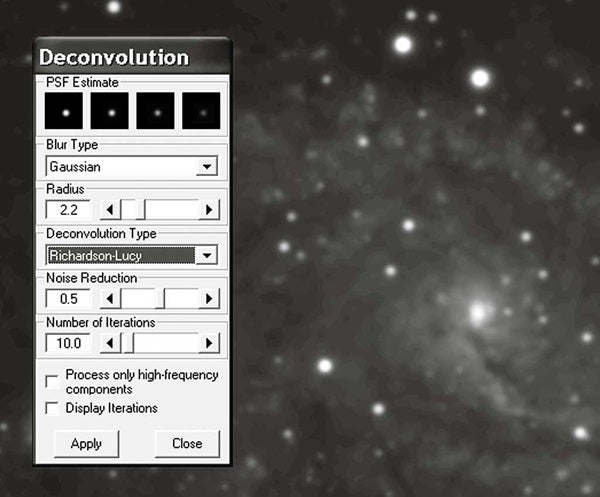
I suggest the following steps. Set the values as indicated.
1. Under “Blur Type,” choose “Gaussian.”
2. Next, estimate your PSF by moving the “Radius” slider until the blur of the stars in the little boxes approximates the blur in your stars. For your image, pick a value of 2.2.
3. Under “Deconvolution Type,” choose “Richardson-Lucy.”
4. Under “Noise Reduction,” choose the default.
5. If after deconvolution your background is too noisy, move this value higher. If you have an extremely good signal-to-noise ratio, you can move this lower.
6. For “Number of Iterations,” choose 10.0.
7. Leave the boxes unchecked and click “Apply.” It might take a few minutes for the magic to happen.
Remember, you are only estimating the PSF. Experiment to find the optimum setting. Also remember that you can adjust the noise filter to create a good result. Don’t hesitate to try different settings to see what the results are. When deconvolution works properly, it is like a miracle. Happy miracles!