During the past few years, we have witnessed a bumper crop of bright naked-eye comets, beckoning us to set up a camera and record their beauty to share with friends and family. However, the next great comet may not be coming by for another decade or more, and many night-sky photographers wish for a chance to shoot another bright one without waiting endlessly.
Fortunately, every year dozens of fainter comets are present in the night sky, with one or two per year visible through binoculars. With the equipment you may already have for deep-sky imaging, you can capture these solar system wanderers and hone your imaging skills, which later can be applied to the next bright comet that comes our way.
Here I’ll cover tips to get you started with the right equipment, and show you how to take and process images using the latest advanced techniques. I’ll also discuss how to best share these images online, in magazines, or for use in professional journals.
Imaging comets today
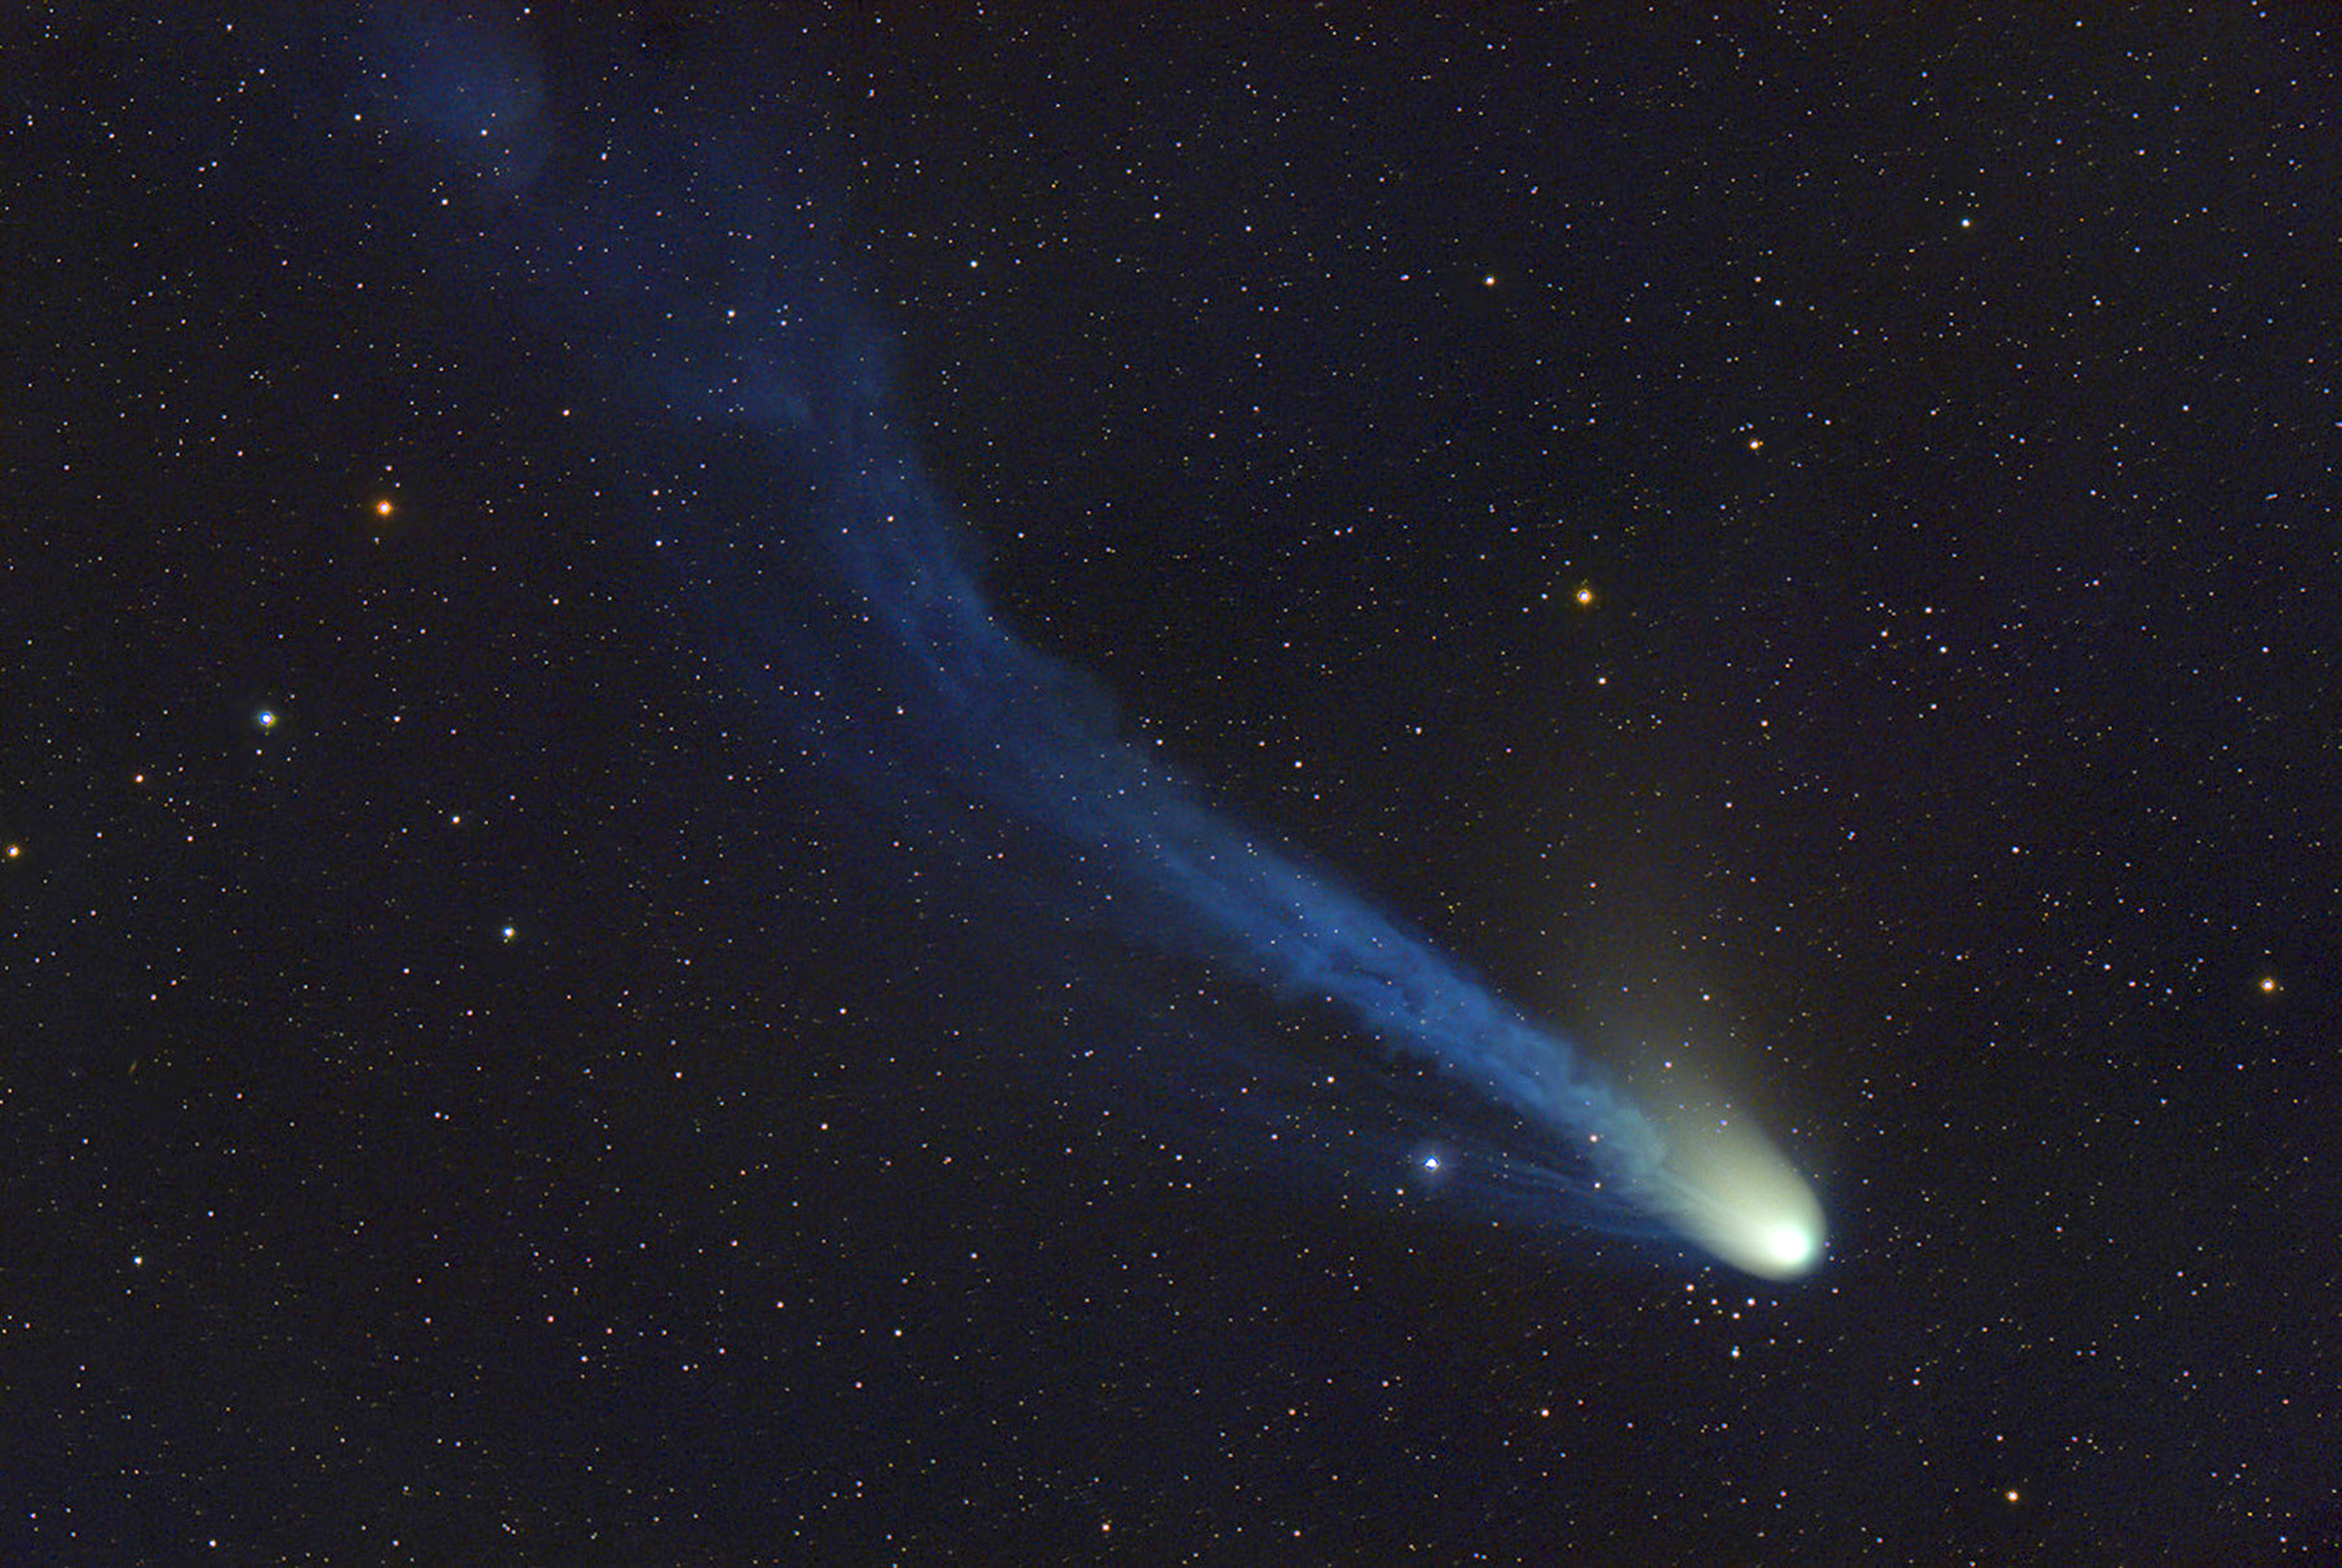
With the possible exception of a total solar eclipse, nothing in the sky compares to the awe and wonder of a bright comet hanging in the twilight like a giant glowing scepter. With modern DSLR and cooled CMOS astronomy cameras, the dedicated imager can obtain memorable shots of these celestial snowballs.
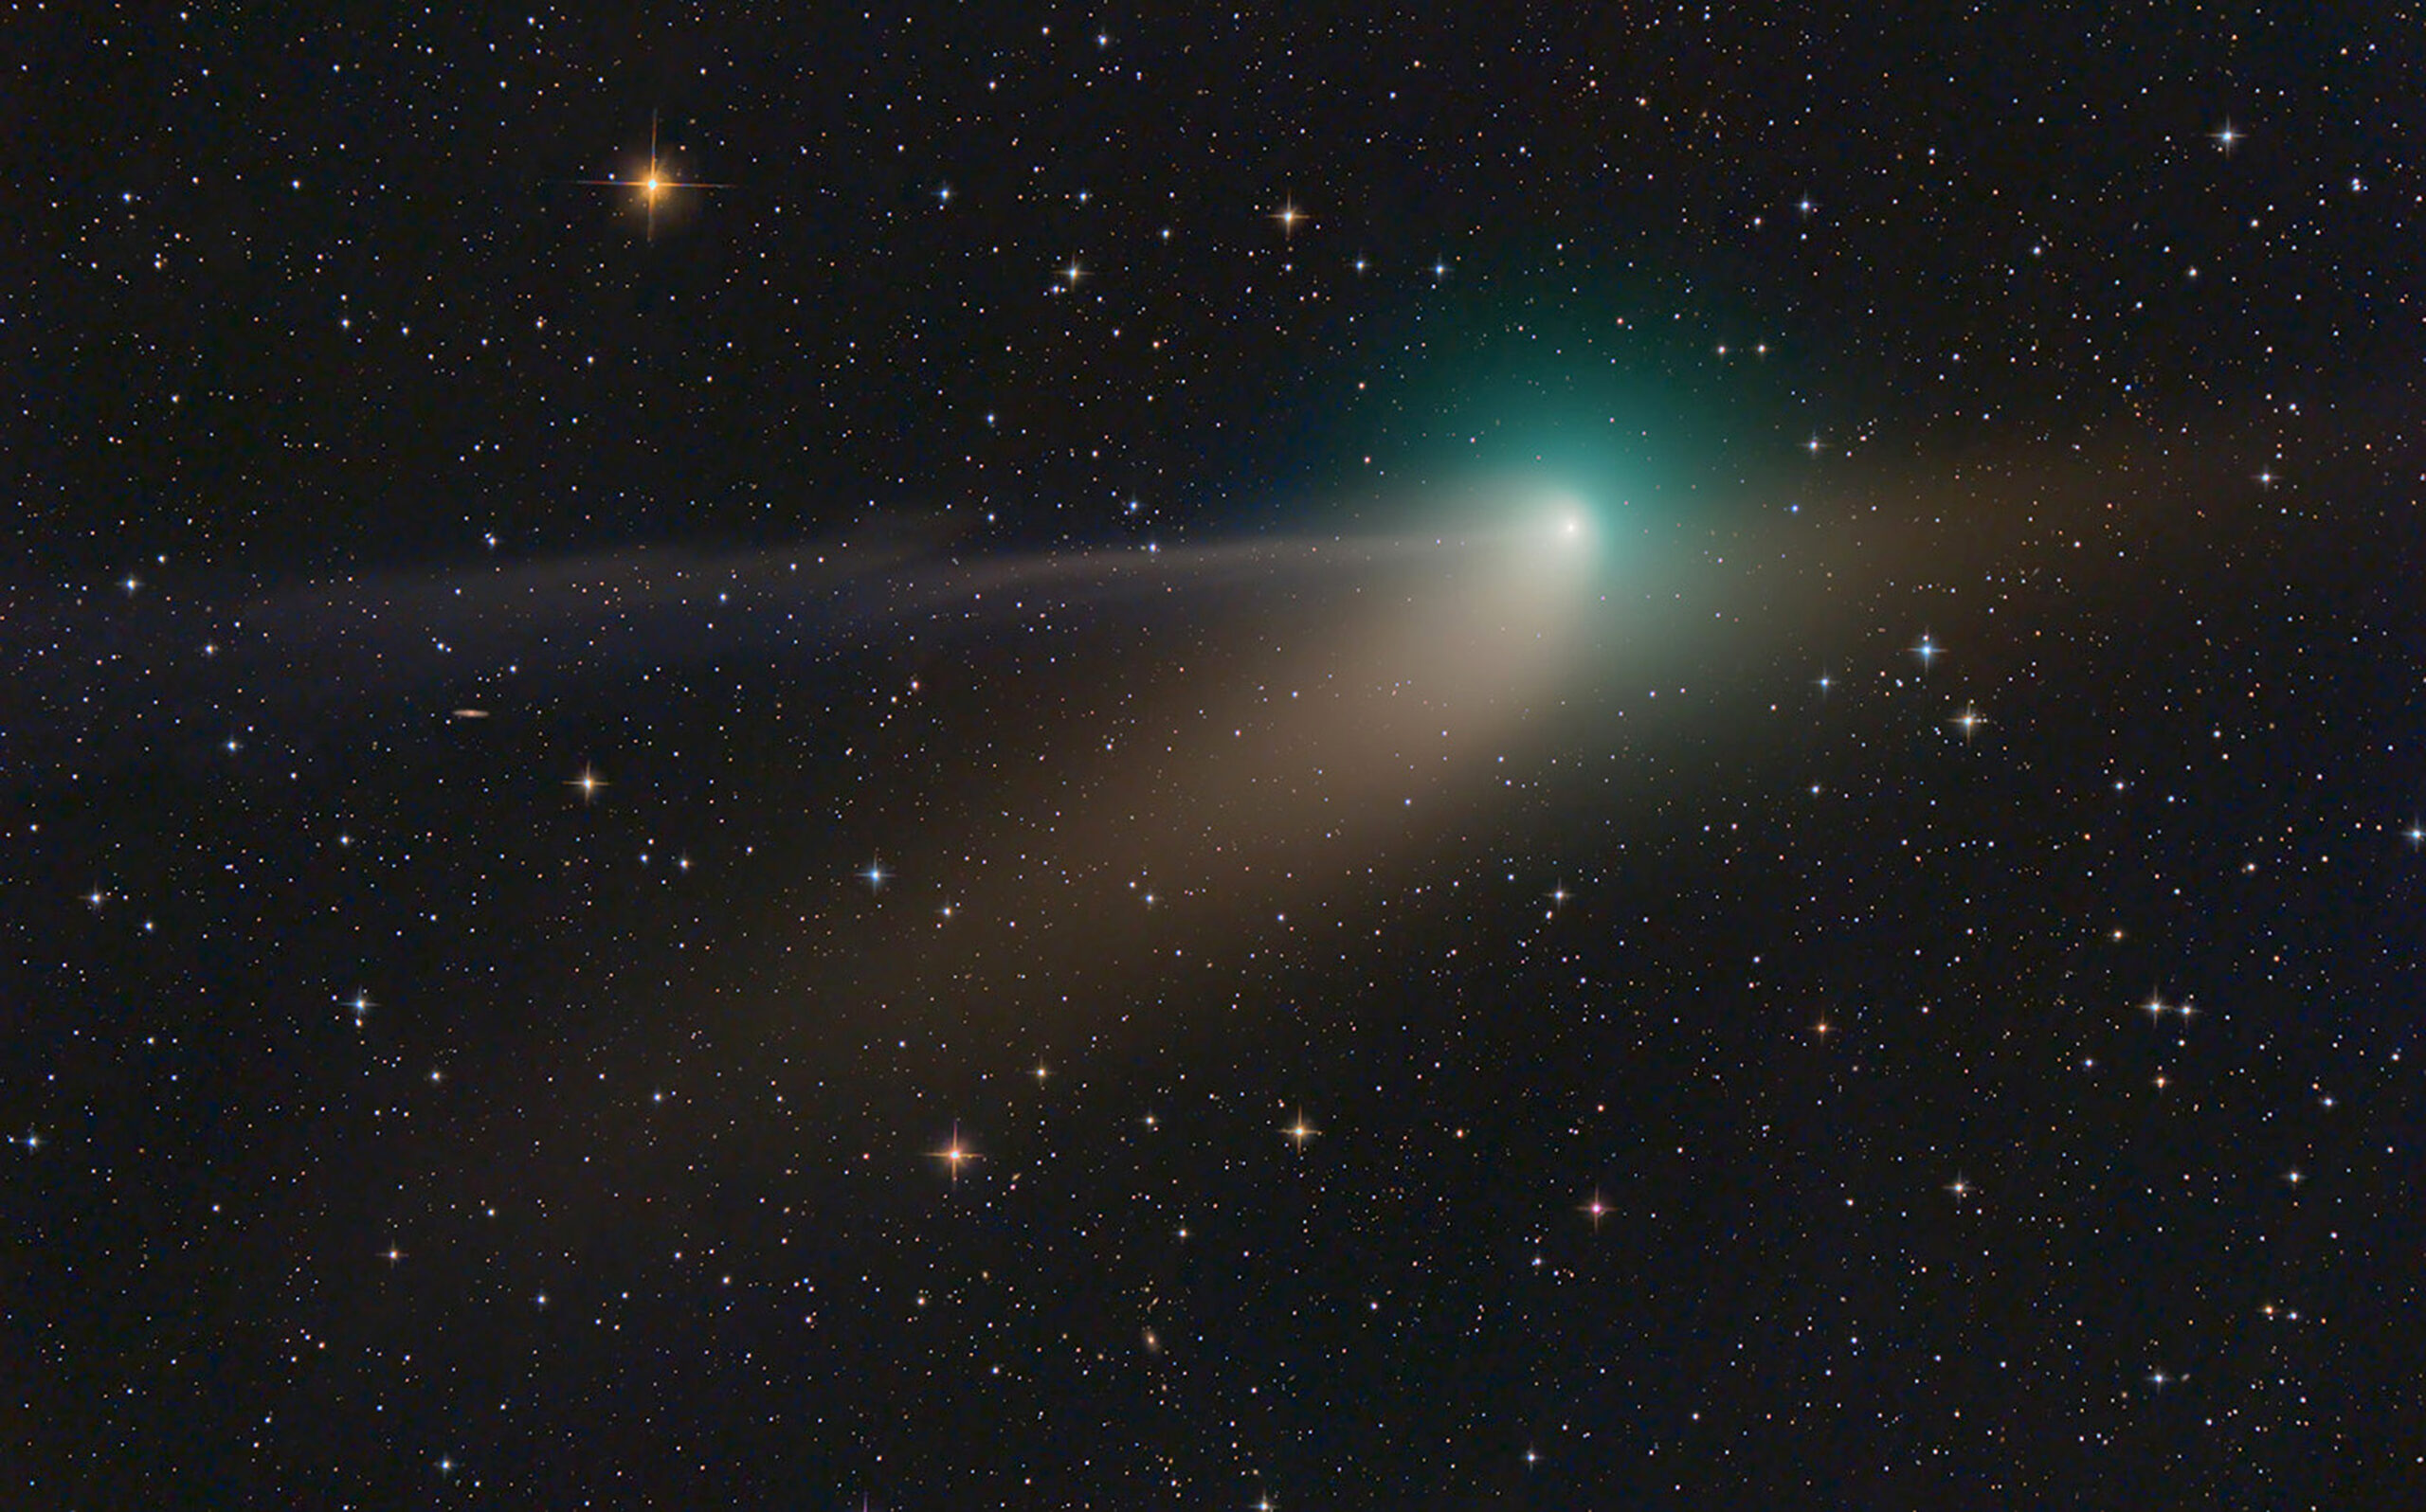
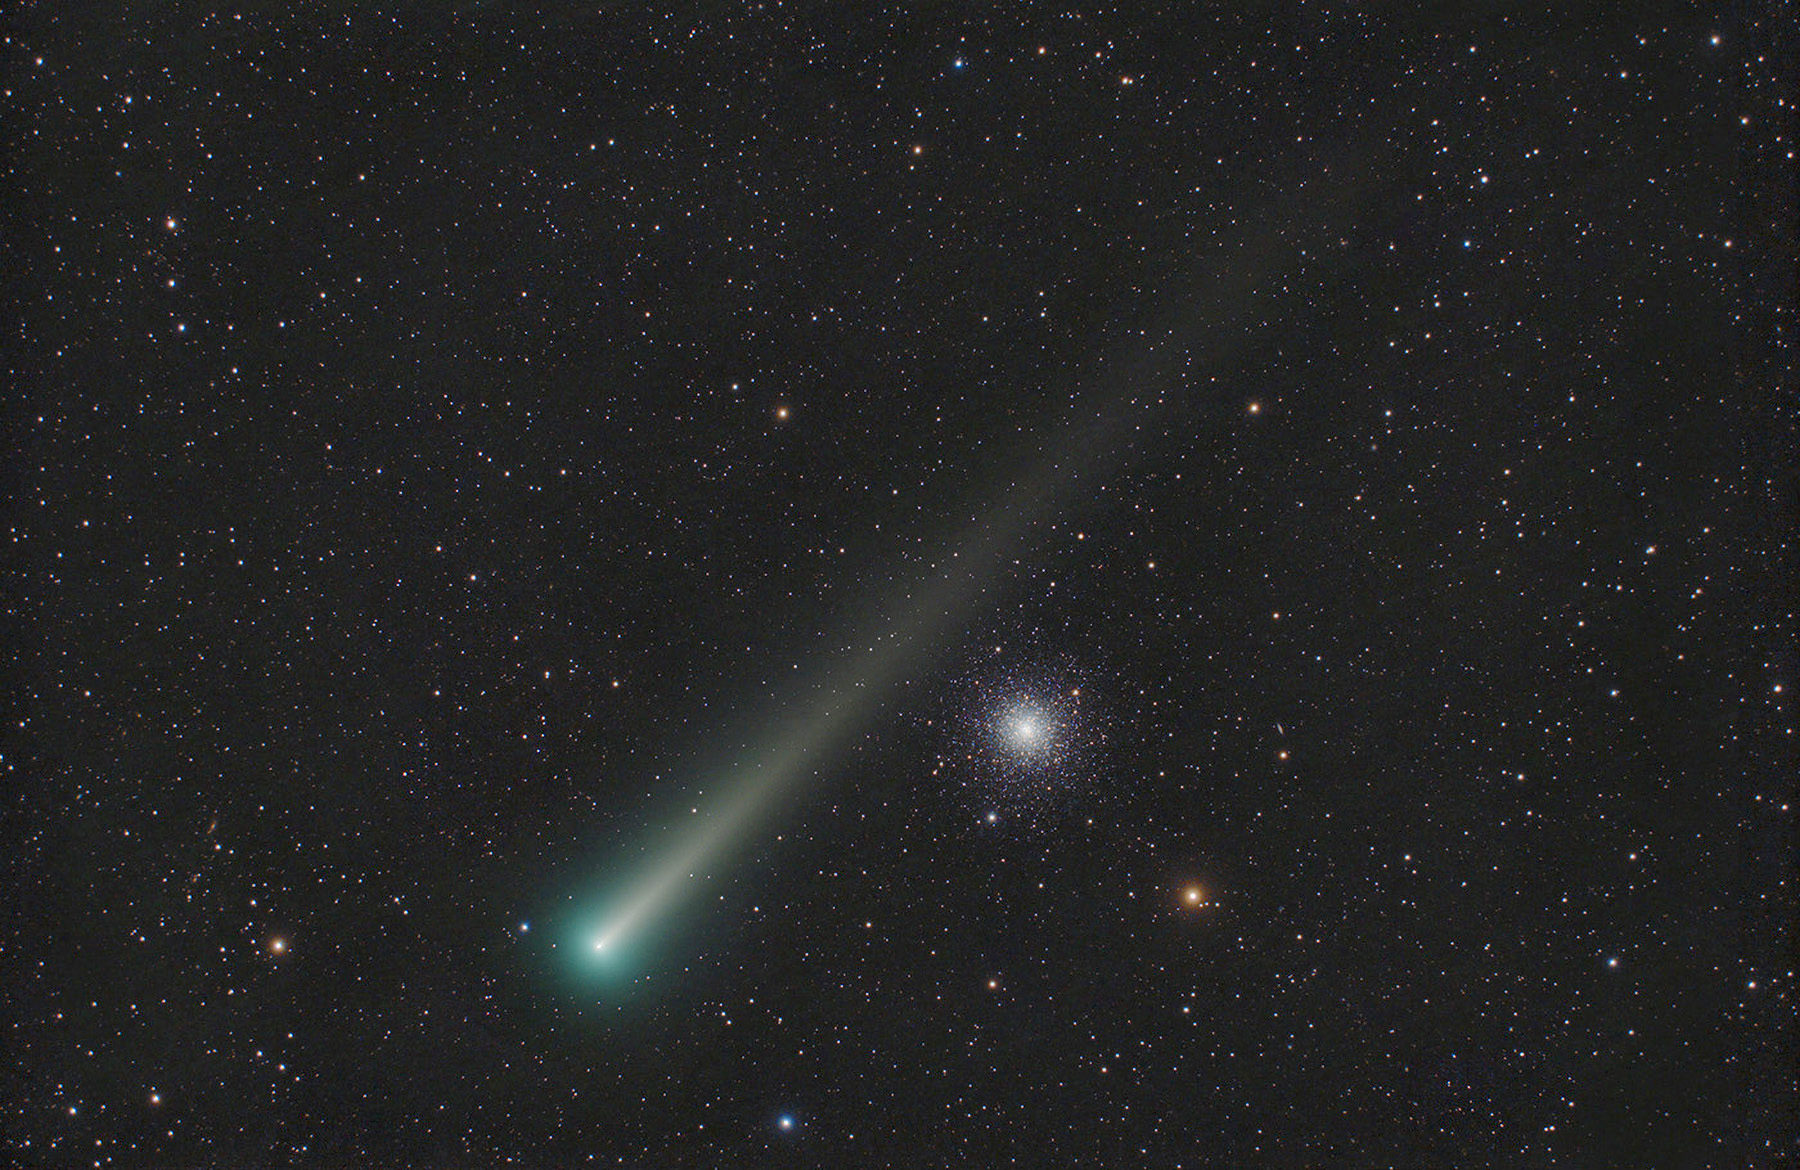
Capturing fainter comets is not too different from shooting any deep-sky object, with the exception that the target will move against the background stars during the exposure; you’ll have to compensate for that during processing. Fortunately, in the past five years or so, new types of AI-powered software have become available to more easily separate the stars from the moving comet, making processing much more straightforward. No longer does an imager have to tolerate trailed stars to get a sharp comet image.
There are many sources of current comet information and ephemerides to find your next target:
• Any bright comets currently visible usually will be highlighted in Astronomy magazine and on Astronomy.com.
• Another good website to check for comets is The Sky Live (https://theskylive.com).
• You can also frequently scan the main page and images section of spaceweather.com.
• The Comet Mailing List (https://groups.io/g/comets-ml) is another resource that discusses currently visible comets and new discoveries as well.
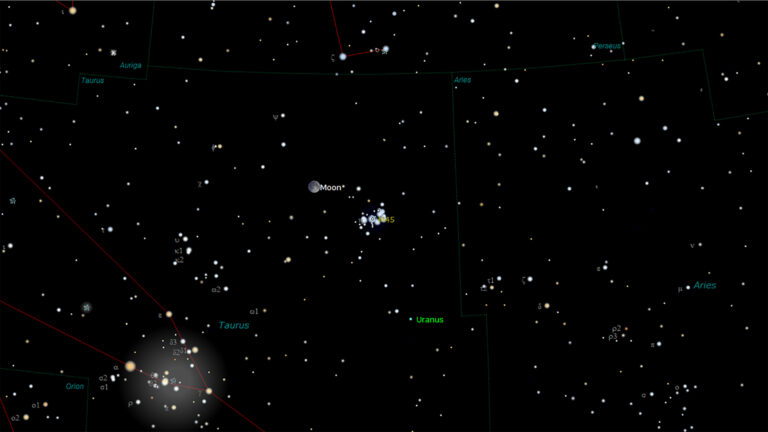
• For finding current comets, the freely available Cartes du Ciel atlas (https://www.ap-i.net/skychart/en/start) is superb star-charting software that allows you to download the latest comet orbital elements and provides an hour-by-hour plot of every available comet in the sky.
Equipment requirements
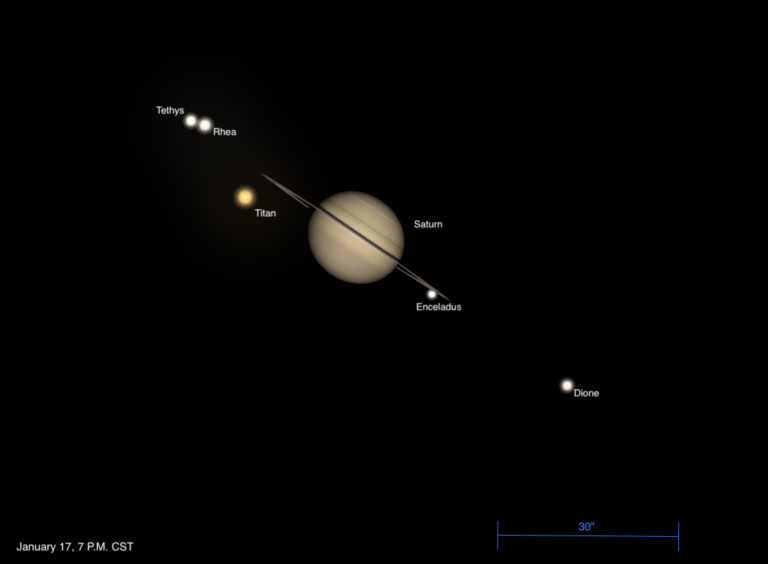
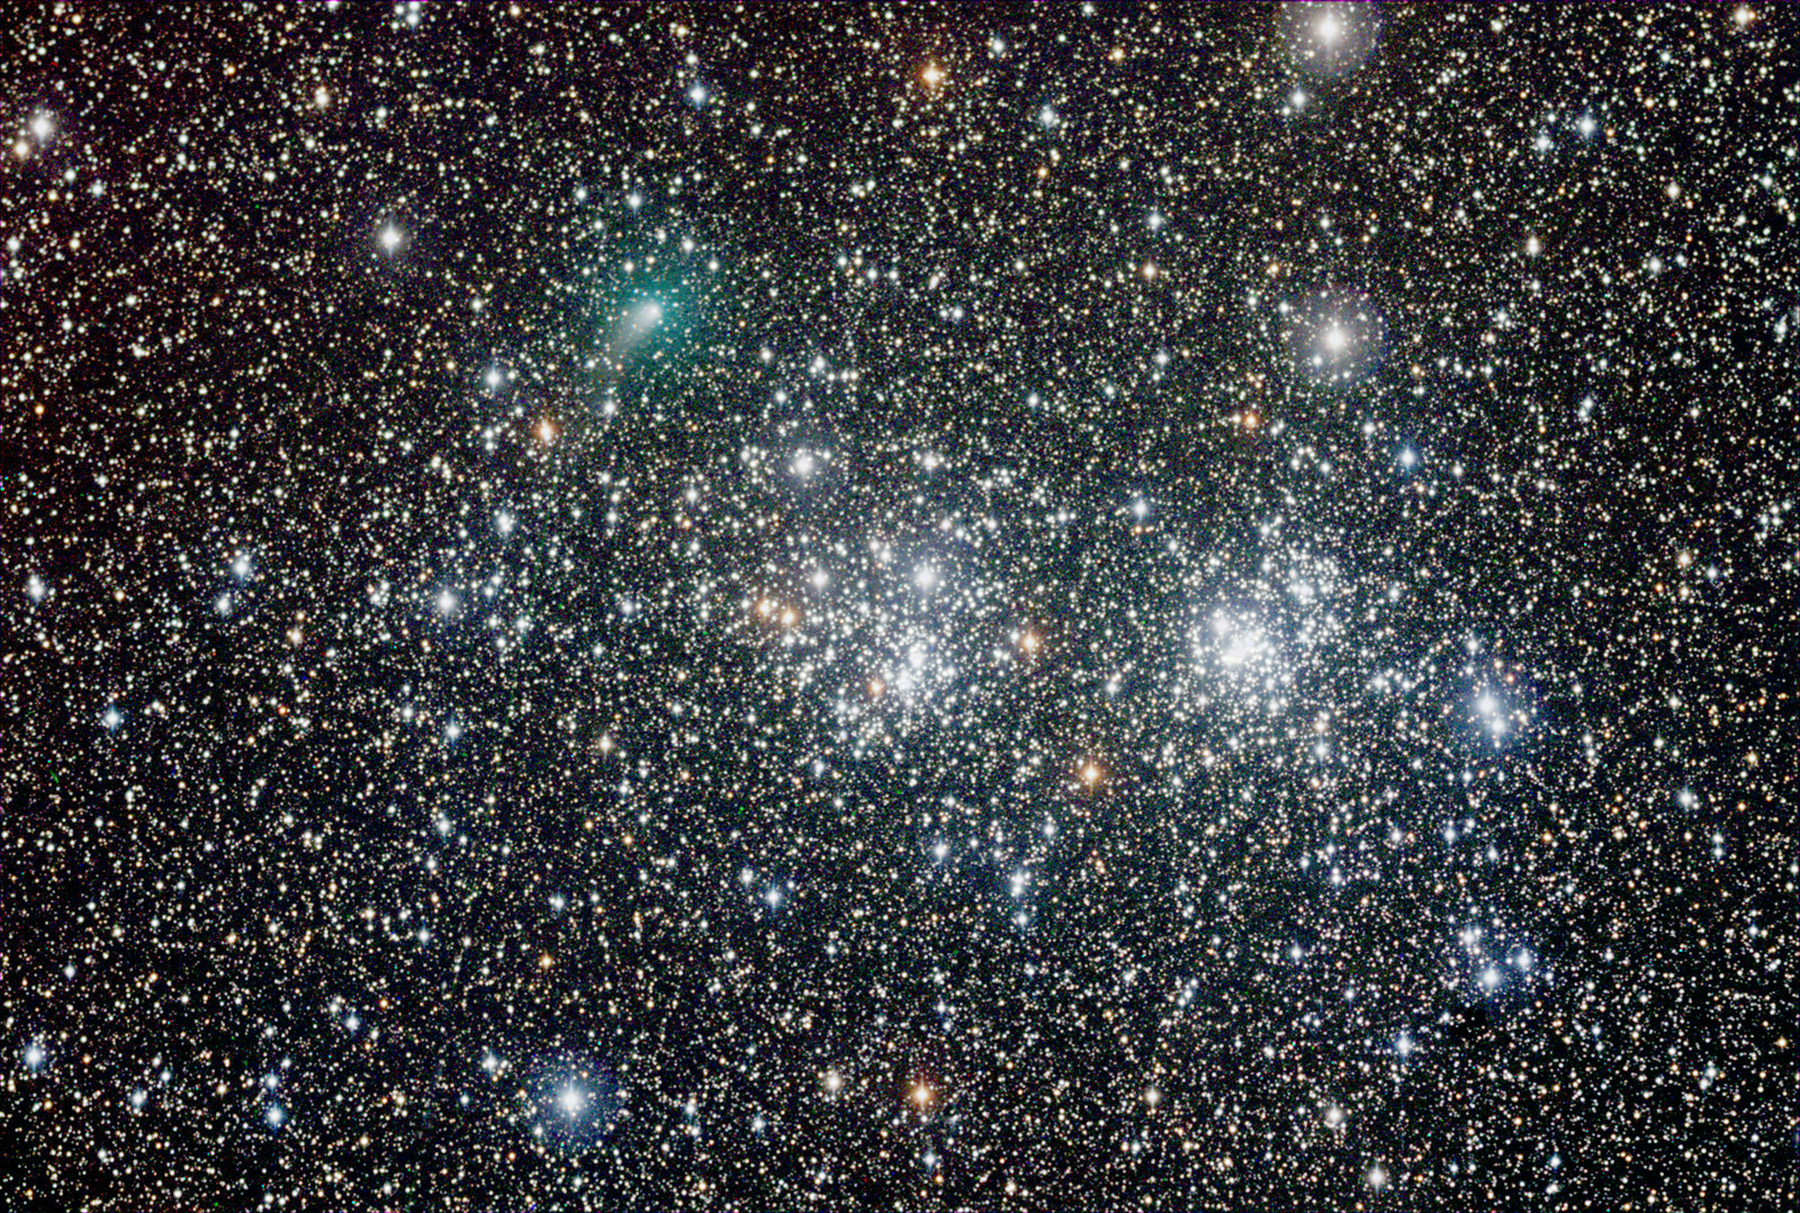
The average naked-eye comet is usually less than 5° long and can be easily captured with any small refractor available on the market today. However, the more numerous fainter comets benefit from longer focal lengths and larger apertures. An 8- to 12-inch reflector is ideal and can record comets dimmer than 15th magnitude without too much effort.
One key factor in selecting a telescope for comet imaging is focal ratio. While no two comets are the same, they all share a bright nuclear region surrounded by a much fainter extended coma, and many of them have low-surface-brightness tails. To capture dim extended objects, either deep-sky targets or comet tails, we need to use a fast focal ratio. Any setup that is f/6 or faster will provide a satisfactory image, but experienced comet imagers will tell you that f/4 or faster is the unspoken rule.
To keep exposures short so as to not trail moving comets, you’ll need a sensitive and low-noise camera. For the brightest comets, DSLRs and mirrorless terrestrial photography cameras can be used to good effect. But they are not cooled, and the images will become noisy at the low light levels we will encounter with fainter comets.
Here, a cooled astronomy camera designed for deep-sky imaging is best, providing a crisp, low-noise image for the short one- to five-minute exposure times that are suitable for most comets. If you are starting out in comet imaging, a one-shot color (OSC) camera is a good match.
Guiding comet images
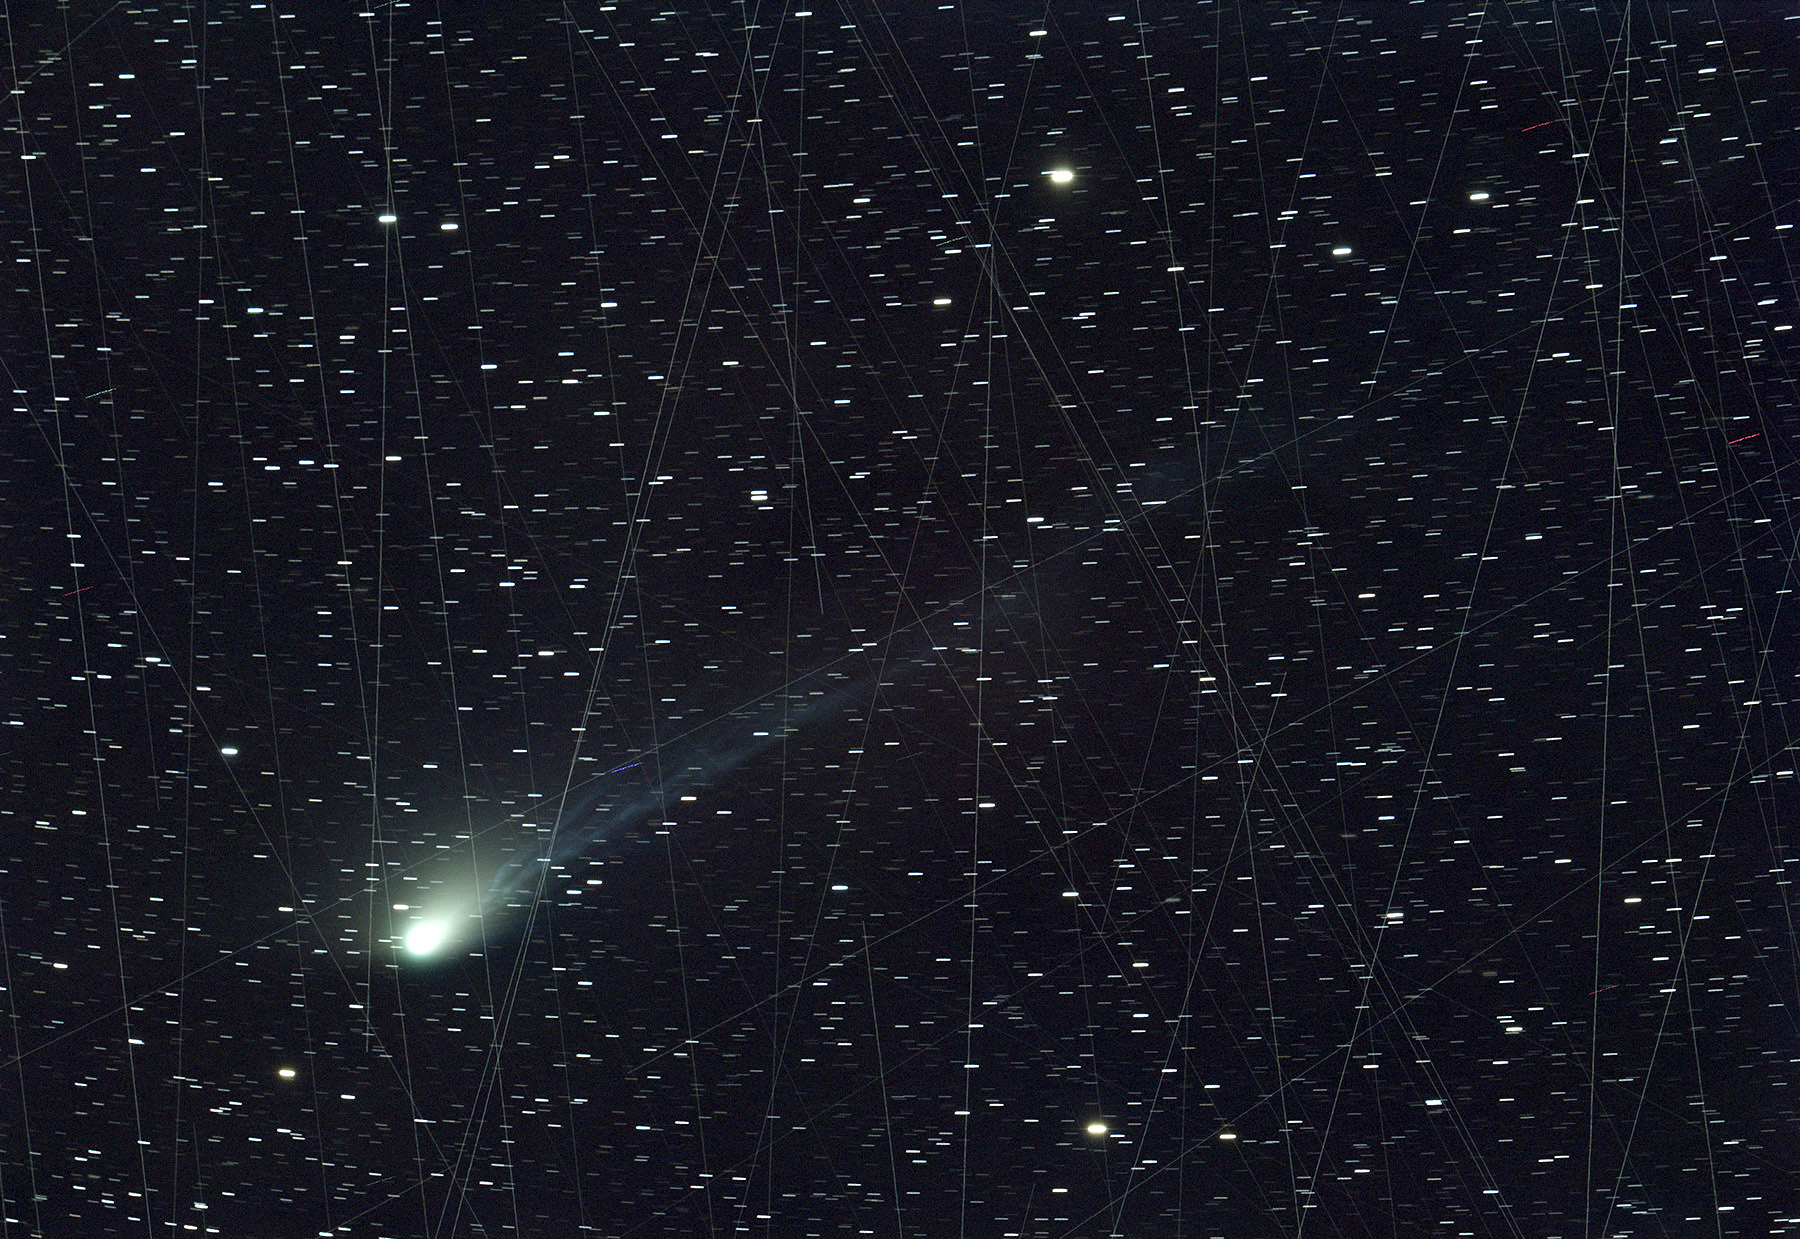
Most hardcore deep-sky imagers will avoid shooting comets for one reason: they move. In the old film days, when you had only one frame to expose, you had a choice. You could guide on the stars and limit the exposure so as to not blur the moving comet, or you could try to guide on the comet’s nucleus to keep it stationary. Unfortunately, this latter option was difficult due to the faintness of the nucleus on most comets, and usually resulted in some wiggly star trails.
Today, we have sensors that allow us to integrate an image by stacking multiple exposures. Most stacking software allows for a “one-star alignment” stack so there’s no longer a need to guide on the comet. This allows us to stick with the usual star-guiding methods.
The length of our exposures will be determined by how fast the comet is moving against the starry background and the scope’s focal length. For fast-moving comets, you may only be able to expose for 30 seconds before the comet starts showing a few pixels of trailed movement. But for most comets, this limit will be around two to five minutes. Comets with rapidly changing gas tails will limit your total time for a stack of exposures to five to 10 minutes so that the structures in the dynamic tail are not blurred.
Another challenge that we have to deal with more often is the legions of satellite trails in our frames. With larger numbers of frames, we can use a sigma-reject algorithm during stacking to eliminate them. A good starting point is to take one- to two-minute exposures, and try to capture a dozen or more for stacking.
Processing your images
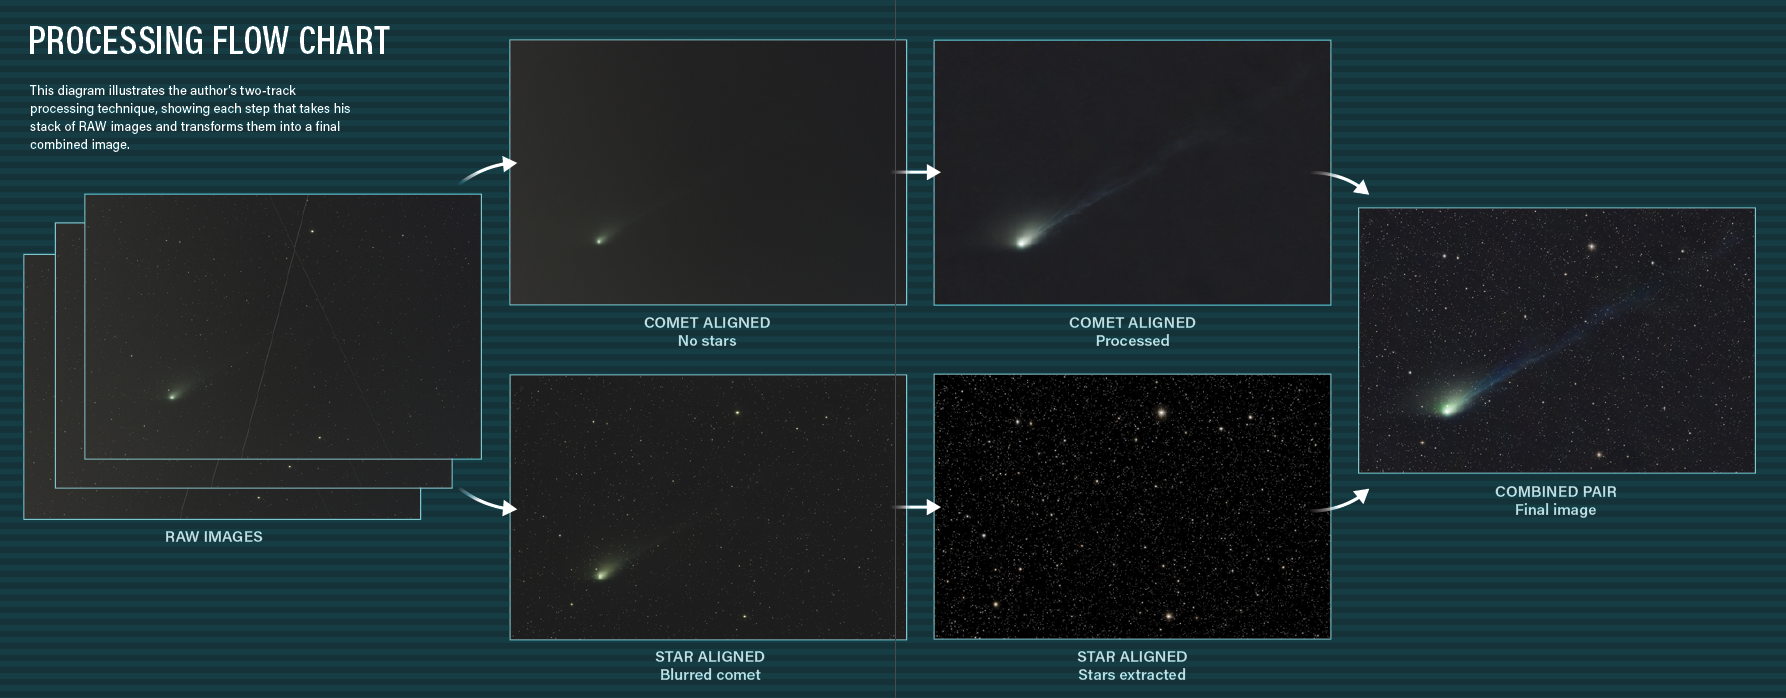
Most software that is suitable for processing deep-sky images will work fine for comets. After all, they’re faint fuzzies, too. Note, however, that you must perform a global star alignment for each set of exposures as well as a one-star alignment that will be used to stack the comet’s nucleus (to yield a stationary comet).
I usually start by calibrating the raw images in Maxim DL using the “batch processing” feature, then port the images over to PixInsight for alignment, stacking, and nonlinear stretching. You will also need a star-removal software app such as the freeware Starnet (www.starnetastro.com) or a similar commercial version, StarXterminator (www.rc-astro.com/software/sxt).
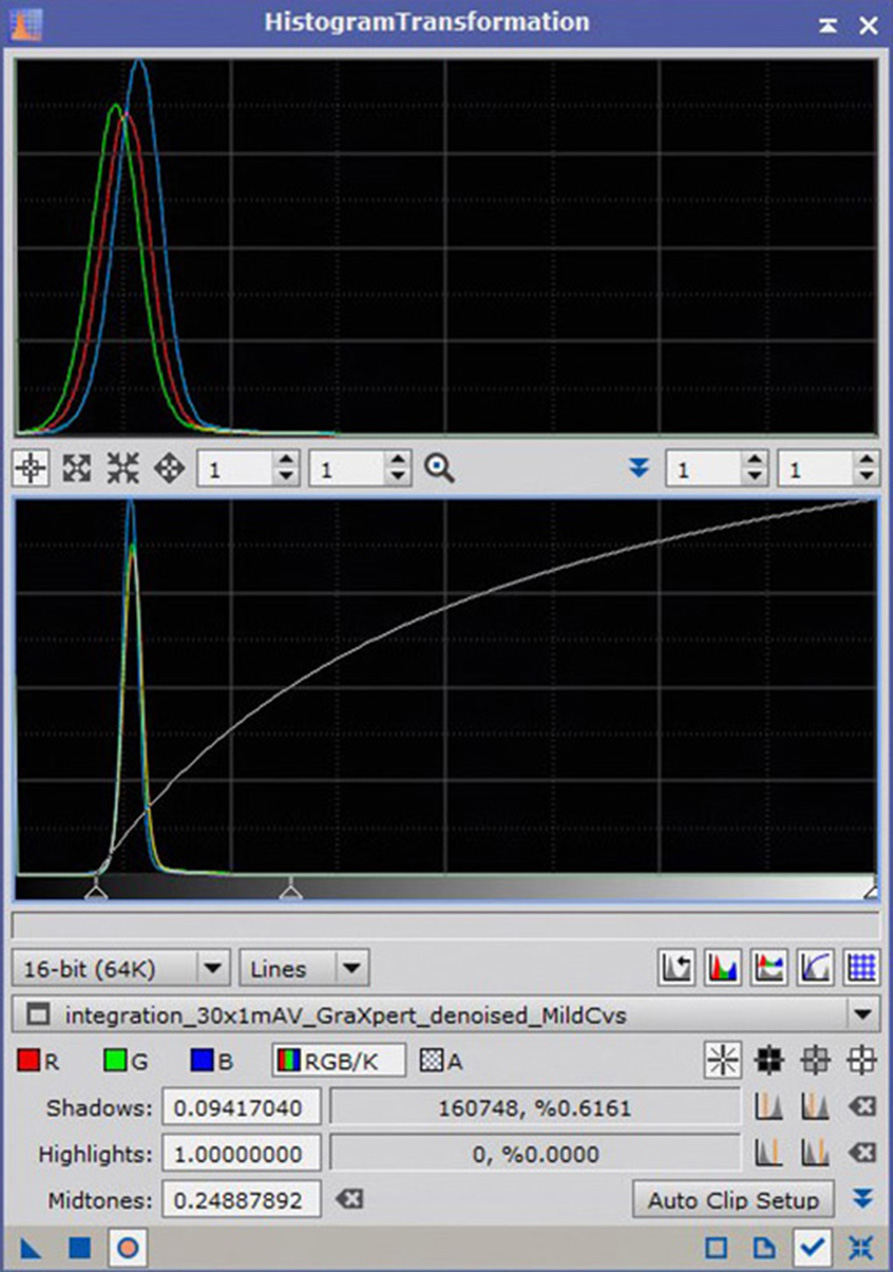
After the raw images are calibrated with flats and darks, you’re ready to align and stack each set. For simplicity, I am assuming you are using an OSC camera. From each calibrated image set, two separate types of alignments must be performed. The first will be a star alignment identical to what is done with any deep-sky image. Save these in a directory called “Star Aligned.”
The second alignment will be using the one-star alignment tool available with most astronomical processing software. We will align each frame manually to register the comet’s nucleus. Save these in the directory “Comet Aligned.”
Next, stack the Star Aligned files using an average combine method. This will produce a single frame with sharp stars and a dim but motion-blurred comet. For the second stack, first use the star removal app and remove all of the stars frame by frame.
StarXterminator is handy at this because it can batch process and supports masks if you need to protect the nucleus from accidental removal. Then we can stack the starless comet frames to create a master frame with a stationary comet and no stars.
Both final images should next be nonlinearly stretched with curves to yield two images: a nice starry background and a well-defined comet image. Use the star removal app again and remove the stars in the star-aligned image, but save the extracted stars as a “stars only” file.
You can then either add this frame to the “comet only” frame with pixel math in your deep-sky processing program or, even better, layer them in Adobe Photoshop and combine with “Add” or “Screen.” The result will be a final image with sharp stars and a stationary comet in one frame.
Finally, adjust the combined image for a nice medium dark-gray background and colorful stars. Any deep-sky objects you wish to keep in the final composite can be done by layering the star-registered image over the composite in Photoshop and using a mask to add in the galaxy or nebula.
Finishing your hard-earned comet shots may require you to create several sets of images, depending on the target application. For sharing online, you used to have to limit the size of the images to no more than 1600 pixels in width so they’d fit most home monitors. Not anymore. For a professional submission, the full-frame size and both monochrome and color versions are preferred in TIFF format. Finally, for magazine submission, stick to the full image size and send it as the highest-quality color JPG.
Final thoughts
Just because a brilliant comet is not currently blazing in the sky doesn’t mean you have to give up comet imaging for years at a time. Shooting the more common fainter comets will allow you to improve your skill and processing techniques. You’ll also learn about comet morphologies and movement, and be able to share plenty of beautiful shots with your friends and family.